Path of Peace (Pot Miru)
How would you rate Path of Peace (Pot Miru)?
Tap a star to share your experience and help other hikers.
Path of Peace (Pot Miru): Complete Hiking Guide
HikeList Score
Path of Peace (Pot Miru) scored 91/100 on HikeList's trail-quality metrics.
See score breakdownHide breakdown
- Ideal length 92
- Balanced challenge 84
- Scenery & wildness 98
- Varied terrain 83
- Accommodation 92
- Food & support 88
- Path quality 98
- Season flexibility 89
Computed from length, challenge, scenery & wildness, terrain variety, accommodation, food & support, path quality and season flexibility.
The Path of Peace (Pot Miru) is a 230 km waymarked long-distance trail through western Slovenia, briefly crossing into Italy and finishing at Trieste. It usually takes about 11 days and is a hard point-to-point hike, with Alpine sections, rocky tracks and around 7,180 m of total ascent. It suits experienced multi-day hikers who want a demanding route combining the Soča Valley, Julian Alps foothills, Karst plateau and major First World War Isonzo Front memorial sites.
Route Overview
The trail starts at Log pod Mangartom, near the Štoln mining shaft and Kluže Fortress, then heads through Bovec, the Soča River valley, Drežnica, Kobarid, Tolmin and Mengore. South of the high Soča area it uses a branching section near Kobarid: one variant goes via the Kolovrat ridge, another via the Kuhinja/Pretovč uplands, before rejoining further south. The route continues towards Nova Gorica and Gorizia, crosses the Karst (Kras) plateau and ends at Trieste on the Adriatic. For nearby Slovenian walking, compare the alpine Kranjska Gora to Trenta Trail, the higher Bohinj to Triglav Trail, or the heritage-themed Idrija Mercury Trail further south.
Isonzo Front history on the Walk of Peace
The Path of Peace follows the line of the First World War Isonzo, or Soča, Front, where Italian and Austro-Hungarian armies fought 12 battles between 1915 and 1917 over roughly 888 days. The fighting left close to a million casualties. The Walk of Peace in the Soča Region Foundation was established in 2000 to preserve and present this heritage, linking outdoor museums, cemeteries, memorial churches and fortifications as a route of remembrance and reconciliation. The route is on UNESCO’s tentative list for World Heritage status.
Notable highlights
- Kolovrat Outdoor Museum: A ridge-top open-air museum with restored Italian front-line trenches, caverns and gun positions. It also gives wide views over the Soča Valley and Julian Alps.
- Javorca Memorial Church: The Church of the Holy Spirit is a wooden memorial church above Tolmin, built by Austro-Hungarian soldiers in 1916. It carries the European Heritage Label and is one of the route’s strongest remembrance sites.
- Kobarid Museum: A museum in Kobarid dedicated to the Isonzo Front, using photographs, maps and artefacts to explain the mountain war.
- Italian Charnel House above Kobarid: A hilltop ossuary around the church of St Anthony, holding the remains of more than 7,000 Italian soldiers.
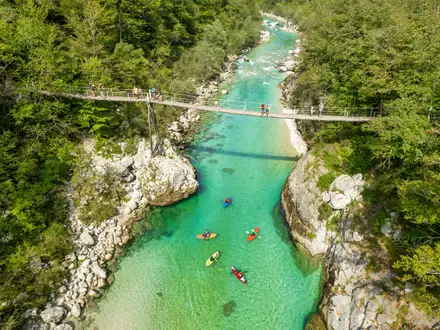
- Soča (Isonzo) River: The emerald river shapes the northern half of the walk, with clear water, gorges and pools along the valley.
- Kluže Fortress: A historic fortress in the gorge above Bovec, guarding the route into the upper Soča valley and linked to both the Napoleonic era and WWI.
Challenges to expect
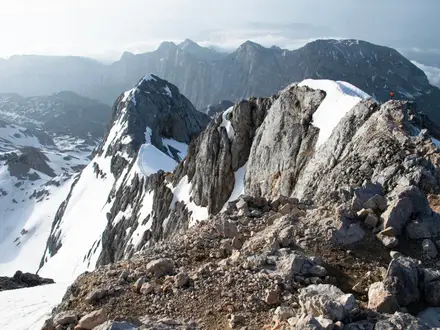
This is not a gentle valley walk. Expect mountainous terrain in the Julian Alps and foothills, rocky and gravel surfaces, forest tracks, hills and limestone Karst paths. The route reaches about 1,306 m and gains around 7,180 m in total. Snow can linger on higher sections into late spring, and Alpine weather is unsettled in spring and autumn. The branching section near Kobarid needs careful route choice.
HikeList Score
Path of Peace (Pot Miru) scored 91/100 on HikeList's trail-quality metrics.
See score breakdownHide breakdown
- Ideal length 92
- Balanced challenge 84
- Scenery & wildness 98
- Varied terrain 83
- Accommodation 92
- Food & support 88
- Path quality 98
- Season flexibility 89
Computed from length, challenge, scenery & wildness, terrain variety, accommodation, food & support, path quality and season flexibility.
 Slovenia
Show more data Show less
- Mountainous
- Forest
- Hills
- Dirt
- Rocky
- Gravel
- Hotels
- Hostels
- Huts
- Campsites
- Family Friendly
- Pet Friendly
- Restrooms
- Water Sources
- Campsites
- Shelters
- Picnic Areas
Download Our Full Guide to Path of Peace (Pot Miru) FREE!
Get our comprehensive guide to this hike for free. Save it for later reading or print out at home.
In these collections
Photos from hikers
Taken on the trail by people who've reviewed Path of Peace (Pot Miru).
Path of Peace (Pot Miru): The Complete Guide
 i
Image by Branko Srot
i
Image by Branko Srot The Path of Peace, or Pot Miru, is a 230 km walk through Slovenia’s upper Soča valley, linking Log pod Mangartom with Mengore above Tolmin. It suits experienced multi-day hikers who want mountain walking with serious historical weight, not a simple riverside ramble.
The route follows the Soča (Isonzo) through Bovec, Kobarid and Tolmin, then climbs to exposed pastures and border ridges where the First World War front line still shapes the ground. Fortresses, trenches, caverns, charnel houses and outdoor museums are part of the walk, not detours from it.
Its strongest days are also its most demanding: the high Bovec-to-Kobarid crossing over Golobar and Zaprikraj, the Kolovrat ridge above the valley, and the Mrzli vrh and Javorca variants near Tolmin. Between them are practical valley bases with guesthouses, apartments, campsites and transport links, but accommodation is thinner on the higher sections.
This is a hard, waymarked point-to-point route with about 7,180 m of ascent, steep forest tracks, gravel roads, rocky paths and exposed ridges. Late spring to early autumn is the normal season, but snow and unsettled Alpine weather can still affect the higher ground.
This guide covers the stages, day planning, accommodation, food, transport, terrain and common mistakes.
Stage-by-Stage Guide
The stages below split the 230 km Soča-valley core into practical walking days, including the Kobarid museum day and the Javorca and Mrzli vrh variants. Distances are approximate: use the Walk of Peace map, current GPS data and local advice before committing to accommodation, especially on the high pasture and ridge stages.
Stage 1: Log pod Mangartom to Bovec — approx. 13 km
The route begins at the Štoln mining shaft at Log pod Mangartom and follows the Koritnica valley towards Bovec. This is the natural introduction to the walk: a mountain-valley stage rather than a high day, with the river corridor, road-accessible settlements and the first major First World War sites setting the tone.
Expect a mix of valley paths, lanes and tracks, with harder surfaces where the route uses local roads. The key places on this stage are Log pod Mangartom, Kal-Koritnica, Kluže Fortress and the approach into Bovec. Kluže Fortress, guarding the Koritnica gorge, is the main landmark, with Fort Hermann above it for walkers adding the extra climb.
Carry food and water from the start unless local services have been checked in advance. Bovec is the first proper service hub, with the best choice of accommodation, shops and onward transport in the upper valley.
Road access is available at Log pod Mangartom, Kluže and Bovec, but the upper Soča valley has no railway. Most walkers reach the start by local bus or transfer from Bovec; summer services towards Log pod Mangartom and the Mangart saddle should be checked before travelling.
Navigation is generally straightforward on the signed Walk of Peace line, but pay attention where the route crosses or follows roads and where side paths lead to Fort Hermann. The main cautions are traffic on road sections, damp or uneven ground near gorge areas, and changeable mountain weather even on a relatively low stage.
Stage 2: Bovec area — Ravelnik, Čelo, Kluže and optional upper Soča side-trips — approx. 14 km
This is a Bovec-based heritage stage rather than a point-to-point relocation day. It gives time for the Ravelnik and Čelo outdoor museums, both with restored Austro-Hungarian trenches, caverns, machine-gun positions and barrack areas, and can be extended towards Kluže or with an optional Trenta or Soča-gorge side-trip.
Underfoot conditions vary from town-edge paths and tracks to uneven trench and cavern systems. The outdoor museums are not technically difficult, but they are not smooth park paths: expect stone, steps, short steep sections and confined or damp-feeling military remains.
Food, water and accommodation are easiest in Bovec, so this is a good day to resupply before the harder high section towards Golobar and Zaprikraj. Use the town to sort route notes, weather, hut or camp arrangements, and any luggage-transfer or shuttle plans.
Bovec is the main transport point for this part of the walk, with buses and private transfers serving the valley. Opening times, access arrangements and any guided-tour options for museums and nearby attractions should be checked before travelling.
Navigation is a matter of linking short signed sites and local paths rather than following one long linear ridge. Take care not to underestimate the time spent inside the open-air museums: the historical sites are close to Bovec, but they reward slow walking and can make the day longer than the distance suggests.
Stage 3: Bovec to Golobar / Zaprikraj high pastures — approx. 14 km
This is where the route becomes a mountain walk. From Bovec the line climbs away from the valley towards the Golobar and Zaprikraj high pastures, crossing the highest part of the 230 km core route around the Čez Utro saddle at about 1,305–1,306 m.
Expect sustained ascent on forest tracks, rougher mountain paths, gravel roads and open pasture. The stage is demanding not because of technical climbing, but because the height gain, exposure and distance all come together after leaving the security of Bovec.
There should be no assumption of food, shops or reliable water once above Bovec. Carry a full day’s food, enough water for a hard climb, and a bad-weather layer even in summer.
Accommodation at or near Golobar and Zaprikraj is much thinner than in Bovec, Kobarid or Tolmin. A hut, camp or arranged transfer must be planned in advance; do not leave this stage’s overnight stop to chance. This should be checked before travelling.
Public transport is not a practical fallback on the high pastures. Navigation is usually helped by Walk of Peace markings, but cloud, mist or late snow can make open pasture and saddle crossings confusing. Snow can linger on higher sections into late spring, and this stage should be treated conservatively in poor weather.
Stage 4: Golobar / Zaprikraj to Kobarid via Drežniške Ravne and Drežnica — approx. 16 km
This stage links the high Italian positions around Zaprikraj with the Kobarid basin. The Zaprikraj outdoor museum is the major historical highlight, with restored positions on the high pastures above the Soča valley.
The walking is a mixture of pasture tracks, rough paths, gravel and descending routes through the settlements of Drežniške Ravne, Magozd and Drežnica towards Kobarid. After the previous day’s climb, the main physical demand is the long descent, which can be hard on knees and slow on loose or wet ground.
Views open across the Soča valley and towards the Julian Alps foothills, with the sense of the front line becoming very clear from the height of the pastures. The descent into Kobarid also marks a major logistical reset: the town is one of the key bases of the whole route.
Do not rely on finding full services between the high pastures and Kobarid unless they have been checked in advance. Carry food and water for the day, then resupply in Kobarid, where there is a wider choice of accommodation, restaurants and shops.
Kobarid has bus and shuttle connections within the Soča valley, and it is a sensible place to build in flexibility if weather has delayed the high section. Navigation requires care leaving the high pastures and through village approaches, where local paths and lanes can be more numerous than the main long-distance line.
Stage 5: Kobarid heritage day — Kobarid Museum, Italian Charnel House, Napoleon Bridge and Kozjak waterfall — approx. 8 km
This is a short walking day but an important planning stage. Kobarid (Caporetto) is central to the history of the Isonzo Front, and the Kobarid Museum is the key indoor stop for understanding the 1917 Battle of Caporetto and the wider mountain war.
The walking can be shaped as a local loop from town, taking in the Italian Charnel House above Kobarid, the Napoleon Bridge over the Soča and the Kozjak waterfall. Terrain is easier than the mountain stages, but it still includes paths, lanes, steps and gorge-side ground rather than only pavement.
Food, water and accommodation are straightforward in Kobarid compared with the high stages. This is the best day to reorganise kit, charge devices, buy supplies and check the forecast before the climb towards Livek and the Kolovrat ridge.
Kobarid is also a practical transport and rest point, with bus and private-transfer options serving the valley. Museum and attraction opening times, access conditions and any entrance fees should be checked before travelling.
Navigation is not difficult, but the day can expand if every site is visited properly. Allow enough time for the museum as well as the outdoor locations; treating this only as a rest day risks rushing one of the most important parts of the route.
Stage 6: Kobarid to Kolovrat ridge via Livek — approx. 16 km
From Kobarid the route climbs towards Livek and the Kolovrat ridge, moving from valley settlement to one of the most dramatic ridge-top sections of the walk. Kolovrat outdoor museum sits at about 1,115 m and preserves Italian trenches, caverns and gun positions along the border ridge.
This is a sustained uphill stage, with lanes and tracks lower down giving way to ridge terrain and more exposed walking higher up. The reward is a broad view over the Soča valley and towards the Julian Alps, but the exposure makes weather a serious planning factor.
Food and water availability should be treated as limited after leaving Kobarid. Do not assume that Livek or the ridge will provide everything needed on the day; carry supplies from Kobarid unless specific services have been checked.
Accommodation near the Kolovrat ridge is much thinner than in Kobarid. Mountain-hut, guesthouse or transfer arrangements should be booked ahead, and the exact overnight plan should be matched to the route line before setting out. This should be checked before travelling.
There is road access in the wider Livek and ridge area, but public transport should not be relied on as an easy escape unless current services or a transfer have been arranged. In mist, take particular care on the border ridge: it is easy to lose time on side tracks, museum paths and cross-border routes that are not the intended onward line.
Stage 7: Kolovrat ridge to Tolmin — approx. 22 km
This is a long descent from the Kolovrat ridge to Tolmin, and it should not be underestimated. The walking begins high and exposed, then gradually leaves the ridge environment for lower tracks, lanes and valley approaches.
The early part of the day is about views and military history; the later part is about managing the cumulative descent. On a clear day the ridge gives some of the finest panoramas of the Soča valley, but wind, rain or mist can make progress slower and navigation more demanding.
Carry food and water from the overnight stop unless services have been arranged. Tolmin is the next major service hub, with accommodation, food and public transport options.
Public transport and road access improve significantly once in Tolmin, with buses towards Nova Gorica, Ljubljana and other parts of the Soča valley. This makes Tolmin the logical place to adjust plans before the Javorca and Mrzli vrh variants.
Navigation is most important at the start of the day on the ridge and during the transition onto descending tracks. The main warning is the length of the stage: 22 km with a long descent after previous mountain days can be tiring, especially in wet conditions or poor visibility.
Stage 8: Tolmin to Javorca and the Tolminka gorge — approx. 20 km
This stage uses Tolmin as a base for the Javorca memorial church and the Tolminka gorge area. Javorca, the Church of the Holy Spirit, is a major memorial site above Tolmin and carries the European Heritage Label.
The terrain is more varied than a town-based day suggests. Expect valley approaches, climbing to the memorial church and gorge-side walking around the Tolminka area, with a mix of tracks, paths and harder surfaces.
Start with food and water from Tolmin. Services away from town should not be assumed, and opening times or access arrangements for Javorca and the gorge should be checked before travelling.
Accommodation is normally back in Tolmin unless a different arrangement has been made. Tolmin’s bus links and road access make this a practical day to shorten, rearrange or skip in bad weather if needed.
Navigation is mainly about avoiding confusion between the Javorca side-trip, Tolminka gorge paths and the onward Walk of Peace options. Gorge paths can be damp and slippery, and the return to Tolmin should be planned with enough daylight rather than treated as a short stroll.
Stage 9: Tolmin to Mrzli vrh outdoor museum via Kuhinja and Pretovč pastures — approx. 22 km
This is another hard mountain-and-pasture stage, climbing from the Tolmin area towards the Mrzli vrh outdoor museum via the Kuhinja and Pretovč pastures. It is one of the days where the route’s First World War landscape and its mountain character are most closely linked.
Expect sustained ascent, open pasture, forest and rougher mountain tracks. The stage gives views towards the Krn massif, but it is also exposed to weather and can feel remote compared with the valley stages.
Carry a full day’s food and sufficient water from Tolmin unless a known service has been arranged on the route. Pasture areas should not be treated as guaranteed resupply points.
Accommodation around Mrzli vrh, Kuhinja and Pretovč is limited compared with the valley towns. A hut, tourist-farm stay, transfer or other overnight arrangement must be fixed before walking this stage. This should be checked before travelling.
Public transport is not a dependable fallback on the high ground. Use current maps and GPS carefully, especially if cloud lowers over the pastures or if snow remains in late spring. The combination of distance, ascent and remoteness makes this one of the more serious planning days of the itinerary.
Stage 10: Mrzli vrh to Tolmin via the German Charnel House and Tolmin gorges — approx. 18 km
This stage returns from the Mrzli vrh area to Tolmin, with the German Charnel House and the Tolmin gorges as the main heritage and landscape stops. It is a descent back into a major service town, but the day still has enough distance and rough ground to require a proper start.
The route leaves pasture and mountain-track terrain for lower paths and valley approaches. The German Charnel House at Tolmin commemorates around 1,000 German soldiers of the Twelfth Isonzo Battle, while the Tolmin gorges add a very different landscape character at the edge of Triglav National Park.
Carry food and water until Tolmin unless specific services have been checked. Once in Tolmin, accommodation, food and transport options are much easier again.
Tolmin is a useful recovery point after the Mrzli vrh variant and before the final stage to Mengore. Buses and transfers can be arranged from here, but current timetables should be checked before travelling.
Navigation is usually less exposed than on the previous day, but care is still needed where pasture tracks, museum access paths and descent routes intersect. Wet rock and steps around gorge areas can be slippery, and a tired descent after two long days should be managed conservatively.
Stage 11: Tolmin to Mengore via Volče — approx. 13 km
The final stage leads from Tolmin through Volče to Mengore, the outdoor museum above Tolmin and the official end of the original 230 km Walk of Peace in the Soča Valley. It is a shorter day, but it should be treated as a real walking stage rather than only an exit route.
Terrain is a mix of valley lanes, local paths and the climb onto the Mengore hill area. The Mengore outdoor museum preserves a fortified hill position and gives a fitting final link in the chain of six open-air museums along the core route.
Take food and water from Tolmin, as Mengore should not be treated as a service point. Volče may be useful for orientation and access, but any food, water or transport options there should be checked before relying on them.
Tolmin remains the main accommodation and transport base at the finish, with buses towards Nova Gorica, Ljubljana and the Soča valley. Private shuttles can also be arranged in the wider Bovec–Kobarid–Tolmin corridor, including connections to airports, but details should be checked before travelling.
Navigation is important at the end because the wider Walk of Peace network continues beyond the Tolmin area on longer variants and extensions. For the 230 km Soča-valley core, finish at Mengore above Tolmin; do not follow signs onwards unless deliberately continuing onto an extended route.
Recommended Itinerary
The 11-day plan below is the most balanced way to walk the 230 km Soča-valley core from Log pod Mangartom to Mengore. It keeps the main mountain crossings manageable, allows time for the major WWI sites, and avoids treating the official long sections as single very hard days.
Distances are approximate planning figures. The official 230 km total includes route variants, museum approaches and side-trips such as the Kolovrat ridge and Mrzli vrh loop, so daily distances should be checked against the official mapping before accommodation is booked.
Standard 11-day itinerary
| Day | From | To | Approx. distance | Why this stage makes sense | Services/accommodation notes |
|---|---|---|---|---|---|
| 1 | Log pod Mangartom, at the Štoln shaft | Bovec | 13 km | A sensible first day from the official start in the Koritnica valley, with time for the historic Kluže area before reaching the first major service town. | Bovec is one of the main valley hubs, with the broadest choice of accommodation, food and onward transport in the upper Soča valley. |
| 2 | Bovec | Bovec area / upper Soča, including Ravelnik, Čelo and Kluže options | 14 km | Keeps the first major WWI sites near Bovec as a focused day rather than rushing straight into the high Bovec–Kobarid traverse. It also gives useful flexibility for weather before the mountain stages. | Stay a second night in Bovec or nearby. This is a good point to sort supplies, maps, transfers or luggage arrangements before accommodation becomes thinner. |
| 3 | Bovec | Golobar / Zaprikraj high pastures | 14 km | Starts the demanding high crossing towards Kobarid, climbing from the valley into pasture and mountain terrain rather than trying to reach Kobarid in one long push. | Accommodation is limited compared with the valley towns. Hut, camping or transfer-based arrangements should be planned in advance; this should be checked before travelling. |
| 4 | Golobar / Zaprikraj | Kobarid, via Drežniške Ravne and Drežnica | 16 km | Completes the high Bovec–Kobarid section with the Zaprikraj outdoor museum and the long descent through the villages above Kobarid. | Kobarid has a good range of accommodation and food. Book ahead in busy periods, especially if planning a rest or museum day here. |
| 5 | Kobarid | Kobarid | 8 km | A deliberate shorter day for the Kobarid Museum, the Italian Charnel House, Napoleon Bridge and Kozjak waterfall, rather than treating them as rushed add-ons after a mountain stage. | Stay a second night in Kobarid. This is one of the best places on the route for a laundry, resupply and recovery stop. |
| 6 | Kobarid | Kolovrat ridge, via Livek | 16 km | A sustained climb to one of the route’s key ridge-top outdoor museums. Splitting here gives time to explore the Kolovrat positions and manage the ascent properly. | Services are much thinner on and around the ridge than in Kobarid or Tolmin. Accommodation or transfer logistics should be arranged before leaving Kobarid. |
| 7 | Kolovrat ridge | Tolmin | 22 km | A longer day, but mostly structured around leaving the exposed ridge and descending towards the next major valley base. Weather matters here: the ridge is open and should not be underestimated. | Tolmin is a main service centre with accommodation, food and onward transport. It is the logical base for the Javorca and Mrzli vrh stages. |
| 8 | Tolmin | Javorca, Church of the Holy Spirit, and the Tolminka gorge | 20 km | Uses Tolmin as a base for one of the most important memorial sites on the route, without forcing a full pack carry over a more awkward onward stage. | Return to Tolmin for the night unless separate accommodation has been arranged. Check opening times and access details for Javorca before setting out. |
| 9 | Tolmin | Mrzli vrh outdoor museum, via Kuhinja / Pretovč pastures | 22 km | A substantial day to reach the Mrzli vrh front-line positions and the pasture country below the Krn massif. This is one of the harder historical side stages. | Accommodation away from Tolmin is more limited. If not staying out near the route, arrange a practical return or transfer plan in advance. |
| 10 | Mrzli vrh | Tolmin, including the German Charnel House and Tolmin gorges | 18 km | Brings the route back to Tolmin while leaving time for the German Charnel House and the Tolmin gorge area, rather than overloading the final day to Mengore. | Tolmin is again the most practical overnight stop, with the best onward transport options near the finish. |
| 11 | Tolmin | Mengore outdoor museum, via Volče | 13 km | A shorter final stage to the fortified hill of Mengore, the official end of the original Soča-valley Walk of Peace. The shorter distance leaves time to return to Tolmin for transport. | There are services in Tolmin; Mengore itself should be treated as a walking finish rather than a full-service trail town. Transport from Tolmin should be checked before travelling. |
Slower variant: 13–14 days
A slower version suits hikers who want more time at the outdoor museums, prefer shorter mountain days, or are carrying a full pack without luggage support. The best places to add nights are Bovec, Kobarid and Tolmin, because they have the strongest services and make practical bases for side-trips.
The high-pasture section between Bovec and Kobarid and the Kolovrat ridge section are the main candidates for splitting further. Any extra overnight away from the valley towns needs careful booking, as accommodation is thinner on the high sections and may depend on huts, small guesthouses, campsites or transfers. This should be checked before travelling.
A sensible slower pattern is:
- add an extra Bovec night before the Bovec–Kobarid high section, especially if the weather is unsettled;
- break the Kobarid to Kolovrat to Tolmin crossing more gently, rather than combining ridge time with a long descent;
- keep two or more nights in Tolmin for Javorca, Mrzli vrh, the German Charnel House and the Tolmin gorges.
Faster variant: 6–8 walking days
A faster itinerary is possible for very fit hikers, and guided operators often cover the core route in about 6–8 walking days. This approach is best for walkers who are comfortable with long ascents, exposed ridge days and less time at museums and memorial sites.
The trade-off is that the route becomes much more demanding. Combining Bovec-area sites with onward walking, compressing the Kobarid stop, or linking the Kolovrat and Tolmin stages can all save days, but they reduce flexibility in bad weather and make accommodation logistics more important.
For most independent hikers, the 11-day version is the better default. It gives the high mountain and ridge sections enough margin, keeps Kobarid and Tolmin useful as service bases, and makes the historical sites part of the walk rather than detours squeezed in at the end of long days.
Planning the Route
Plan this as the Soča-valley core of the Walk of Peace: Log pod Mangartom to Mengore above Tolmin, not the much longer Alps-to-Adriatic continuation to Trieste. The practical route-planning question is not simply distance, but how to fit the heritage sites, high pasture crossings, ridge days and valley transport together without creating over-long mountain stages.
How many days to allow
Eleven days is a sensible independent itinerary for most experienced walkers. It gives enough time for the major WWI sites around Bovec, Kobarid and Tolmin, and avoids forcing the high Bovec–Kobarid and Kobarid–Kolovrat–Tolmin sections into unnecessarily punishing days.
Fast, well-supported walkers sometimes cover the core in 6–8 walking days, but that is a very different style of trip. It leaves less margin for museum visits, poor weather on the exposed ridges, transport delays, or a slower pace on rocky and steep ground.
A slower itinerary is usually better than a rushed one on this route. Much of the value of the walk is in stopping at outdoor museums, trench systems, charnel houses and memorial churches; treating them as quick waypoints misses the point and can also make the days harder than they look on paper.
Natural planning blocks
The route is easiest to plan around the three main Soča valley hubs: Bovec, Kobarid and Tolmin. These are the places where accommodation, food, transport and rest-day options are most dependable.
The more awkward planning comes between those hubs. The high pasture and ridge sections around Golobar, Zaprikraj, Livek, Kolovrat and Mrzli vrh have thinner accommodation and fewer services, so those nights should be arranged before committing to daily stages.
A practical structure is:
| Planning block | What matters most |
|---|---|
| Log pod Mangartom to Bovec | Start transport to Log pod Mangartom, then a manageable first approach into the Bovec area via the Koritnica valley and Kluže area. |
| Bovec local sites | Ravelnik, Čelo, Kluže and possible upper Soča side-trips work well from a Bovec base rather than as hurried add-ons. |
| Bovec to Kobarid | The key mountain section: Golobar, Zaprikraj and the high crossing towards Drežnica/Kobarid need good weather, early starts and pre-planned accommodation. |
| Kobarid area | Allow time for the Kobarid Museum, Italian Charnel House, Napoleon Bridge and Kozjak waterfall rather than pushing straight on to Kolovrat. |
| Kobarid to Kolovrat to Tolmin | A demanding ridge block via Livek and the Kolovrat outdoor museum, with sustained climbing and an exposed descent towards Tolmin. |
| Tolmin-based final section | Javorca, Mrzli vrh, the Tolmin gorges, Volče and Mengore can be organised from Tolmin, making logistics easier at the end of the walk. |
Accommodation and stage design
Do not rely on the official long sections as comfortable daily hiking stages. The Walk of Peace is signed in a small number of long sections, while an 11-day itinerary breaks those down into more realistic walking days with time for side visits.
The valley towns give the most flexibility. Bovec, Kobarid and Tolmin have the broadest mix of hotels, guesthouses, apartments, hostels, campsites and tourist-farm style accommodation.
The high stages need more care. Around the Golobar/Zaprikraj pastures, the Kolovrat ridge and the Mrzli vrh area, accommodation is thinner and may involve mountain-hut or rural options rather than a choice of town beds. Dom Pod Ježo is one hut option associated with higher sections, but current opening dates, availability and booking arrangements should be checked before travelling.
If carrying camping equipment, still plan sites rather than assuming there will be convenient places at the end of each day. Campsites are part of the general accommodation mix in the valley, but the high route should not be treated as a free-form camp-anywhere itinerary.
Food and water planning
Food planning is straightforward in the main towns and less forgiving between them. Bovec, Kobarid and Tolmin are the logical places to restock and to plan meals around.
On high or ridge days, carry lunch and enough snacks for the full stage. Do not assume cafés, shops or reliable food stops between the valley hubs and the outdoor museums.
Water should be treated in the same way. Valley settlements and accommodation are the safest resupply points; availability on pastures, ridges and museum approaches can vary by season. This should be checked before travelling.
Navigation and route choices
The route is waymarked with Walk of Peace markings, but navigation should not be treated as automatic. The trail includes variants, museum approaches, side-trips and high sections where poor visibility can make even a signed route harder to follow.
Carry the official Walk of Peace map or guidebook information and download GPS data before starting. The Walk of Peace Visitor Centre in Kobarid supplies maps, leaflets, GPS data and guidance, and is a useful planning stop before committing to the higher southern sections.
Be especially careful where the walking day combines a main line with a side visit, such as Javorca, Mrzli vrh or the Tolmin gorges. These are valuable additions, but they can turn a moderate day into a long one if the route back to accommodation has not been planned.
Weather and seasonal planning
The best planning window is late spring to early autumn, with the most reliable conditions generally in the warmer months. Snow can linger on higher sections including Golobar, Zaprikraj, Kolovrat and the Krn massif area into late spring.
Spring and autumn can still be excellent, but they need more flexibility. Alpine weather can change quickly, and the exposed ridges and high pastures are not places to be caught without waterproofs, warm layers and a reliable escape plan.
Winter is not a good season for the high sections. If walking outside the main season, check accommodation opening, transport frequency, snow conditions and daylight before setting out.
Transport and section hiking
Section hiking is practical, but it works best if planned around Bovec, Kobarid and Tolmin. There is no railway in the upper Soča valley, so buses, private shuttles and transfers are more important here than on many European long-distance routes.
The nearest useful railheads are Most na Soči on the Bohinj line and Nova Gorica. Bovec, Kobarid and Tolmin are the main bus-linked gateways for joining or leaving the route, while Log pod Mangartom usually requires a local bus or transfer from Bovec.
In summer, a Hop-on Hop-off service links Bovec, Log pod Mangartom and the Mangart saddle several times a day. Timetables, seasonal operation and connections should be checked before travelling.
For walkers with limited time, the route can be split into separate trips: Log pod Mangartom–Bovec, Bovec–Kobarid via the high pastures, Kobarid–Kolovrat–Tolmin, and the Tolmin/Mengore museum section. This is also a good strategy if poor weather makes the exposed high sections unsuitable on a particular day.
Shortening or extending the walk
The easiest way to shorten the itinerary is to base yourself in Bovec, Kobarid or Tolmin and select the strongest sections rather than trying to walk every link. Local buses, shuttles and luggage-transfer operators can help join up stages, but availability and prices should be checked before booking.
The most obvious time-saving cuts are the optional or variant-style days: a Bovec-area side-trip, the Kobarid rest-and-museum day, Javorca, Mrzli vrh or the Tolmin gorge additions. Cutting them reduces walking time, but also removes some of the most important First World War and memorial sites.
Extending the walk is easy in principle. You can add extra time around the upper Soča, Kobarid, Kozjak waterfall, Javorca or the Tolmin area, or continue onto the much longer Walk of Peace from the Alps to the Adriatic. That longer route is a separate undertaking with different distances, stages and logistics, so it should not be planned using the 230 km core figures.
What to arrange before departure
Book the high-stage accommodation first, then fill in the easier town nights around it. This is the best way to avoid discovering that the logical end point for a mountain day has no suitable bed available.
Arrange start and finish transport early. Reaching Log pod Mangartom and leaving from Tolmin/Mengore both involve bus or transfer planning rather than simply stepping off a train at the trailhead.
Check current opening arrangements for the Kobarid Museum, the Walk of Peace Visitor Centre, Javorca, gorges, outdoor museums and any paid attractions. These are part of the route experience, but opening times and access arrangements can change by season.
Towns, Villages and Overnight Stops
Accommodation planning on the Path of Peace is straightforward in the main Soča valley towns, but much tighter on the high pasture and ridge sections. Bovec, Kobarid and Tolmin are the key service bases; Golobar, Zaprikraj, Kolovrat and Mrzli vrh require more careful booking, food planning and weather flexibility.
For an 11-day itinerary, most walkers should avoid relying on walk-up accommodation outside the main towns. Smaller villages can be useful for splitting hard days, but rooms, meals, transfers and opening times should be checked before travelling.
| Place | Best use for hikers | Overnight suitability |
|---|---|---|
| Log pod Mangartom | Trailhead at the Štoln shaft | Usually a start-point rather than the main overnight base |
| Bovec | Major early base, transport, resupply, side-sites | Excellent |
| Golobar / Zaprikraj | High pasture stage between Bovec and Kobarid | Possible only with advance planning |
| Drežnica area | Descent-side villages before Kobarid | Useful if splitting the high stage |
| Kobarid | Main heritage stop and resupply base | Excellent |
| Livek / Kolovrat | Climb and ridge section | Limited; plan ahead |
| Tolmin | Main southern base for Javorca, Mrzli vrh and Mengore | Excellent |
| Volče / Mengore | Final approach and official end | Finish point; usually return to Tolmin for services |
Log pod Mangartom
Log pod Mangartom is the official starting area for the original Walk of Peace in the Soča Valley, at the entrance to the Štoln mining shaft in the Koritnica valley above Bovec. It is a practical trailhead rather than the strongest base for the night before the walk.
Most hikers will find Bovec the simpler place to sleep, shop and organise the start, then travel up to Log pod Mangartom for the first walking day. A local bus or transfer from Bovec is the usual approach; in summer, a Hop-on Hop-off service links Bovec, Log pod Mangartom and the Mangart saddle several times a day. Timetables should be checked before travelling.
Food and shop availability at the trailhead should not be assumed. Carry what is needed for the first day to Bovec, especially if starting early or outside the main summer season.
Kal-Koritnica and Kluže
Kal-Koritnica and Kluže sit on the opening section between Log pod Mangartom and Bovec. Kluže is important because of Kluže Fortress and Fort Hermann above it, both key early WWI and earlier military sites on the route.
These are not the main overnight anchors for the itinerary. They work better as route points and sightseeing stops on the way into Bovec, where accommodation and onward logistics are stronger.
If arranging a shortened first day, taxi or local transfer options around this part of the Koritnica valley should be checked before travelling. Do not depend on small-place food services without checking opening times in advance.
Bovec (Plezzo)
Bovec is the main service hub for the northern part of the route and one of the best places to spend more than one night. It has the broadest practical choice in this section: hotels, guesthouses, apartments, hostels, campsites and access to local transfers and luggage-transfer operators.
It is also the logical base for visiting Ravelnik and Čelo outdoor museums, Kluže Fortress and upper Soča valley side-trips. The 11-day plan uses Bovec as both the first overnight stop and a second base day, which helps avoid rushing the heritage sites around the town.
For food and supplies, Bovec is the place to prepare for the harder Bovec-to-Kobarid mountain section. Stock up before leaving town, because the next stage crosses high pasture and exposed terrain where services are thin.
Transport-wise, Bovec is one of the key bus-access points in the upper Soča valley, although there is no railway in the valley. It is also the practical connection point for reaching Log pod Mangartom by local bus or transfer.
Čezsoča
Čezsoča lies close to Bovec on the upper Soča side of the route. It can be useful for accommodation in the wider Bovec area, particularly if the central town is busy.
For route planning, treat Čezsoča as part of the Bovec accommodation zone rather than a separate resupply hub. Food, transport and transfer details should be checked before booking if staying outside Bovec itself.
Golobar and Zaprikraj
Golobar and Zaprikraj are on the demanding high section between Bovec and Kobarid. This is where accommodation planning becomes much less forgiving: the route leaves the easy valley bases and crosses alpine pasture, gravel mountain roads and exposed ground near the high point of the core route.
An overnight around the Golobar / Zaprikraj area is possible in a practical 11-day split, but it must be arranged in advance. The standard itinerary allows for a camp or hut-style stop here; do not treat this as a place where accommodation, meals or supplies can be improvised on arrival.
Carry sufficient food, water and bad-weather layers from Bovec. Snow can linger on higher sections into late spring, and weather on the pastures can change quickly, so this is not a section to enter with uncertain accommodation or no exit plan.
Zaprikraj is also one of the route’s outdoor museums, with Italian Army positions above Kobarid. Build in time for the site, but do not let the museum visit push the descent into poor weather or darkness.
Drežniške Ravne, Magozd and Drežnica
Drežniške Ravne, Magozd and Drežnica lie on the descent-side approach towards Kobarid after the high Golobar / Zaprikraj section. They are useful route villages for breaking up the demanding mountain crossing or shortening the day into Kobarid.
Accommodation and meals in these smaller villages should be booked and checked in advance. They should not be treated like Bovec or Kobarid, where there is a wider concentration of hiker services.
Drežnica is particularly useful as a practical staging point because it sits before the final approach to Kobarid. If bad weather, fatigue or late timing makes the full descent unwise, pre-arranged accommodation in this area can make the Bovec-to-Kobarid section more manageable.
Kobarid (Caporetto)
Kobarid is one of the most important overnight stops on the whole route. It is a major Soča valley hub, with a strong accommodation base of hotels, guesthouses, apartments, hostels, campsites and tourist-style lodging in and around the town.
It is also the key heritage stop for the Battle of Caporetto. The Kobarid Museum, the Italian Charnel House above the town, the Napoleon Bridge and Kozjak waterfall all make a rest or short walking day here highly worthwhile.
Kobarid is the best place to reset before the climb towards Livek and the Kolovrat ridge. Use it for laundry, food shopping, route checks and any luggage-transfer or shuttle arrangements before leaving the valley floor again.
The Walk of Peace Visitor Centre in Kobarid is the main specialist information point for maps, leaflets, GPS data and guided tours. It is at Gregorčičeva ulica 8, SI-5222 Kobarid; current opening times and services should be checked before relying on them.
Kobarid is served by bus and by private shuttle and luggage-transfer operators working across Bovec, Kobarid and Tolmin. There is no railway here; the nearest practical railheads for the wider valley are Most na Soči and Nova Gorica.
Livek
Livek sits on the route from Kobarid towards the Kolovrat ridge. It is a useful intermediate point on a hard climbing day, but it is not one of the main accommodation hubs of the trail.
Anyone planning to stop here rather than continue to the ridge should book ahead and check meals, supplies and transfer options. Otherwise, leave Kobarid carrying enough food and water for a full mountain day.
Livek also marks the shift from valley walking back into higher, more exposed terrain. Weather, visibility and timing matter more from here onwards, especially if continuing to Kolovrat the same day.
Kolovrat Ridge
Kolovrat is one of the most memorable and logistically sensitive overnight areas on the route. The ridge carries the Kolovrat outdoor museum, with restored Italian trenches, caverns and gun positions, and the walking here includes exposed cross-border ridge terrain.
Accommodation on or near the ridge is limited compared with Kobarid and Tolmin. If using a mountain hut or other high-level accommodation, book ahead and check seasonal opening, meals and payment arrangements before travelling.
There should be no assumption of shops or easy resupply on the ridge. Carry food, water and warm clothing from Kobarid, and keep enough daylight for the museum and the onward descent.
The descent from Kolovrat to Tolmin is long. In poor weather, low cloud or after a late start, it may be safer to adjust the schedule than to force the full ridge-to-valley day.
Tolmin (Tolmino)
Tolmin is the main southern service base and the best place to organise the final part of the Path of Peace. It has the most practical accommodation choice in this section, including hotels, guesthouses, apartments, hostels, campsites and other valley lodgings.
The 11-day itinerary sensibly uses Tolmin for several nights. From here, walkers can tackle Javorca and the Tolminka gorge, the Mrzli vrh outdoor museum, the German Charnel House, the Tolmin gorges and the final approach to Mengore without carrying a full pack every day.
Tolmin is also the strongest transport point at the end of the route. Buses run from Tolmin towards Nova Gorica, Ljubljana and the Soča valley, and private shuttle or luggage-transfer operators connect the main valley towns with wider airport gateways including Ljubljana, Trieste and Venice.
Most na Soči is one of the nearest railheads on the Bohinj line, with Nova Gorica another practical rail gateway for the wider region. Connections and onward bus timings should be checked before booking tight travel plans.
Javorca and the Tolminka Gorge
Javorca, the Church of the Holy Spirit, is usually treated as a side-trip or variant from Tolmin rather than a separate overnight stop. It is an important memorial site above Tolmin and carries the European Heritage Label.
Use Tolmin as the base for this day unless accommodation has been specifically arranged elsewhere. The walking involves hill terrain and the Tolminka gorge area, so allow enough time for the return and do not treat it as a rest day if carrying tired legs from Kolovrat.
Food, water and opening arrangements for any heritage sites should be checked before setting out. Seasonal conditions can also affect the feel of this day, particularly in spring and autumn.
Mrzli vrh
Mrzli vrh is a variant and outdoor museum reached via the Kuhinja and Pretovč pastures. It is another high, historically important section rather than a straightforward village-to-village accommodation stop.
Most itineraries should plan this from Tolmin, either as a demanding day or as part of a carefully arranged high-level split. Accommodation, meals and transport around the pasture area should be checked before travelling.
Carry supplies and bad-weather kit. The route crosses exposed pasture and front-line terrain, and the day can be long if combined with a return towards Tolmin.
Volče
Volče is the village on the final approach from Tolmin towards Mengore. It is useful as a route marker and access point for the last climb to the outdoor museum.
For most walkers, Volče is not the main overnight choice; Tolmin is far stronger for accommodation, food, onward buses and luggage logistics. If considering a stay in or near Volče, book ahead and check food options before committing.
Mengore
Mengore, above Tolmin, is the official end of the original 230 km Walk of Peace in the Soča Valley. The Mengore Hill outdoor museum marks the final heritage site of the core route.
There is no need to plan Mengore as an overnight stop. Finish the walk, then return to Tolmin for accommodation, transport and onward travel.
Because the official end sits above the valley, allow time and energy for the final climb and descent rather than treating the last day as a flat walk-out. Buses and transfers should be arranged from Tolmin, not from the hill itself.
Getting to the Start
The Path of Peace starts at the entrance to the Štoln mining shaft in Log pod Mangartom, above Bovec in the Koritnica valley. This is not a rail-served trailhead, so most walkers reach Bovec first and then continue to Log pod Mangartom by local bus, seasonal shuttle or pre-booked transfer.
By train
There is no railway in the upper Soča valley. The nearest practical railheads for the route are Most na Soči, on the Bohinj line, and Nova Gorica, with onward travel by bus or transfer towards Tolmin, Kobarid, Bovec and finally Log pod Mangartom.
If arriving by train, build in enough time for the onward road leg into the valley. Bus connections in mountain areas can be limited and seasonal, especially if trying to reach the Štoln shaft the same day. This should be checked before travelling.
By bus
Bovec is the main public-transport base for the start. From there, Log pod Mangartom is reached by a short local bus or transfer.
In summer, a Hop-on Hop-off service runs between Bovec, Log pod Mangartom and the Mangart saddle several times a day. This is the most convenient public option for reaching the official start at Log pod Mangartom, but operating dates and daily frequency should be checked before travelling.
From Ljubljana, the journey to Log pod Mangartom is roughly 4.5 hours by bus, travelling either via Rateče/Kranjska Gora or via Bovec. Timetables, changes and same-day onward connections to the Štoln shaft should be checked before travelling.
Outside the main summer period, do not assume there will be a convenient early bus to the trailhead. If the first walking day needs an early start, it is often simpler to stay in Bovec and pre-book a taxi or local transfer to Log pod Mangartom.
By car
Driving to Log pod Mangartom is possible in practical terms, but the route is point-to-point and finishes at Mengore above Tolmin, not back at the start. Leaving a car at or near the Štoln shaft can therefore create a retrieval problem at the end of the walk.
Long-stay parking arrangements at Log pod Mangartom or the Štoln shaft should not be assumed. This should be checked before travelling.
A more workable car plan is to arrange accommodation in Bovec before the first stage, use a local transfer to the start, and deal with vehicle logistics from one of the main valley towns. Private shuttle operators serve Bovec, Kobarid and Tolmin, and can also help with car retrieval or end-of-walk transfers where available. Prices and availability should be confirmed before booking.
From the nearest airport
The most useful airport gateways for this route are those with established transfer links into the Soča valley: Ljubljana, Trieste and Venice. Private shuttle and luggage-transfer operators serve Bovec, Kobarid and Tolmin and connect with these airports.
For public transport from an airport, the usual pattern is to travel first towards Ljubljana, Nova Gorica, Most na Soči or another regional transport hub, then continue by bus into the Soča valley. Exact airport-to-valley timings vary by season and day of the week. This should be checked before travelling.
If flight arrival times are late in the day, plan to sleep in Bovec rather than trying to continue straight to Log pod Mangartom. Missing the last valley connection can leave taxi or private transfer as the only practical option.
Where to stay before starting
Bovec is the most practical pre-hike base. It has a much wider choice of hotels, guesthouses, apartments, hostels and campsites than the high trailhead area, and it sits close enough to Log pod Mangartom for a morning transfer to the Štoln shaft.
Staying in Log pod Mangartom can make the first morning simpler if suitable accommodation and transport line up, but services are thinner than in Bovec. This should be checked before travelling.
For a smooth start, book the first night in Bovec, confirm the next morning’s bus or transfer to Log pod Mangartom, and make sure the driver or service is taking you to the Štoln mining shaft entrance rather than only to the village.
Getting Home from the Finish
The 230 km Soča-valley route finishes at the Mengore outdoor museum above Tolmin, reached via Volče. Treat Mengore as the walking finish, not as a transport hub: plan the end of the day around getting down to Volče or Tolmin for buses, taxis, accommodation and onward connections.
If finishing late, staying in Tolmin is usually the most practical choice. Public transport in the upper Soča valley is timetable-dependent, and onward travel after a full final walking day can be awkward without a pre-booked transfer.
By train
There is no railway in the upper Soča valley or at Mengore itself. The practical railheads for this end of the route are Most na Soči, on the Bohinj line, and Nova Gorica.
From the finish, descend to Tolmin or arrange a taxi/transfer to reach a station connection. Most walkers should check the Tolmin–Most na Soči and Tolmin–Nova Gorica bus or taxi options before fixing train times, as the rail journey is only useful if the valley connection works.
Train and connecting-bus times should be checked before travelling, especially outside the main summer season and at weekends.
By bus
Tolmin is the key public-transport point at the finish. From Tolmin there are buses towards Nova Gorica, Ljubljana and other places in the Soča valley.
Do not assume there will be a convenient bus from Mengore or Volče at the exact time you finish. Build in time to walk down, or pre-arrange a short taxi or shuttle into Tolmin if onward travel matters that day.
For same-day travel to Ljubljana or Nova Gorica, check the current timetable before booking accommodation or onward tickets. If the final stage runs long, overnighting in Tolmin avoids relying on the last useful bus of the day.
By car/taxi
If a car has been left in Tolmin, the final logistics are straightforward: finish at Mengore, descend via Volče, then return to Tolmin. Leaving a vehicle at Mengore itself is less convenient for onward services than using Tolmin as the base.
Private shuttle and luggage-transfer operators serve Bovec, Kobarid and Tolmin, and can be useful for groups, late finishes or airport connections. Transfers should be booked ahead, particularly if finishing on a Sunday, outside summer, or after normal bus hours.
A taxi or private transfer is also the simplest way to connect directly from Tolmin to Most na Soči station if the bus timing does not line up. Current availability and prices should be confirmed before booking.
From the nearest airport
For flights after the hike, the most practical approach is to travel first from Tolmin to a larger transport hub, or to book a direct private shuttle. Operators serving the Soča valley connect Tolmin, Kobarid and Bovec with Ljubljana, Trieste and Venice airports.
Airport choice should be based on the available transfer rather than distance alone. Public transport from the finish usually involves at least one connection, so allow generous time and avoid booking an early flight for the morning after a late finish unless a private transfer is already arranged.
Airport transfer schedules and journey times are changeable and should be checked before travelling.
Where to stay at the finish
Tolmin is the best place to stay at the end of the walk. It is one of the main Soča valley hubs, with hotels, guesthouses, apartments, hostels and campsites, and it gives access to buses, taxis and onward transfers.
Volče and Mengore are useful for reaching the final outdoor museum, but Tolmin is the more practical overnight base. Staying there also gives flexibility if the final day is slower than expected or if public transport connections do not line up with your arrival time.
Accommodation in Tolmin should still be booked ahead in the main walking season, especially if finishing on a weekend or combining the final stage with visits to the Tolmin area sites.
Which Direction Should You Walk?
Standard direction: Log pod Mangartom to Mengore
The standard direction is from Log pod Mangartom, at the Štoln mining shaft, to Mengore above Tolmin. This matches the official direction of the original Walk of Peace in the Soča Valley and is the most logical way to follow the route as a historical journey through the upper Soča (Isonzo) front-line landscape.
It also gives the cleanest transport plan. Log pod Mangartom is the more awkward end to reach, so it is better dealt with at the start by travelling via Bovec and using a local bus, summer Hop-on Hop-off service or private transfer. Finishing near Tolmin is simpler: from Tolmin/Mengore there are onward buses towards Nova Gorica, Ljubljana and the Soča valley, with rail access via Most na Soči or Nova Gorica.
Scenically, this direction works well. The route begins in the Koritnica valley above Bovec, builds through the Bovec military sites and the Soča valley, then crosses the demanding high pasture section over Golobar and Zaprikraj before dropping towards Kobarid. The later ridge and memorial sections around Kolovrat, Tolmin, Javorca, Mrzli vrh and Mengore feel like a natural progression from mountain front line to remembrance landscape.
Reverse direction: Mengore to Log pod Mangartom
Walking in reverse is possible, but it is less convenient for most independent hikers. Starting from Tolmin is straightforward, but finishing at Log pod Mangartom leaves the more awkward transfer for the end of the trip, when public transport options and timing matter more. This should be checked before travelling, especially outside the main summer service period.
The reverse direction can appeal if you prefer to move gradually upstream towards the more enclosed upper Soča and Koritnica valleys. It also puts Bovec and Log pod Mangartom at the emotional finish rather than the start. However, it loses the official start-to-finish structure of the route and makes Mengore feel more like an opening viewpoint than a concluding site.
In terms of effort, neither direction is clearly easy. The route has steep ascents and descents whichever way it is walked: the Bovec–Kobarid section crosses the high Golobar/Zaprikraj area and the Kobarid–Kolovrat–Tolmin section involves sustained climbing and a long ridge descent. Reversing the route simply swaps long descents for long climbs, which may suit some knees but not necessarily overall energy levels.
Direction comparison
| Factor | Log pod Mangartom → Mengore | Mengore → Log pod Mangartom |
|---|---|---|
| Official route logic | Follows the original direction from the Štoln shaft to Mengore | Possible, but against the standard route narrative |
| Transport | Awkward start handled first; easier finish near Tolmin | Easier start near Tolmin; more awkward finish at Log pod Mangartom |
| Scenery progression | Builds from upper valley and Bovec sites to Kobarid, Kolovrat and Tolmin memorial landscapes | Builds upstream towards Bovec and the Koritnica valley |
| Climbing profile | Major climbs fall after some warm-up time around Bovec and Kobarid | Major climbs and ridge sections may come earlier depending on itinerary |
| Accommodation flow | Works well with Bovec, Kobarid and Tolmin as main planning bases | Also workable, but high-pasture and ridge nights still need careful booking |
| Psychological finish | Mengore is the official end of the core route and a strong concluding outdoor museum | Log pod Mangartom is historically important but less practical as a finish |
Weather does not strongly favour one direction over the other. The important point is timing exposed high sections such as Golobar, Zaprikraj, Kolovrat and Mrzli vrh for stable conditions, particularly in spring and autumn when Alpine weather can change quickly.
Recommendation: walk the Path of Peace from Log pod Mangartom to Mengore. It follows the official direction, gives better transport logistics, allows a sensible build-up before the harder mountain sections, and finishes with the Mengore outdoor museum above Tolmin as a clear endpoint to the Soča-valley core.
Accommodation Along the Route
Accommodation on the Path of Peace is workable for independent hikers, but it is unevenly spaced. Bovec, Kobarid and Tolmin are the key overnight bases, with the best mix of hotels, guesthouses, apartments, hostels, tourist farms and campsites. Between those hubs, especially across Golobar, Zaprikraj, Kolovrat and the Mrzli vrh side of the route, options are much thinner and need more careful planning.
This is not a trail where every walking day naturally ends in a large settlement. The harder mountain and ridge stages may require a hut, campsite, pre-booked transfer, or a deliberately adjusted itinerary. Walkers wanting a pure inn-to-inn trip should plan the high sections first, then build the rest of the schedule around what accommodation or transfers are available.
Best overnight bases
Bovec is the practical base for the start of the route and the first couple of days. Many hikers stay in Bovec before transferring to Log pod Mangartom for the official start at the Štoln shaft, then return to Bovec after the first walking day. Bovec also works well for visiting the nearby Ravelnik, Čelo, Kluže and Fort Hermann sites without changing accommodation.
Kobarid is the natural mid-route base. It has strong accommodation choice and is the best place to build in a rest or museum day for the Kobarid Museum, Italian Charnel House, Napoleon Bridge, Kozjak waterfall and nearby Soča sites. It is also the last major base before the climb towards Livek and the Kolovrat ridge.
Tolmin is the main base for the southern end of this 230 km Soča-valley core. It works for the descent from Kolovrat, the Javorca and Tolminka gorge day, the Mrzli vrh variant, the German Charnel House and the final walk to Mengore via Volče. Most walkers should expect to spend several nights in or around Tolmin if including these side-trips and variants.
Where accommodation is limited
The high Bovec-to-Kobarid section over Golobar and Zaprikraj is the main accommodation pinch point. The route plan may involve a camp or hut night around the high pastures, or a transfer if no suitable overnight option is available. This section should not be left to same-day improvisation.
The Kolovrat ridge is another awkward area. The ridge is a highlight of the route, but it is not a large accommodation hub, and the descent to Tolmin is long. Mountain huts such as Dom Pod Ježo can be relevant on higher sections, but current opening, booking rules and access should be checked before travelling.
The Javorca and Mrzli vrh days are usually best handled from Tolmin rather than treated as guaranteed overnight stops. The route passes through pasture and upland areas around Kuhinja and Pretovč on the Mrzli vrh variant, but accommodation availability there should be checked before building a fixed itinerary around it.
Accommodation table
| Place | Accommodation level | Best for | Notes |
|---|---|---|---|
| Log pod Mangartom | Limited | Starting the route at the Štoln shaft | Many walkers will find it simpler to stay in Bovec and use a local bus, transfer or shuttle to reach the start. Current transport and any local accommodation should be checked before travelling. |
| Bovec | Good | First main base; Log pod Mangartom access; Ravelnik, Čelo, Kluže and upper Soča sites | One of the strongest accommodation hubs on the route, with hotels, guesthouses, apartments, hostels and campsites in the wider valley. Useful for two nights if visiting the Bovec-area outdoor museums and fortifications. |
| Čezsoča / Kal-Koritnica / Kluže area | Limited | Shorter Bovec-area stages or route adjustment | Useful on the map but not the main accommodation focus. Most walkers base in Bovec for this part unless a specific local stay is booked. |
| Golobar / Zaprikraj high pastures | Limited | Breaking the demanding Bovec-to-Kobarid mountain section | This is a key planning point. The stage may require a camp or hut arrangement, or a transfer solution. Book ahead and check current seasonal opening. |
| Drežniške Ravne / Magozd / Drežnica | Limited | Descent from Zaprikraj before Kobarid | Potentially useful for shortening the high section, but accommodation choice is not comparable with Kobarid. Check availability before committing to the day split. |
| Kobarid | Good | Mid-route base; museum/rest day; Italian Charnel House; Kozjak waterfall; start for Kolovrat approach | One of the best places to pause, resupply and reorganise. Strong choice compared with the high sections before and after it. |
| Livek | Limited | Breaking the climb between Kobarid and Kolovrat | A possible staging point before the ridge, but not a major accommodation hub. Availability should be checked before travelling. |
| Kolovrat ridge | Limited | Ridge-top outdoor museum and border-ridge section | Do not assume an easy bed at the end of the ridge day. Plan a hut, transfer, or continuation to Tolmin depending on fitness, weather and availability. |
| Tolmin | Good | Main base for Kolovrat descent, Javorca, Mrzli vrh, Tolmin gorges, German Charnel House and final Mengore day | The most practical base for the last part of the 230 km core route. Several nights here can reduce the need to move luggage for side-trips. |
| Javorca / Tolminka gorge area | Limited | Day trip from Tolmin | Best planned as an out-and-back or loop-style day from Tolmin unless a specific overnight has been booked. |
| Kuhinja / Pretovč / Mrzli vrh area | Limited | Mrzli vrh outdoor museum variant | Upland pasture terrain with limited accommodation certainty. Check current options and consider returning to Tolmin. |
| Volče / Mengore | Limited | Final approach to the Mengore outdoor museum | Mengore is the route finish, not a major overnight hub. Tolmin is the practical base before and after the final stage. |
Booking strategy
Book Bovec, Kobarid and Tolmin first, then solve the gaps between them. These three towns provide the backbone of an inn-to-inn itinerary and are the best places for rest days, bad-weather flexibility and luggage logistics.
Next, deal with Golobar/Zaprikraj and Kolovrat. These are the sections most likely to force a change to the ideal walking plan. If accommodation is not available on or near the high ground, arrange a transfer down to a valley base and back to the route the next morning.
For summer dates, weekends and the main walking season from late spring to early autumn, booking ahead is strongly advised. Campsites, huts and smaller guesthouses can have seasonal opening patterns, and high-section options should be checked before travelling.
Luggage transfer and taxi options
Private shuttle and luggage-transfer operators serve Bovec, Kobarid and Tolmin and can make the route much easier to organise. They are particularly useful if staying multiple nights in the main towns while walking outlying sections, or if the high pasture and ridge accommodation does not line up with the desired day lengths.
A practical inn-to-inn version can be built around Bovec, Kobarid and Tolmin, with occasional taxi or shuttle links to cover awkward gaps. This is less elegant than sleeping exactly on the route each night, but it avoids carrying full camping kit and gives better control over the demanding mountain stages.
If relying on transfers, agree pickup points and times in advance. Mobile coverage, weather and fatigue can complicate late changes on exposed ridges and high pastures, so transfer days should be planned as carefully as accommodation nights.
Camping and Wild Camping
Camping can work on the Path of Peace, but it is not the simplest way to walk the whole route. The most practical camping bases are the main Soča valley towns — Bovec, Kobarid and Tolmin — where the accommodation mix includes campsites as well as hotels, guesthouses, apartments and hostels.
The higher walking days are the complication. Between Bovec and Kobarid the route climbs through Golobar and Zaprikraj, while the Kobarid–Kolovrat–Tolmin section involves exposed ridge terrain and thinner services. Those stages need advance planning rather than an assumption that a tent can be pitched wherever the day ends.
Campsites and camping-friendly sections
| Area | Camping practicality | Planning notes |
|---|---|---|
| Bovec / upper Soča valley | Good base area | Useful for the Log pod Mangartom start, Kluže, Ravelnik, Čelo and the early valley stages. Campsites and other accommodation are available in the wider valley hub, but exact sites and opening dates should be checked before travelling. |
| Golobar / Zaprikraj high pastures | Limited and exposed | This is the awkward Bovec-to-Kobarid mountain section. The stage plan allows for a camp or hut solution, but arrangements must be checked in advance; do not rely on finding an informal pitch late in the day. |
| Kobarid | Good base area | One of the best places to pause, resupply and use a campsite or other booked accommodation before the Kolovrat ridge. Also practical for the Kobarid Museum, Italian Charnel House, Napoleon Bridge and Kozjak waterfall day. |
| Kolovrat ridge | Poor for casual camping | Exposed, cross-border ridge terrain with outdoor museum remains and variable weather. Treat this as a section to cross with a planned onward bed or transfer, not as a place to improvise a wild camp. |
| Tolmin | Good base area | The most useful base for Javorca, Mrzli vrh, the Tolmin gorges, Volče and Mengore. Campsites and other accommodation are available in the wider hub, but seasonal opening should be checked. |
A camping itinerary usually works best by using valley campsites as bases and booking huts, rooms or transfers for the exposed high stages. Carrying a full camping load over the route’s steep ascents, rocky tracks and long descents makes an already hard trail noticeably harder.
Wild camping
Do not assume wild camping is allowed on this route. The path crosses settled valleys, private land, high pastures, border-ridge terrain, memorial landscapes and areas close to protected natural sites, so a tent should only be pitched where it is clearly permitted or with the landowner’s agreement.
Rules can vary by municipality, land status and protected-area boundary, and the route briefly touches Italy on the Kolovrat ridge, where regulations may differ again. This should be checked locally before travelling, especially if planning any overnight outside an established campsite or booked accommodation.
Wild camping is particularly inappropriate around outdoor museums, trenches, caverns, charnel houses, churches and memorial sites. These are heritage and remembrance landscapes, not informal camping areas.
Water and cooking
Water planning is straightforward in the main valley towns, but less reliable on the exposed pasture and ridge days. Refill in Bovec, Kobarid, Tolmin and other settlements when possible, and carry enough for the long climbs over Golobar/Zaprikraj, Kolovrat and Mrzli vrh.
The Soča and its tributaries are a major feature of the route, but natural water should not be treated as automatically drinkable. Use a filter, purification method or reliable tap supply, and avoid washing or camping close to watercourses.
Open fires should be avoided unless a campsite or accommodation provider explicitly permits them in a designated place. Use a stove responsibly, keep it stable on gravel or bare ground, and follow any seasonal fire restrictions in hot, dry weather. This should be checked before travelling.
Leave No Trace on the Path of Peace
The route’s WWI remains make low-impact walking especially important. Stay on marked paths through trenches, caverns and outdoor museums, do not move artefacts or stones, and keep tents, cooking and rest stops away from memorial structures.
Pack out all rubbish, including food waste. If camping is permitted, choose durable ground, keep groups small, arrive late and leave early, and leave no visible sign of the pitch.
In spring and autumn, snow or unsettled Alpine weather can affect the higher sections; in summer, exposed ridges and pastures can be hot and short of shade. A camping plan should therefore be flexible enough to switch to booked accommodation if weather, water availability or local restrictions make a tent impractical.
Food, Water and Resupply
Food and water planning on the Path of Peace is straightforward in the Soča valley towns, but much less reliable on the high pasture, ridge and museum sections. Bovec, Kobarid and Tolmin are the main resupply points; outside them, treat cafés, shops and meal stops as a bonus unless they have been checked before travelling.
The most important rule is to leave each valley hub with enough food for the full walking day ahead. The Bovec–Golobar/Zaprikraj–Kobarid and Kobarid–Livek–Kolovrat–Tolmin parts are the key sections where services thin out and the walking is slower, steeper and more exposed.
Main resupply points
Bovec, Kobarid and Tolmin are the practical food bases for the route. These are the places to buy trail snacks, picnic food and next-day supplies, and to arrange packed lunches through accommodation where available.
Log pod Mangartom is the official start, but it should not be treated as a dependable resupply point. Arrive at the Štoln shaft with food and water already sorted, usually from Bovec or before reaching the valley.
Kobarid is particularly useful because many walkers spend an easier or rest-style day there for the museum, charnel house, Napoleon Bridge and Kozjak waterfall. Use that stop to reset food supplies before the climb towards Livek and the Kolovrat ridge.
Tolmin is the final major base for the Javorca, Mrzli vrh and Mengore sections. If walking those as day loops or variants from Tolmin, carry packed food rather than assuming there will be reliable food outlets en route.
Limited-service sections
The higher sections over Golobar, Zaprikraj, Kolovrat and Mrzli vrh are not places to improvise food. Accommodation may exist on or near some high sections, including mountain-hut-style options such as Dom Pod Ježo, but meals and opening periods should be checked before travelling and booked ahead where needed.
Small villages such as Kal-Koritnica, Čezsoča, Drežniške Ravne, Magozd, Drežnica, Livek, Volče and the pasture areas may have limited or seasonal hospitality, but they should not be relied on for a full resupply without checking current opening times. Rural hours can be short, and Sunday or public-holiday closures can affect shops and cafés.
Outdoor museums, ridges, memorial churches and charnel-house sites should be treated as heritage stops, not service points. Carry what is needed before visiting Ravelnik, Čelo, Zaprikraj, Kolovrat, Javorca, Mrzli vrh and Mengore.
Water
Refill from accommodation, cafés and confirmed potable taps whenever possible. Do not start the longer mountain or ridge days expecting regular treated water on the trail.
The route follows and crosses a landscape shaped by the Soča (Isonzo), Koritnica and Tolminka areas, but natural water should be treated before drinking unless it is clearly marked as potable. A filter, purification tablets or another reliable treatment method is sensible, especially in warm weather or if camping.
On exposed pasture and ridge days, carry more than a valley walk would require. A practical minimum is usually around 2 litres for a normal day, with more in hot weather, on long ascents, or if walking away from confirmed accommodation or food stops.
Food and water by section
| Section | Food availability | Water availability | Notes |
|---|---|---|---|
| Log pod Mangartom to Bovec | Limited at the start; Bovec is the first dependable resupply hub. | Start with water already filled; refill reliably once in Bovec. | Do not assume supplies at the Štoln shaft. Carry snacks or lunch from before the start. |
| Bovec area day: Ravelnik, Čelo, Kluže and nearby options | Good when based in Bovec; limited at the outdoor museum sites themselves. | Refill in Bovec and at confirmed services only. | This is one of the easiest parts of the route for food logistics if accommodation is in Bovec. |
| Bovec to Golobar / Zaprikraj high pastures | Limited once above the valley. | Carry a full day’s water; natural sources should be treated. | One of the key self-sufficiency stages. Leave Bovec with lunch, snacks and enough water for a hard climb. |
| Golobar / Zaprikraj to Kobarid via Drežnica area | Limited until the descent reaches more settled areas; Kobarid is the next major hub. | Carry enough from the overnight stop; treat natural water unless potable. | Check any planned hut, farm or village meal stop before relying on it. |
| Kobarid rest / museum day | Best resupply opportunity on the middle route. | Easy to refill from accommodation and town services. | Use Kobarid to buy food for the Kolovrat stage and to arrange a packed lunch if needed. |
| Kobarid to Kolovrat via Livek | Limited after leaving Kobarid; do not rely on ridge services. | Carry sufficient water for the climb and ridge. | The Kolovrat outdoor museum is exposed and should be treated as service-free. |
| Kolovrat to Tolmin | Limited on the ridge and descent; Tolmin is the next major hub. | Start full; refill only where potable water or services are confirmed. | A long descent day where poor weather or heat can increase water needs. |
| Tolmin to Javorca / Tolminka gorge | Good when starting and finishing in Tolmin; limited away from town. | Refill in Tolmin; treat natural water unless marked potable. | Carry lunch for the Javorca side-trip rather than depending on facilities near the church. |
| Tolmin to Mrzli vrh via Kuhinja / Pretovč pastures | Limited on the pastures and around the outdoor museum. | Carry a full day’s water; treat natural sources. | Another self-sufficient mountain day. Check any accommodation or meal option before booking the stage plan around it. |
| Mrzli vrh to Tolmin | Limited until returning towards Tolmin. | Start with enough water for the descent; refill reliably in Tolmin. | Plan this as a full walking day, not a café-to-café stage. |
| Tolmin to Mengore via Volče | Best supplied from Tolmin before setting off; limited at the final outdoor museum. | Refill in Tolmin before departure. | Mengore is the route finish, but it is not a resupply point. Finish logistics should be arranged through Tolmin or onward transport. |
Practical carrying strategy
For valley-based days around Bovec, Kobarid and Tolmin, a normal daypack with snacks, lunch and 1.5–2 litres of water is usually adequate, provided services are open. In hot weather, carry more.
For the high pasture and ridge days, carry a full packed lunch, high-energy snacks and at least 2 litres of water, with capacity for more if temperatures are high or accommodation is uncertain. A small emergency food reserve is sensible because steep descents, route variants and weather can make these days longer than the map suggests.
Check shop, café, hut and restaurant hours before relying on them, especially outside high summer, on Sundays and on public holidays. This should be checked before travelling.
Terrain, Conditions and Difficulty in Practice
The Path of Peace is hard because of the amount of climbing, the changes in terrain and the exposure on the higher pasture and ridge sections, not because it is consistently technical. The route is waymarked, but the ground underfoot changes repeatedly: riverside paths, tarmac lanes, forest tracks, gravel mountain roads, rocky paths, open pasture and restored WWI trench and cavern areas all occur along the core route.
The headline ascent of about 7,180 m is the main physical challenge. Several days involve long climbs followed by sustained descents, and the higher sections are more committing than the valley walking around Bovec, Kobarid and Tolmin.
Underfoot: what the path is like
Low in the Soča and Koritnica valleys, expect a mix of paths, minor roads and tarmac lanes between villages, memorial sites and museums. These sections are generally straightforward underfoot, though they can still feel tiring when combined with road walking and a multi-day pack.
Above the valley floor, the route becomes much more mountainous. Forest tracks and gravel mountain roads climb towards alpine pastures such as Golobar and Zaprikraj, with dirt, rock and loose gravel on steeper gradients. Descents can be hard on knees, especially when leaving the high ground towards Drežnica, Kobarid or Tolmin.
The outdoor museum areas add another type of terrain. Restored trenches, caverns, gun positions and military tracks are fascinating but uneven, and should not be treated like smooth tourist paths. Take care around stonework, steps, damp shaded sections and narrow trench lines, particularly in poor light or wet weather.
The hardest terrain sections
| Route section | What makes it harder in practice |
|---|---|
| Log pod Mangartom to Bovec | Valley and fortress terrain around the Koritnica corridor, with a mix of tracks, paths and road sections rather than one continuous mountain trail. |
| Bovec to Golobar / Zaprikraj | One of the most demanding parts of the route: sustained climbing from the valley towards high pastures, with rougher mountain tracks and exposed open ground. |
| Golobar / Zaprikraj to Kobarid | High pasture terrain followed by a long descent via the Drežnica area towards Kobarid; footing can be rocky or gravelly and the descent is cumulative. |
| Kobarid to Kolovrat via Livek | A major climbing day, with the route gaining the ridge and reaching the Kolovrat outdoor museum at about 1,115 m. This is exposed border-ridge walking rather than sheltered valley walking. |
| Kolovrat to Tolmin | The long descent off the ridge is a real leg-tester, especially after a hard previous day. Loose gravel and sustained downhill walking can be as tiring as the climb. |
| Tolmin to Javorca / Mrzli vrh variants | These side routes add significant hill mileage and ascent. Mrzli vrh via Kuhinja / Pretovč pastures is especially exposed to mountain weather. |
| Tolmin to Mengore via Volče | Shorter than the biggest mountain stages, but still includes hill terrain to the Mengore outdoor museum rather than a flat finish. |
Exposure and weather
The high pastures and ridges are exposed to weather. Golobar, Zaprikraj, Kolovrat and the Mrzli vrh area should be treated as mountain terrain, even though the route’s high point is only about 1,306 m at the Čez Utro saddle rather than a high alpine summit.
In clear, settled conditions these sections are straightforward for fit hillwalkers with good footwear. In rain, wind or low cloud they become more serious: waymarking is helpful, but navigation, warmth and traction matter more once the route leaves the valley.
Snow can linger on higher sections into late spring, especially around Golobar, Zaprikraj, Kolovrat and the Krn massif area. Winter hiking on the high sections is discouraged, and spring or autumn itineraries need enough flexibility to avoid exposed ridges in poor conditions.
Mud, rock and road walking
This is not primarily a boggy trail. The main underfoot issues are rock, gravel, dirt tracks and steep gradients rather than prolonged marshy ground. After rain, forest paths, shaded trench areas and dirt tracks can still become slippery.
There is some road and lane walking, especially in and around the valley settlements and links between heritage sites. This makes parts of the route physically easier to navigate but not necessarily easier on the feet, so cushioned footwear and careful pacing are useful.
Rocky and gravelly ground is more common on the mountain approaches, old military routes and ridgeline sections. Trekking poles are useful for the long descents, particularly from the high pasture and Kolovrat sections.
Pastures, fences and working land
The route crosses open alpine pasture areas, particularly on the Bovec-to-Kobarid and Mrzli vrh sections. These should be treated as working mountain landscapes: stay on the marked route, do not cut corners across pasture, and leave any gates as found.
Stiles and gate arrangements are not the defining logistical challenge of this route. The bigger practical issue is that accommodation and services are thinner on high pasture and ridge days, so these sections need firmer planning than the valley stages.
Seasonal difficulty
Late spring, summer and early autumn are the normal walking window. April/May to October/November is realistic in broad terms, but the higher sections decide the true start and end of the season.
Late spring can still bring snow patches or damaged, wet ground on the higher stages. Early autumn can be excellent, but Alpine weather becomes less settled and daylight shortens. Summer gives the easiest access to the full route, though exposed ridges and long climbs still require early starts and enough water.
Before committing to the high sections, check current trail, snow and weather conditions locally, especially for Golobar, Zaprikraj, Kolovrat and Mrzli vrh. This should be checked before travelling.
What makes it easier — and what catches walkers out
The route is easier than an unmarked alpine traverse because it is waymarked and repeatedly returns to practical valley hubs such as Bovec, Kobarid and Tolmin. These towns allow accommodation, food, rest days and itinerary adjustments.
It becomes harder when the official long sections are underestimated. The signed route is arranged in a small number of long sections, while an 11-day plan splits them into more walkable days and adds important side-trips. The apparent daily distance can therefore understate the effort if museum loops, ridge variants and descents are included.
The common mistake is treating the Path of Peace as a cultural valley walk. It is partly that, but the core route also crosses steep forest tracks, open high pastures and exposed ridges, with more than 7,000 m of total ascent. Fit multi-day hikers with proper mountain kit should find it manageable; beginners should not treat it as an easy first long-distance trail.
Weather and Best Time to Walk
The practical walking season is late spring to early autumn, roughly April/May to October/November. For the full 230 km route, including Golobar, Zaprikraj, Kolovrat and Mrzli vrh, the most dependable window is after late-spring snow has cleared and before autumn weather becomes too unsettled.
Winter is not a realistic season for most independent hikers on the full route. The high pasture and ridge sections are exposed, snow can affect the higher ground, and the steep forest tracks, gravel roads and rocky paths become more serious in cold or wet conditions.
Seasonal planning
| Season | What to expect | Planning advice |
|---|---|---|
| April to May | The valley sections around Bovec, Kobarid and Tolmin may be walkable, but snow can linger on higher sections such as Golobar, Zaprikraj, Kolovrat and the Krn-side terrain. Spring weather in the Julian Alps foothills can be unsettled. | Treat this as a cautious shoulder season. Check current snow conditions before committing to the high stages, and be ready to alter the route or use valley accommodation. |
| June to September | The main hiking season, with the best chance of completing the higher pasture and ridge days without snow. Valley sections can feel warm, while exposed ridges still need windproof and waterproof layers. | Book accommodation ahead, especially where options are thinner on high-stage days. Start early on long ascent days such as Bovec to the Golobar/Zaprikraj area and Kobarid to Kolovrat. |
| October to November | Early autumn can still be suitable, but weather becomes less predictable and daylight is shorter. Wet leaves, muddy forest tracks and cold wind on the ridges can make the route slower. | Build in flexibility and avoid committing to exposed ridge days in poor forecasts. Accommodation and transport availability may reduce outside the main season. This should be checked before travelling. |
| December to March | Snow, ice, short daylight and closed or limited mountain services make the full route unsuitable for normal long-distance walking. | Not recommended for the full trail. Low valley heritage walks may still be possible in suitable conditions, but the high route should be treated as winter mountain terrain. |
Weather risks that matter on this route
The route is not high-alpine in the sense of crossing major summits, but the high point near Čez Utro is about 1,306 m and several days spend time on open pasture, steep forest tracks and exposed border ridges. Weather changes are therefore more consequential than on a simple valley trail.
Rain can make the rocky, gravelly and forested sections slippery, especially on long descents from the high pastures and off the Kolovrat ridge. Waterproofs, warm layers and footwear with reliable grip are essential even in summer.
Low cloud, wind and poor visibility are most problematic on Golobar, Zaprikraj, Kolovrat and Mrzli vrh, where the route crosses open ground and WWI trench and cavern areas. In bad visibility, navigation should not rely only on waymarks; carry offline mapping or GPS data and know how to use it.
Thunderstorms and fast-moving unsettled weather are a particular concern on exposed ridge days. If the forecast is poor, it is better to delay, shorten the day or stay low in the Soča valley than be committed to a long descent from high ground.
Daylight and daily timing
The 11-day split includes several demanding days with sustained ascent and descent, so daylight matters. In early spring and late autumn, shorter days leave less margin for route-finding delays, museum visits, weather changes or long descents into Kobarid and Tolmin.
Summer gives the most comfortable daylight margin, but early starts are still sensible on the harder stages. This is especially true for Bovec to the Golobar/Zaprikraj area, Kobarid to Kolovrat via Livek, the descent from Kolovrat to Tolmin, and the Mrzli vrh variant.
Trail surface by season
Expect a mix of riverside paths, tarmac lanes, dirt tracks, gravel mountain roads, rocky sections and forest paths. After rain, the steep wooded sections and gravel descents can be tiring and slow; on exposed ridges, wind and wet ground can make footing less secure.
In late spring, any remaining snow on higher sections can obscure the path and make crossings of pasture and ridge terrain more difficult. In autumn, wet ground and fallen leaves can hide uneven stones, roots and old military features around trench and cavern systems.
Accommodation and seasonal services
Bovec, Kobarid and Tolmin have the most reliable accommodation base, with hotels, guesthouses, apartments, hostels, campsites and other services. The high pasture and ridge stages have thinner options, including mountain-hut-style accommodation in some areas, so these nights should be planned before setting out.
Opening periods for huts, campsites, visitor sites, local shuttles and some accommodation vary by season. This should be checked before travelling, particularly for April/May, October/November and any plan that depends on staying high rather than dropping back to the valley.
Safety Notes
Emergency help
Use 112 for emergency services in Slovenia and Italy. On a cross-border ridge section, the same number applies, but be ready to describe your location clearly: nearest village, museum, ridge, pasture, saddle or road access point.
Do not rely on mobile coverage throughout the route. The Soča valley towns and villages are the safest places to make calls, but signal may be weaker in gorges, forested slopes, around trenches and caverns, and on more remote high-pasture sections. Carry an offline map or GPS track, a charged phone and a power bank.
Mountain weather and exposure
This is not just a valley heritage walk. The demanding sections over Golobar, Zaprikraj, Čez Utro, the Kolovrat ridge and the Mrzli vrh area are exposed to sudden Alpine weather, even though the route’s high point is only about 1,306 m.
Snow can linger on higher sections into late spring, especially around Golobar, Zaprikraj, Kolovrat and the Krn massif area. Spring and autumn can bring unsettled weather, cold rain, poor visibility and slippery ground. Winter hiking on the higher sections is discouraged.
In summer, the lower valley stages around Bovec, Kobarid and Tolmin can be hot, while ridges and pastures can still become cold and windy quickly. Carry layers, waterproofs, sun protection and enough water for the high days where services are thinner.
Remote and harder sections
The main safety challenge is cumulative effort: around 7,180 m of ascent over the route, with steep climbs and long descents on rock, gravel, forest tracks and mountain roads. The Bovec-to-Kobarid high section and the Kobarid-to-Kolovrat-to-Tolmin section deserve conservative timing.
Accommodation and services are thinner on the high pasture and ridge days. Do not start these sections late unless onward accommodation, daylight and weather are certain. If staying near huts, farms or camps on higher ground, book ahead and check access arrangements before leaving the valley.
Solo walkers should be especially cautious on the high sections. Leave the day’s plan with accommodation staff or a trusted contact, include the intended finish point, and update them if changing route or taking a variant.
WWI trenches, caverns and outdoor museums
Several sections pass restored front-line positions, trenches, caverns, gun emplacements and outdoor museums, including Ravelnik, Čelo, Zaprikraj, Kolovrat, Mrzli vrh and Mengore. Stay on marked paths and do not enter closed, unstable or unlit structures.
Caverns, steps and trench paths can be damp, uneven and slippery. A small headtorch is useful if visiting darker features, but it is not a reason to explore beyond maintained areas.
Road walking and village lanes
Some lower sections use tarmac valley lanes, village roads and gravel mountain roads. Expect occasional traffic near settlements, fortresses, viewpoints and trailheads.
Where there is no pavement, keep visible, use the outside edge of bends carefully, and avoid wearing headphones on narrow roads. In poor visibility or late in the day, a bright layer or reflective detail is worthwhile.
Rivers, gorges and wet rock
The Soča and Tolminka gorge areas are major highlights, but they are not places to take risks. River water can be cold and fast, and wet limestone or polished rock can be extremely slippery.
Keep back from gorge edges, do not scramble down to pools where there is no maintained access, and take extra care after rain. There are no tidal issues on this inland route, and river fords are not a normal planning feature of the walk.
Livestock and pasture areas
The route crosses alpine pastures such as Golobar, Zaprikraj, Kuhinja and Pretovč. If livestock is present, give animals space, pass calmly, keep food packed away and close any gates as found.
Dogs should be kept under close control wherever animals, farm tracks or settlements are encountered. Local restrictions and accommodation rules should be checked before travelling.
Daily safety checks before setting off
Before each walking day, check:
- the weather forecast for both the valley and higher ridges;
- whether snow, storms, heavy rain or poor visibility affect Golobar, Zaprikraj, Kolovrat, Mrzli vrh or other high sections;
- the day’s route against the official Walk of Peace map or GPS data;
- expected ascent, descent and realistic walking time, not just distance;
- accommodation, hut, campsite or transfer arrangements for the night;
- food and water availability before leaving Bovec, Kobarid, Tolmin or smaller villages;
- phone charge, offline navigation, waterproofs and warm layers;
- public transport or shuttle times if using them to shorten, start or leave a stage.
If conditions make a high section unsafe, use the valley towns as reset points rather than pushing on. Bovec, Kobarid and Tolmin are the practical places to pause, re-plan transport, arrange transfers or wait out bad weather.
Gear Recommendations
The Path of Peace is not a technical high-alpine route, but it is a long, steep and often exposed mountain-and-valley walk. Kit should be chosen for sustained ascents, rocky and gravel tracks, forest paths, wet-weather exposure on Golobar, Zaprikraj, Kolovrat and Mrzli vrh, and long days between valley services.
Footwear
Wear proper walking boots or robust trail shoes with a grippy sole. The route mixes riverside paths, tarmac lanes, steep forest tracks, gravel mountain roads, rocky ground and sections around trenches, caverns and outdoor museums, so footwear needs more support and grip than a valley path would suggest.
Waterproof boots are useful in spring and autumn, especially where snowmelt, wet grass or muddy forest sections linger on the higher pastures. In high summer, breathable footwear can work for experienced hikers, but it still needs good edging and braking grip for the long descents into Kobarid and Tolmin.
Gaiters are not essential for most walkers, but lightweight gaiters can help in wet grass, muddy woodland and late-spring snow patches on the higher sections.
Waterproofs and Warm Layers
Carry full waterproofs every day: jacket and overtrousers, not just a shower shell. The higher sections around Golobar, Zaprikraj, Kolovrat and Mrzli vrh are exposed to Alpine weather, and conditions can change quickly even when the Soča valley is warm.
A warm mid-layer is needed outside the hottest summer conditions. A fleece or light insulated jacket is sensible for ridge stops, early starts, hut evenings and cool descents after bad weather.
Gloves and a warm hat are worthwhile in spring and autumn. Winter hiking on the high sections is discouraged, and snow can linger into late spring, so shoulder-season walkers should pack for cold wind rather than relying on valley temperatures.
Navigation
The route is waymarked with Walk of Peace markings and poles, but navigation should not rely on waymarks alone. Carry an offline map on a phone or GPS device, plus a paper map or printed stage notes for backup.
This is especially important on the high pasture and ridge days, where mist, poor weather or fatigue can make junctions less obvious. The official route has long signed sections, while many hikers split it into shorter days, so stage planning should be checked against current route mapping before setting out.
A headtorch is strongly recommended. It is useful for early starts, delayed finishes, hut approaches and any visits to darker WWI cavern or trench areas where access is permitted.
Water and Food Carry
Do not assume frequent resupply on the high days. Bovec, Kobarid and Tolmin are the main places for reliable shops and services, while the sections over Golobar, Zaprikraj, Kolovrat and Mrzli vrh have thinner accommodation and fewer obvious resupply points.
Carry enough water for a full mountain day, particularly in summer heat and on exposed ridges. A capacity of around 2 litres is a sensible baseline for most hikers, with more in hot weather or if walking slowly with a heavy pack.
Pack lunch and emergency snacks before leaving the valley towns. On days from Bovec towards Golobar and Zaprikraj, from Kobarid towards Kolovrat, and on the Mrzli vrh variant via Kuhinja and Pretovč, food options should be planned rather than assumed.
Trekking Poles
Trekking poles are strongly recommended. The route has about 7,180 m of total ascent and includes steep, sustained climbs and long descents, so poles reduce strain on knees and help with balance on gravel, rock and wet forest tracks.
They are particularly useful on the Bovec-to-Kobarid high section and on the climb to and descent from the Kolovrat ridge. Rubber tips are useful on tarmac lanes through the valley settlements.
Power, Phone and Documents
Carry a power bank if using a phone for navigation, accommodation details or transport connections. Cold, long GPS days and poor signal areas can drain batteries quickly.
Keep key route files, accommodation addresses and transport information available offline. The upper Soča valley has no railway, and onward travel depends on buses, local transfers or shuttles, so losing access to booking details can cause avoidable problems.
A passport or national ID card should be carried because the route includes short cross-border ridge sections touching Italy. Keep it accessible but protected from rain.
Sun and Insect Protection
Sun protection matters on the open pastures and ridges. Carry sunglasses, a hat and high-factor sunscreen, especially for Kolovrat, Mrzli vrh and the exposed Bovec-to-Kobarid high ground.
Insect repellent is useful in warm weather, particularly around riverside, woodland and pasture sections. A small tick-removal tool is sensible for multi-day walking through grass and forest.
Camping and Hut Kit
Accommodation is mixed, with hotels, guesthouses, apartments, tourist farms, hostels, campsites and some mountain huts. Campers should not assume that every high section has convenient camping or full facilities; overnight stops on the pasture and ridge days need to be planned in advance.
If using mountain huts, carry a lightweight sleeping liner, earplugs, a small towel and cash or card as appropriate for the hut. Current hut opening dates, booking requirements and accepted payment methods should be checked before travelling.
Campers need a shelter suitable for wet mountain weather, a warm enough sleep system for cool nights above the valley, and a stove only where its use is permitted. Camping arrangements and local rules should be checked before travelling.
Gear by Hiking Style
| Hiking style | Route-specific priorities |
|---|---|
| Inn-to-inn hikers | Keep the pack light but do not cut waterproofs, warm layers, poles, navigation backup or a full-day food and water carry. Luggage transfer may be available through local operators, but mountain-day essentials must stay with you. |
| Campers | Add a weatherproof shelter, warm sleep system, stove setup where permitted, headtorch, power bank and enough food for less-serviced sections. Plan high-stage overnight stops carefully, as accommodation and camping options are thinner away from Bovec, Kobarid and Tolmin. |
| Fast or section hikers | Trail shoes may be suitable if they are grippy and protective, but carry the same waterproof and navigation safety kit as slower walkers. A light pack helps on the big climbs, but the exposed ridges and long descents still require mountain-ready clothing, poles and enough water. |
Seasonal Extras
In late spring, expect the possibility of lingering snow on higher sections such as Golobar, Zaprikraj, Kolovrat and areas connected with the Krn massif. Extra warm layers, waterproof gloves and careful route checks are sensible; if snow affects the high sections, current local advice should be followed.
In summer, heat management becomes more important than cold protection in the valleys, but the ridges still require waterproofs and an insulating layer. Increase water capacity, start early on exposed climbs and protect against sun on open pasture and ridge ground.
In early autumn, days shorten and weather becomes less settled. Carry a reliable headtorch, warmer gloves and a hat, and avoid planning long exposed ridge days with no margin for delays.
Budget and Costs
Slovenia uses the euro (€). For this route, the largest costs are accommodation, food in the main valley towns, transport into and out of the upper Soča valley, and any taxis or luggage transfers used to bridge awkward public-transport gaps.
Current prices vary strongly by season, availability and booking channel, especially in Bovec, Kobarid and Tolmin. Confirm current prices before booking and build the trip budget from live accommodation, bus, shuttle and attraction listings rather than relying on old guidebook figures.
Main cost drivers
| Cost | What to budget for | Planning note |
|---|---|---|
| Accommodation | Around 10–11 nights for the full HikeList itinerary | Bovec, Kobarid and Tolmin have the widest choice; the high pasture and ridge sections have fewer options and should be booked early. |
| Food | Breakfasts, packed lunches, evening meals and trail snacks | Supermarkets and restaurants are easiest in the valley hubs. Carry food for the higher Golobar, Zaprikraj, Kolovrat and Mrzli vrh sections. |
| Transport to the start | Bus or transfer to Log pod Mangartom via Bovec, or longer bus connections from Ljubljana | There is no railway in the upper Soča valley. This should be checked before travelling. |
| Transport from the finish | Bus or transfer from Tolmin / Mengore area | Tolmin has onward bus links towards Nova Gorica, Ljubljana and the Soča valley. |
| Local transfers | Short taxi or shuttle legs, especially for start access, accommodation repositioning or bad-weather changes | Private shuttle operators serve Bovec, Kobarid and Tolmin; prices should be checked before booking. |
| Luggage transfer | Optional bag movement between valley accommodation bases | Useful if using Bovec, Kobarid and Tolmin as bases, but less straightforward on high pasture and ridge days. Confirm coverage before relying on it. |
| Museums and sights | Kobarid Museum, Javorca, gorges, waterfalls and other managed sites may add entry costs | Check current opening times and ticket prices, especially outside the main summer season. |
Budget approach
The cheapest realistic version uses campsites, hostels, simple guesthouses or apartments, self-catering where possible, and public transport rather than private transfers. This works best if the itinerary is planned around nights in Bovec, Kobarid and Tolmin, where services are concentrated.
Do not assume every high section can be made cheap at short notice. Accommodation is thinner around the Golobar / Zaprikraj and Kolovrat ridge sections, and a taxi back to a valley base can quickly outweigh any saving from cheaper lodging.
A budget hiker should also allow for paid museum or heritage-site visits rather than treating them as optional extras. The route’s WWI sites are a major part of the walk, particularly around Kobarid, Kolovrat, Javorca, Mrzli vrh and Mengore.
Mid-range approach
Most independent walkers will fall into a mid-range budget: guesthouses, apartments, tourist farms or modest hotels; restaurant meals in the main towns; packed lunches for mountain days; and occasional taxis or shuttles where public transport is inconvenient.
This is the most practical style for the 11-day itinerary. It gives enough flexibility to stay close to the route without needing to carry camping gear throughout, while still avoiding the cost of a fully supported trip.
Book Bovec, Kobarid and Tolmin accommodation well ahead in the main walking season. If staying off-route to get a better price, include the transfer cost and time in the budget.
Comfortable approach
A more comfortable trip uses private rooms or hotels where available, pre-booked transfers, luggage movement between bases, and possibly a guided or self-guided package. This reduces logistics but costs more, particularly where transfers are needed between the valley towns, the start at Log pod Mangartom, and higher sections.
Guided operators often walk the core route in fewer walking days than the 11-day HikeList split. Compare what is included: accommodation standard, luggage transfer, transport to Log pod Mangartom, return transport from Tolmin, museum entries, meals and whether high-route variants such as Kolovrat, Javorca and Mrzli vrh are included.
Where to save money
Base nights in Bovec, Kobarid and Tolmin usually give the best balance of services and competition between accommodation types. Self-catering apartments can reduce food costs if they are close enough to shops and the route.
Public transport should be used where it fits the schedule, but timetables in the upper Soča valley are not frequent enough to improvise around every stage. The summer Hop-on Hop-off service between Bovec, Log pod Mangartom and the Mangart saddle can be useful for start access, but current dates and times should be checked before travelling.
Avoid false economies on the mountain stages. Carrying inadequate food, booking accommodation too far from the trail, or relying on an unconfirmed lift can lead to expensive last-minute taxi use.
Cash, cards and booking practicalities
Cards are widely useful in the main towns, but smaller accommodation providers, campsites, huts, taxis or rural services may require different payment arrangements. Carry some euros in cash for minor costs and confirm payment method when booking.
Accommodation on the high pasture and ridge days should not be left to arrival. The route is long, steep in places and exposed to weather, so a confirmed bed or a confirmed transfer back to a valley base is part of the safety plan as well as the budget.
Luggage Transfer, Guided Tours and Support Services
Support is available on the Path of Peace, but it is not as standardised as on some heavily packaged European trails. The easiest places to arrange help are the main Soča valley hubs: Bovec, Kobarid and Tolmin. These towns have the best accommodation choice, transport links and access to local shuttle or taxi services.
The high pasture and ridge sections need more careful planning. Luggage transfer, pick-ups and accommodation logistics are less straightforward around Golobar, Zaprikraj, Kolovrat and Mrzli vrh, so do not assume a bag can be moved to every overnight stop without arranging it in advance.
Luggage transfer
Private shuttle and luggage-transfer operators serve Bovec, Kobarid and Tolmin, and can be useful if you want to walk with a daypack rather than carry full multi-day kit. This is especially attractive on the steep Bovec-to-Kobarid section over the Golobar and Zaprikraj area, and on the Kobarid-to-Kolovrat-to-Tolmin ridge section, where sustained ascent and descent make pack weight more noticeable.
The simplest luggage plan is to move bags between valley bases rather than to every high overnight point. For example, many walkers can base logistics around Bovec, Kobarid and Tolmin, carrying only what is needed for any hut, campsite or remote overnight section. This reduces cost and avoids relying on vehicle access to exposed pastures or ridge locations.
Book luggage help before travelling, particularly in summer and early autumn. Give operators clear details for collection and drop-off accommodation, expected walking dates, bag numbers and whether any stage involves a non-standard overnight stop outside the main towns. Current prices, cut-off times and vehicle access should be checked when booking.
Guided walks and local interpretation
The Walk of Peace Visitor Centre in Kobarid is the key official contact for maps, leaflets, GPS data and guided tours. It is especially useful for walkers who want the military history explained properly rather than simply passing trenches, caverns, ossuaries and memorial sites without context.
Guided support is most worthwhile around the outdoor museums and major WWI sites: Ravelnik and Čelo near Bovec, Zaprikraj above Kobarid, Kolovrat, Mrzli vrh and Mengore. A guide can also add value in Kobarid, where the Kobarid Museum, the Italian Charnel House and the wider Caporetto battlefield context are central to understanding the route.
A fully guided end-to-end walk is not essential for experienced independent hikers, because the route is waymarked and the main valley towns have services. It can still make sense for groups, walkers with a strong interest in the Isonzo Front, or anyone who wants route planning, transfers and accommodation handled for them.
Self-guided walking packages
Self-guided packages for the Walk of Peace typically suit hikers who are comfortable walking independently but prefer accommodation booking, luggage transfers and route notes to be organised in advance. On this route, that can remove much of the friction around the higher stages and the side-trips to Javorca and Mrzli vrh.
Check the exact scope before booking. Some itineraries use the name Walk of Peace for the longer Alps-to-Adriatic route towards Trieste, while this HikeList route is the 230 km Soča-valley core from Log pod Mangartom to Mengore above Tolmin. Make sure the package follows the intended Log pod Mangartom–Bovec–Kobarid–Kolovrat–Tolmin–Mengore line and includes any side-trips you want.
A package is unnecessary if you are happy booking guesthouses and transfers directly, carrying a pack where needed, and using the official route information. It becomes more useful if you are travelling in peak season, want luggage moved most days, or have limited flexibility around accommodation in smaller settlements and high-stage locations.
Taxi transfers and shuttles
Taxi transfers are useful at both ends of the walk and for awkward stage logistics. Log pod Mangartom is normally reached from Bovec by local bus or transfer, while the finish at Mengore above Tolmin can be linked back to Tolmin, onward buses or pre-booked private transport.
Private shuttle operators in the Soča valley also connect Bovec, Kobarid and Tolmin with larger gateways including Ljubljana, Trieste and Venice airports. These are practical options for groups, late arrivals, early departures or walkers carrying more luggage than is convenient on public transport.
Do not rely on ad-hoc same-day availability for remote pick-ups from ridge or pasture areas. Arrange timings in advance, share the exact pick-up point, and have a fallback plan if weather, tiredness or navigation delays affect the day.
When support is most useful
Support services are most valuable on this route for:
- reducing pack weight on the steep Bovec–Golobar–Zaprikraj–Kobarid mountain section;
- handling the Kobarid–Livek–Kolovrat–Tolmin ridge logistics;
- arranging side-trips to Javorca and Mrzli vrh without overloading the itinerary;
- interpreting the WWI outdoor museums, charnel houses and memorial sites;
- connecting the start at Log pod Mangartom and the finish at Mengore/Tolmin with public transport or airports.
For strong independent hikers staying mostly in Bovec, Kobarid and Tolmin, support can be minimal: pre-book accommodation, carry appropriate mountain kit, use local buses or transfers where needed, and arrange only the occasional taxi or luggage move. For lighter-pack walking, book transfers and accommodation together before committing to the stage plan.
Shorter Hikes and Best Sections
You do not need to walk the full 230 km to get a strong sense of the Path of Peace. The easiest shorter plans use the main Soča valley bases — Bovec, Kobarid and Tolmin — because they have the best mix of accommodation, buses, taxis and shuttle options.
Distances below are approximate and should be checked against the Walk of Peace map or GPS data before booking accommodation or transport, especially on the higher variants around Golobar, Zaprikraj, Kolovrat and Mrzli vrh.
Best day walk: Kobarid history loop
| Detail | Recommendation |
|---|---|
| Start / end | Kobarid |
| Approx. distance | About 8 km, depending on the exact loop |
| Best for | WWI history, an easier logistics day, bad-weather flexibility |
| Key places | Kobarid Museum, Italian Charnel House, Napoleon Bridge, Kozjak waterfall |
| Transport notes | Kobarid is one of the main valley hubs. It is reached by bus and by private shuttle from elsewhere in the Soča valley; current times should be checked before travelling. |
This is the most practical one-day sample of the route because it combines major memorial sites with a compact walking day from a town base. The Kobarid Museum gives the Battle of Caporetto context before or after the walk, while the Italian Charnel House above town is one of the route’s most important memorials.
The Napoleon Bridge and Kozjak waterfall add a scenic Soča-valley element without committing to the harder high-pasture stages. It is also a useful rest-day option for hikers walking the full route, as it keeps the day short while still covering core Path of Peace sites.
Best weekend section: Kobarid to Tolmin via Livek and Kolovrat
| Detail | Recommendation |
|---|---|
| Start | Kobarid |
| End | Tolmin |
| Approx. distance | About 38 km over 2 days using the Kobarid–Kolovrat and Kolovrat–Tolmin split |
| Best for | Ridge walking, open-air museums, the Slovenia–Italy border section |
| Key places | Livek, Kolovrat ridge outdoor museum, Tolmin |
| Transport notes | Kobarid and Tolmin are both bus-served Soča valley towns. The ridge itself has thinner services and accommodation, so transfers or overnight arrangements should be planned in advance. |
This is the strongest short version for experienced walkers who want the route’s military-history theme and mountain feel without committing to the full trail. The climb from Kobarid towards Livek and Kolovrat is demanding, but the ridge-top outdoor museum is one of the signature sites of the Path of Peace.
The second day is a long descent off the ridge to Tolmin. It is not the easiest weekend option, but it gives a concentrated version of what makes the route distinctive: WWI positions, border-ridge walking, wide views and a finish in one of the main valley towns.
Best 3–5 day section: Bovec to Kobarid via Golobar and Zaprikraj
| Detail | Recommendation |
|---|---|
| Start | Bovec |
| End | Kobarid |
| Approx. distance | About 30 km over 2 walking days on the direct high split; allow 3 days if adding the Bovec museums or a Kobarid museum day |
| Best for | Mountain scenery, exposed pastures, the hardest classic section |
| Key places | Golobar, Zaprikraj outdoor museum, Drežniške Ravne, Magozd, Drežnica, Kobarid |
| Transport notes | Bovec and Kobarid are the practical transport bases. Accommodation is thinner on the high pasture section, so any hut, campsite or transfer plan should be arranged before setting off. |
This is the best compact mountain section of the 230 km route. It leaves the easier valley logistics behind and climbs into the high Golobar and Zaprikraj area, where the route reaches its most alpine-feeling terrain and passes the Zaprikraj outdoor museum.
It is also one of the more serious shorter options. The section includes steep climbing, exposed weather and a long descent towards the Kobarid side via the Drežnica area, so it suits fit walkers with proper footwear and wet-weather kit rather than casual day hikers.
For a fuller 3–5 day itinerary, begin with the Bovec-area outdoor museums at Ravelnik and Čelo, then walk the high Bovec–Kobarid section, and finish with the Kobarid Museum, Italian Charnel House, Napoleon Bridge and Kozjak waterfall.
Best section for scenery: Bovec to Kobarid high route
| Detail | Recommendation |
|---|---|
| Start | Bovec |
| End | Kobarid |
| Approx. distance | About 30 km over 2 days on the Bovec–Golobar/Zaprikraj–Kobarid split |
| Best for | Soča valley views, high pastures, mountain atmosphere |
| Key places | Golobar, Zaprikraj, Drežnica area, Kobarid |
| Transport notes | Use Bovec and Kobarid as the transport and accommodation anchors. High-stage logistics should be checked before travelling. |
For pure landscape, this section is the standout. It is the part of the route where the Path of Peace feels least like a valley heritage trail and most like a mountain walk, with forest tracks, open pastures, gravel mountain roads and exposed terrain.
It also includes the route’s high point around the Čez Utro saddle, at about 1,305–1,306 m. Snow can linger on the higher ground into late spring, and the section should be treated with caution in poor weather.
Best section for beginners: Tolmin to Mengore via Volče
| Detail | Recommendation |
|---|---|
| Start | Tolmin |
| End | Mengore outdoor museum, above Tolmin, via Volče |
| Approx. distance | About 13 km |
| Best for | A shorter introduction to the trail’s memorial landscape |
| Key places | Tolmin, Volče, Mengore outdoor museum |
| Transport notes | Tolmin is one of the main valley transport hubs, with buses to Nova Gorica, Ljubljana and the Soča valley. Return logistics from Mengore should be planned in advance if not walking back or arranging a pickup. |
This is a sensible first taste of the route because it starts from Tolmin, avoids the long high-ridge commitments of Kolovrat or the Golobar/Zaprikraj section, and finishes at one of the six outdoor museums. It is still a real walk, with a hilltop finish, but it is more manageable than the exposed mountain stages.
Beginners should not treat the Path of Peace as a flat riverside trail. Even the easier sections can include rough paths, forest tracks, gravel and short steep climbs, so walking shoes, water and weather protection are still needed.
Best section for public transport: Kobarid-based day or Tolmin-based finish
| Option | Start / end | Approx. distance | Why it works |
|---|---|---|---|
| Kobarid history day | Kobarid to Kobarid | About 8 km | Compact, town-based, no need to move luggage, major sites close together |
| Tolmin to Mengore | Tolmin to Mengore via Volče | About 13 km | Starts from a main valley hub and reaches the official end of the 230 km core route |
Public transport in the upper Soča valley is useful but not as simple as a rail-linked lowland trail. There is no railway in the upper valley; the practical railheads are Most na Soči on the Bohinj line and Nova Gorica, with onward bus connections to the valley towns.
For the least complicated short hike, base in Kobarid or Tolmin rather than trying to start or finish on a high ridge. Bovec is also a useful base, especially for the Log pod Mangartom start and the Bovec-area outdoor museums, but local bus, shuttle and seasonal services should be checked before travelling.
Best section for villages and accommodation: Bovec to Kobarid, or Kobarid to Tolmin
| Section | Approx. distance | Accommodation notes |
|---|---|---|
| Bovec to Kobarid | About 30 km over the high split, longer if adding Bovec and Kobarid town days | Strong town bases at each end, but thinner accommodation on the Golobar/Zaprikraj high section |
| Kobarid to Tolmin via Kolovrat | About 38 km over 2 days | Good valley bases at Kobarid and Tolmin, but the ridge stage needs advance planning |
For a shorter multi-day trip with access to services, plan around Bovec, Kobarid and Tolmin. These are the main hubs for guesthouses, apartments, hotels, hostels, campsites and transfers.
The villages between them — including Drežniške Ravne, Magozd, Drežnica, Livek, Volče and the pasture areas — make the route varied, but they are not all equivalent as overnight bases. On the higher sections, book ahead and avoid assuming there will be a last-minute bed, meal or onward lift.
Camping and hut-friendly shorter options
Camping is most practical in and around the main Soča valley hubs, where campsites form part of the mixed accommodation picture. The high Bovec–Golobar/Zaprikraj–Kobarid section may also be planned with a camp or hut overnight, but availability and rules should be checked before travelling.
For campers, the best short plan is usually not a remote wild-style itinerary but a valley-based one: use Bovec, Kobarid or Tolmin as fixed bases, then walk day sections with a light pack. If carrying full camping gear over Golobar, Zaprikraj or Kolovrat, factor in the steep ascents, exposed weather and long descents, because the extra weight makes these already hard stages noticeably more demanding.
Highlights and Points of Interest
The Path of Peace is strongest where the landscape and First World War history overlap: river gorges, fortified hills, high pastures, trench systems and memorial buildings are often reached on the same walking day. If time is limited, the most worthwhile extra nights are usually in Bovec, Kobarid and Tolmin, because they give access to the densest clusters of museums, memorials and side-trips.
Key highlights along the route
| Place / section | Why it matters | Planning note |
|---|---|---|
| Log pod Mangartom and the Štoln shaft | The route begins at the entrance to the Štoln mining shaft in the Koritnica valley. It is a fitting start point for a trail built around wartime movement through difficult mountain terrain. | Allow time at the start rather than treating it only as a transfer drop-off. |
| Kluže Fortress and Fort Hermann | Kluže guards the Koritnica gorge above Bovec and is linked to both the Napoleonic period and the First World War. Fort Hermann sits above it, adding context to the defensive importance of this narrow valley. | A good stop on the Log pod Mangartom–Bovec approach or as part of a Bovec-based day. |
| Ravelnik and Čelo outdoor museums | These restored Austro-Hungarian front-line sites near Bovec include trenches, caverns, machine-gun positions and barracks. They are two of the six open-air museums connected by the core Walk of Peace. | These are among the easiest battlefield sites to visit from a valley base, so Bovec is worth more than a single overnight. |
| The Soča (Isonzo) River | The emerald Soča shapes much of the northern half of the walk, with clear pools, gorges and river scenery from the Bovec area towards Kobarid and Tolmin. | Build in pauses near the river rather than rushing the valley stages; the river is one of the route’s defining natural features. |
| Golobar and Zaprikraj high pastures | The demanding Bovec-to-Kobarid mountain section crosses open pasture country and reaches the route’s high ground around the Čez Utro / Čez Utra saddle. Zaprikraj outdoor museum preserves Italian Army positions above Kobarid. | This is one of the route’s more exposed mountain sections. Visit in stable weather and avoid leaving the outdoor museum until late in the day. |
| Drežniške Ravne, Magozd and Drežnica | These settlements sit on the descent towards Kobarid and help break up the transition from high pasture to valley town. | Useful places to pace the long descent into Kobarid, especially after the Zaprikraj section. |
| Kobarid (Caporetto) and the Kobarid Museum | Kobarid is the key cultural stop on the route. The museum explains the Isonzo Front and the 1917 Battle of Caporetto, giving essential context for the open-air sites walked before and after it. | This is the strongest candidate for a planned rest or museum day. Opening times should be checked before travelling. |
| Italian Charnel House above Kobarid | The hilltop ossuary around the church of St Anthony holds the remains of more than 7,000 Italian soldiers. It is one of the most significant memorial sites on the walk. | Combine it with the Kobarid Museum rather than treating it as a quick detour. |
| Napoleon Bridge and Kozjak waterfall | Near Kobarid, the old stone bridge crosses the Soča and Kozjak waterfall lies in a hidden gorge. Together they provide a strong natural contrast to the military heritage of the town. | A worthwhile addition to the Kobarid rest day if time and legs allow. |
| Livek and the climb to Kolovrat | Livek marks the approach to the border ridge and the transition from valley walking to one of the route’s most memorable high sections. | The climb towards Kolovrat is sustained; start with enough water, food and daylight. |
| Kolovrat outdoor museum | At about 1,115 m, this cross-border ridge-top museum preserves restored Italian trenches, caverns and gun positions. It also gives broad views over the Soča valley and the Julian Alps. | One of the best places on the route to spend extra time in clear weather. In poor weather, the exposed ridge can feel severe. |
| Tolmin (Tolmino) | Tolmin is the main base for the southern part of the core route, with access to Javorca, Mrzli vrh, the German Charnel House and the Tolmin gorges. | A second multi-night stop here is practical if walking the Javorca and Mrzli vrh variants. |
| Javorca, Church of the Holy Spirit | This wooden memorial church above Tolmin was built by Austro-Hungarian soldiers in 1916 and carries the European Heritage Label. | Treat it as a proper side-trip rather than an afterthought; it is one of the route’s most important memorial buildings. Access details should be checked before travelling. |
| Tolminka gorge and Tolmin gorges | The gorge landscape at the edge of Triglav National Park adds another major natural feature to the Tolmin area. | Best combined with a Tolmin-based day, depending on the chosen stage split. |
| Mrzli vrh outdoor museum | The route variant reaches front-line positions on the slopes above the Soča via the Kuhinja and Pretovč pastures, with views towards Mt Krn. | This is a demanding upland excursion and should be planned with the same care as the main mountain days. |
| German Charnel House at Tolmin | The ossuary contains around 1,000 German soldiers from the Twelfth Isonzo Battle. It adds important context to the final Tolmin-area stages. | A worthwhile stop before or after the Mrzli vrh day, depending on accommodation and timing. |
| Volče and Mengore outdoor museum | The route finishes above Tolmin at Mengore, a fortified hill reached via Volče. The outdoor museum marks the end of the original Walk of Peace in the Soča Valley. | Do not rush the final approach: Mengore is not just a finish marker, but the last major open-air museum of the core route. |
Where to spend extra time
Bovec is the best base for the early route heritage sites. Kluže, Fort Hermann, Ravelnik and Čelo can all be fitted around the Bovec stages, and the Soča and Koritnica valleys give the first strong sense of the landscape the trail follows south.
Kobarid deserves a deliberate pause. The Kobarid Museum, the Italian Charnel House, Napoleon Bridge and Kozjak waterfall can fill a rest day without feeling like padding, and the museum greatly improves understanding of the Kolovrat and Mrzli vrh sections that follow.
Kolovrat is the standout ridge viewpoint and one of the most atmospheric outdoor museums. If the weather is clear, it is worth allowing more time than a normal walking-day schedule might suggest; if the forecast is poor, prioritise safe progress over lingering on the exposed ridge.
Tolmin is the most useful base for the later variants and memorials. Javorca, Mrzli vrh, the German Charnel House and the Tolmin gorges make this area much more than a simple overnight before the finish at Mengore.
Common Mistakes and Planning Tips
| Common mistake | Better plan |
|---|---|
| Treating the 230 km route as a walk to Trieste | Plan this itinerary as the Soča-valley core: Log pod Mangartom to Mengore above Tolmin, via Bovec, Kobarid, Kolovrat and Tolmin. Trieste belongs to the much longer Alps-to-Adriatic Walk of Peace, not this 230 km version. |
| Underestimating the mountain stages | Build the itinerary around ascent, not just kilometres. The route totals about 7,180 m of climbing, with demanding high sections over Golobar, Zaprikraj, Kolovrat and Mrzli vrh. |
| Assuming the official sections are sensible walking days | The route is signed in roughly five long official sections, but most independent walkers need shorter daily stages. An 11-day plan is more realistic if you want time for museums, side-trips and recovery. |
| Leaving high-stage accommodation to chance | Book ahead for the Bovec–Golobar/Zaprikraj–Kobarid section and the Kolovrat ridge. Accommodation is plentiful in Bovec, Kobarid and Tolmin, but thinner on high pastures and ridges. |
| Relying only on waymarks | Carry an up-to-date map or GPX as well as following the Walk of Peace markings. This is especially important where variants, outdoor museums and side-trips overlap around Kobarid, Kolovrat, Javorca and Mrzli vrh. |
| Planning valley logistics but not finish logistics | There is no railway in the upper Soča valley. Plan the finish from Tolmin/Mengore using buses towards Nova Gorica, Ljubljana or the Soča valley, or arrange a private shuttle in advance. |
Mistake: confusing the Soča-valley route with the full Alps-to-Adriatic trail
The name “Walk of Peace” is used for more than one route. For this hike, the practical endpoint is Mengore above Tolmin, reached via Volče, not Trieste.
The fix is simple: when booking accommodation, transfers or GPX files, check that the route is the 230 km Soča-valley core from Log pod Mangartom to Mengore. Anything describing Nova Gorica/Gorizia, the Karst plateau or a finish at Trieste is referring to the longer route and will not match an 11-day plan.
Mistake: treating it like a valley history walk
The heritage sites can make the route sound gentler than it is. In reality, the hard days are mountainous: steep forest tracks, gravel roads, exposed ridges and long descents, with the high point around 1,306 m near Čez Utro on the Bovec-to-Kobarid section.
Plan daily effort around climb and descent rather than distance alone. The Bovec–Golobar/Zaprikraj–Kobarid section and the Kobarid–Livek–Kolovrat–Tolmin section deserve particular respect, especially in poor weather.
Mistake: overloading the Kobarid and Tolmin days
Kobarid is not just another overnight stop. The Kobarid Museum, the Italian Charnel House, Napoleon Bridge and Kozjak waterfall can easily fill the short “rest” day built into the itinerary.
Tolmin also needs careful planning if you want to include Javorca, the Tolminka gorge, Mrzli vrh, the German Charnel House and Mengore. Treat these as walking days, not casual add-ons after a long stage.
Mistake: not booking the high and ridge nights early enough
Bovec, Kobarid and Tolmin have the widest choice of hotels, guesthouses, apartments, hostels, campsites and tourist farms. The higher sections around Golobar, Zaprikraj, Kolovrat and Mrzli vrh are much less flexible.
Book accommodation before fixing transport. If a key high-stage bed is unavailable, adjust the day split rather than forcing an over-long mountain day with a heavy pack.
Mistake: assuming every village has useful resupply
The route passes named villages and pastures, but that does not mean there will be a shop, café or reliable opening hours when you arrive. High pasture and ridge days are the ones where this mistake matters most.
Use Bovec, Kobarid and Tolmin as the main resupply hubs. Carry enough food for the day before leaving the valley towns, and do not rely on finding lunch on the Bovec–Zaprikraj, Kolovrat or Mrzli vrh sections unless specific services have been checked before travelling.
Mistake: ignoring seasonal conditions on exposed sections
The best season is roughly April/May to October/November, but snow can linger on higher ground into late spring. Golobar, Zaprikraj, Kolovrat and the Krn massif area are more exposed to weather than the riverside sections suggest.
Check the mountain forecast before committing to the high days, particularly in spring and autumn. Winter hiking on the high sections is discouraged; if conditions are poor, use Bovec, Kobarid or Tolmin as bases and adjust the itinerary rather than pressing onto exposed ridges.
Mistake: using an old GPX without checking the route scope
Some digital route files and descriptions mix figures from the 230 km Soča-valley core with the longer Alps-to-Adriatic route. That can lead to mismatched distances, endpoints and stage expectations.
Before setting off, compare the GPX against the official Walk of Peace material and the intended sequence: Log pod Mangartom, Bovec, Kobarid, Kolovrat, Tolmin and Mengore. The Walk of Peace Visitor Centre in Kobarid can supply current maps, leaflets and route information.
Mistake: under-planning public transport
The start at Log pod Mangartom is not a railhead, and neither are Bovec or Kobarid. The practical public-transport gateways are Bovec, Kobarid and Tolmin, with rail connections via Most na Soči on the Bohinj line or Nova Gorica.
For the start, plan the final link from Bovec to Log pod Mangartom by local bus, summer Hop-on Hop-off service or transfer. For the finish, plan how to get from Mengore/Volče back to Tolmin and onwards by bus or shuttle. Timetables and seasonal services should be checked before travelling.
Mistake: rushing the museums and memorial sites
The outdoor museums at Ravelnik, Čelo, Zaprikraj, Kolovrat, Mrzli vrh and Mengore are part of the route, not minor detours. Trenches, caverns, gun positions and memorial sites take time, and some are on demanding terrain.
Build in shorter walking days where the heritage concentration is highest: around Bovec, Kobarid, Kolovrat and Tolmin. This makes the route more manageable and avoids reducing the Walk of Peace to a forced march between accommodation stops.
Final Advice
The Path of Peace is best suited to experienced multi-day walkers who want a demanding mountain-and-history route rather than a simple valley trail. The waymarking and valley services make it approachable for independent hikers, but the cumulative ascent, exposed ridges and long climbs over Golobar, Zaprikraj, Kolovrat and Mrzli vrh require proper hill fitness and settled-weather judgement.
The main planning priority is accommodation and transport on the higher sections. Bovec, Kobarid and Tolmin have the strongest service base, while the pasture and ridge days have fewer options and should not be left to chance. Book ahead, carry enough food and water for the mountain stages, and check current bus, shuttle and luggage-transfer options before travelling.
The most rewarding part of the route is the combination of the Soča valley landscape with the open-air WWI museums. The Kobarid Museum, Italian Charnel House, Kolovrat ridge, Javorca and Mrzli vrh give the walk its depth; allowing time for these places is more worthwhile than rushing the route as a pure point-to-point hike.
For most walkers, the full Log pod Mangartom to Mengore route works best over the suggested 11-day structure, with a museum/rest day in Kobarid and time for the Tolmin-area variants. Strong hikers with limited time can section-hike from Bovec to Kobarid or Kobarid to Tolmin, but doing only the valley towns misses much of the route’s character.
Do not treat this as the longer Alps-to-Adriatic Walk of Peace to Trieste unless deliberately planning that separate, extended route. For this 230 km core itinerary, the finish is Mengore above Tolmin, and the key final recommendation is simple: verify the latest official map, GPS data, accommodation and transport details, then give the high ridge days the respect of a mountain route.
Useful Links
Hand-picked external resources for planning and researching the Path of Peace (Pot Miru) — official trail sites, maps and GPX downloads, baggage transfer and local information. Each link opens in a new tab.
Official & reference
- The Walk of Peace (official foundation site) thewalkofpeace.com
Official site of the Walk of Peace in the Soča Region Foundation, the body that manages and waymarks the Pot Miru trail. Has the interactive map, GPS database, visitor-centre details (Kobarid, Sabotin, Cerje), the heritage/outdoor-museum sites and guided-tour booking.
Planning & logistics
-
 Soča Valley transfers, shuttles & luggage transport socavalley.com
Local operator offering luggage-transport-only between pickup and drop-off points across the Soča Valley (Bovec, Kobarid, Tolmin) plus transfers to and from Trieste, Ljubljana and Venice. Useful for moving bags between stages and for getting to the start/finish.
Local area & national parks
-
 The Walk of Peace from the Alps to the Adriatic – I Feel Slovenia slovenia.info
Slovenia's national tourist board overview of the trail, with route context, difficulty, the main highlights (Kolovrat, Javorca, fortresses) and links to visitor centres and accommodation. Good for trip planning and background before you go.
External links are provided for convenience and are not affiliated with HikeList. Always check official sources for the latest trail conditions before you set out.
Reviews
How would you rate Path of Peace (Pot Miru)?
Tap a star to start your review — you could be the first.