Michinoku Coastal Trail (Partial)
How would you rate Michinoku Coastal Trail (Partial)?
Tap a star to share your experience and help other hikers.
Michinoku Coastal Trail (Partial): Northern Iwate Coast Guide
HikeList Score
Michinoku Coastal Trail (Partial) scored 89/100 on HikeList's trail-quality metrics.
See score breakdownHide breakdown
- Ideal length 70
- Balanced challenge 100
- Scenery & wildness 98
- Varied terrain 77
- Accommodation 100
- Food & support 88
- Path quality 87
- Season flexibility 89
Computed from length, challenge, scenery & wildness, terrain variety, accommodation, food & support, path quality and season flexibility.
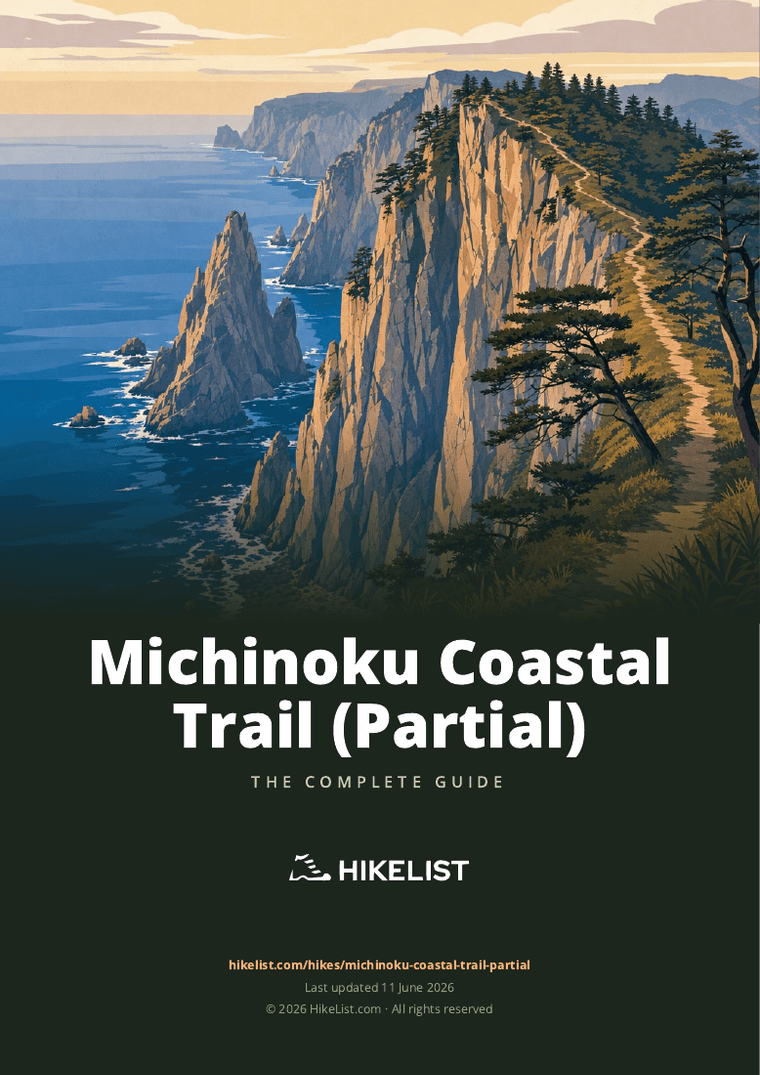
The Michinoku Coastal Trail (Partial) is a roughly 50 km, 3-day, moderate point-to-point hike on Japan’s northern Iwate / Sanriku coast. This section follows part of the country’s longest long-distance footpath, linking Fudai, Tanohata, Taro, Miyako and Jodogahama through sea cliffs, forested headlands, fishing villages and tunnels. It suits fit walkers who want a compact coastal thru-hike in Japan, but expect the harder end of the trail: steep stairways, ladders, headland climbs and sparse signage in places.
Route Overview
This partial route runs south along the northern Iwate coast from Fudai through Tanohata and Taro towards Miyako and Jodogahama. The signature stage is Fudai to Tanohata, about 26 km, passing Kurosaki viewpoint, Anmoura Falls, the Kitayamazaki cliffs and hand-dug cliff tunnels. Continuing south adds Aketo, with its tsunami seawall memorial, then Taro and the approach to Jodogahama near Miyako. It is a point-to-point section-hike, not the full 1,025 km Michinoku Coastal Trail. Transport details are not specified in the verified brief, so plan access around the named towns and book rural accommodation ahead.
History and recovery on the Sanriku coast
The Michinoku Coastal Trail was conceived after the 2011 Great East Japan Earthquake and tsunami as part of the Ministry of the Environment’s Green Reconstruction Project. Proposed by travel writer Noriyoshi Kato, it was designed as a “bridge” linking nature, coastal life and the traces of the disaster with visitors. Planning began around 2012, and the full 1,025 km route opened in June 2019. It is one of Japan’s Long Distance Nature Trails and runs through Sanriku Fukko National Park.
Notable highlights
- Kitayamazaki cliffs (up to 200 m above the Pacific): Roughly 8 km of jagged sea cliffs form the centrepiece of this section. The Kitayamazaki Observatory gives the key view over the cliffs and ocean.
- Hand-dug cliff tunnels: Short, unlit tunnels cut through the headlands between Fudai and Tanohata. Carry a headtorch, as these are part of the route rather than a side attraction.
- Jodogahama beach: A white-pebble cove near Miyako, known for pale rhyolite rock, clear water and pine trees. Its name means “paradise”, and it makes a strong coastal finish to the hike.
- Aketo tsunami memorial: A preserved seawall and monument near Tanohata commemorating the 2011 Great East Japan Earthquake and tsunami. It connects the walking route directly with the history behind the trail’s creation.
- Anmoura Falls: Iwate’s tallest waterfall, viewed from the Anmoura viewpoint on the Fudai-to-Tanohata stage.
Challenges to expect
This is moderate only for a fit walker. The northern Iwate sections are among the most demanding on the Michinoku Coastal Trail, with steep stairways, fixed ladders, repeated climbs over forested headlands and unlit tunnels. Fudai to Tanohata alone is about 26 km with roughly 1,070 m of ascent. Signage can be sparse, and summer heat plus typhoon risk make spring and autumn better choices.
HikeList Score
Michinoku Coastal Trail (Partial) scored 89/100 on HikeList's trail-quality metrics.
See score breakdownHide breakdown
- Ideal length 70
- Balanced challenge 100
- Scenery & wildness 98
- Varied terrain 77
- Accommodation 100
- Food & support 88
- Path quality 87
- Season flexibility 89
Computed from length, challenge, scenery & wildness, terrain variety, accommodation, food & support, path quality and season flexibility.
 Japan
JapanShow more data Show less
- Coastal
- Forest
- Dirt
- Gravel
- Rocky
- Boardwalk
- Paved
- Hotels
- Lodges
- Campsites
- Hostels
- Wild Camping Spots
- Family Friendly
- Pet Friendly
- Restrooms
- Water Sources
- Campsites
- Shelters
- Picnic Areas
Download Our Full Guide to Michinoku Coastal Trail (Partial) FREE!
Get our comprehensive guide to this hike for free. Save it for later reading or print out at home.
Photos from hikers
Taken on the trail by people who've reviewed Michinoku Coastal Trail (Partial).
Michinoku Coastal Trail (Partial): The Complete Guide
This is a compact, demanding slice of the Michinoku Coastal Trail, following the Sanriku coast of northern Iwate from Fudai (普代) towards Jōdogahama (浄土ヶ浜) near Miyako (宮古). It suits fit walkers who want a short point-to-point hike with serious coastal terrain rather than a gentle seaside ramble.
The route links fishing villages, forested headlands, pebble coves and high Pacific cliffs within Sanriku Fukkō (Reconstruction) National Park. Kitayamazaki (北山崎) is the centrepiece: a rugged clifftop coast of jagged rock, pine and sea views rising about 200 m above the water.
This section also carries the recovery story of the 2011 Great East Japan Earthquake and tsunami. Aketo (明戸), Tarō (田老), the Tarō seawall and Nakanohama Tsunami Memorial Park make the walk as much about memory and resilience as scenery.
Expect repeated steep climbs and descents, long stairways, fixed ladders, short unlit hand-dug tunnels and stretches where signage and services are limited. A headtorch, careful timing and pre-booked accommodation matter more here than on many better-served coastal trails.
This guide covers the practical planning: stages, days, accommodation, food, transport, terrain and the common mistakes to avoid.
Stage-by-Stage Guide
This stage plan covers the northern-Iwate sample section from Fudai (普代) to Jōdogahama (浄土ヶ浜), not the full Michinoku Coastal Trail. The walked stages are split around the two official signature sections: Fudai→Tanohata and Tarō→Jōdogahama, with the Tanohata→Tarō link usually handled by Sanriku Railway rather than walked as part of this itinerary.
Stage 1: Fudai (普代) to Kurosaki / Kitayamazaki (黒崎・北山崎) — approx. 13 km
The route starts from Fudai village, with Fudai Station (普代駅) on the Sanriku Railway giving the cleanest access point. From here the Michinoku Coastal Trail heads south out towards the Sanriku coast, leaving the village environment for a much wilder mix of forested headlands, coves, cliff-edge terraces and steep constructed paths.
This is the first half of the official Fudai→Tanohata stage, which is rated Difficult, and it should be treated as a proper mountain-style walking day despite the coastal setting. Expect repeated climbs and descents rather than a gentle shoreline path. Underfoot conditions vary between dirt and gravel trail, rocky clifftop sections, steps, boardwalk-like constructed sections and short paved stretches near settlements.
The main places and features on this stage include Nedari-hama / Nedarihama Beach, Anmoura and the Kurosaki area. The Anmoura Falls viewpoint is reached by a long stairway behind Kurosaki-sō, with the waterfall dropping more than 100 m from the cliffs towards the sea. Kurosaki Viewpoint is another key stop, looking out over the northern Kitayamazaki coastline.
The stage builds towards the Kitayamazaki (北山崎) cliffs, the signature landscape of this part of the trail. These jagged sea cliffs rise to around 200 m above the Pacific and continue for roughly 8 km of the Sanriku coast, with the Kitayamazaki Observatory and visitor area forming the natural end point for many walkers splitting Fudai→Tanohata into two days.
Food and water should be sorted in Fudai before setting off. Services are sparse once the route leaves the village, and there should be no assumption of regular shops or cafés on the cliff sections. Carry enough food and water for the full day, with extra capacity in warm or humid weather.
Accommodation is limited but there are rural options around Kurosaki / Kitayamazaki, including Kurosaki-sō near Kitayamazaki. Book ahead, especially outside peak holiday periods when opening days and meal arrangements may vary. This should be checked before travelling.
Public transport access is strongest at the start in Fudai. Local buses serve the Kitayamazaki area, but rural services can be infrequent, so any plan to finish here and move on by bus needs timetable checking before relying on it.
Navigation is generally by the Michinoku Coastal Trail’s blue waymarks and route signs, but this is not a place to depend only on spotting the next marker. Carry the official map or digital route information, and check current trail notices before departure. The cliff-and-forest terrain can make missed turns costly in time and effort.
Key warnings for this stage are the steep stairways, exposed-feeling cliff terrain, slippery surfaces after rain and the effort of repeated climbing. In summer, heat and humidity can make the ascents much harder than the distance suggests. During typhoon season or after storms, check for closures, fallen trees, damaged steps or diversion notices before setting out.
Stage 2: Kitayamazaki (北山崎) to Tanohata (田野畑) via Aketo (明戸) — approx. 13 km
This stage completes the official Fudai→Tanohata section and keeps the same demanding character: short in distance, but slow because of the terrain. The route continues along high coastal ground and broken headlands before dropping towards lower coastal areas around Aketo and Tanohata.
The walking is a mix of forest path, cliffside sections, steps, ladders, rocky ground and some paved village approaches. This is one of the sections where the hand-dug cliff tunnels are part of the experience. They are short but unlit, so a headtorch is essential rather than optional.
The early part of the day remains tied to the Kitayamazaki coast, with views back across the cliffs and pine-cloaked headlands when the route opens out. As the trail moves south, the walking becomes less about a single viewpoint and more about negotiating the folds of the coastline: down to small coastal pockets, up over wooded spurs, then back towards the sea again.
Aketo (明戸) is the most important landmark before Tanohata. The preserved broken seawall and two surviving red pines form one of the clearest tsunami memorials on this sample section, connecting the walk directly with the 2011 Great East Japan Earthquake and the reconstruction theme of the Michinoku Coastal Trail.
Plan food and water conservatively. There may be services at or near the start and finish, but the walking section between Kitayamazaki and Tanohata should be approached as a low-resupply day. Carry lunch, snacks and sufficient water from the morning start.
Tanohata is the practical end point for the walked northern section. Accommodation options in and around Tanohata include small hotels and ocean-view inns, with Hotel Ragaso one named option in the area, plus rural minshuku-style stays. Aketo also has a campsite, but opening dates, booking requirements and facilities should be checked before travelling.
Tanohata Station (田野畑駅) on the Sanriku Railway is the key transport point at the end of the stage. This is also where most walkers bridge the short non-walked link south towards Tarō before beginning the next stage. Train times should be checked carefully, as services on this rural coastal line are infrequent compared with urban Japan.
Navigation requires attention, particularly around forested headlands, tunnel approaches, ladders and any road or village transitions. Follow the blue Michinoku Coastal Trail waymarks, but keep a map available and allow time for slower progress than the kilometre count implies.
The main cautions are the unlit tunnels, fixed ladders, steep steps and wet or mossy surfaces after rain. A headtorch, grippy footwear and trekking poles are useful, though poles may need to be stowed on ladder sections. Do not start late unless accommodation and onward transport at Tanohata are secure.
Stage 3: Tarō (田老) to Jōdogahama (浄土ヶ浜) — approx. 22 km
The next walked stage begins at Tarō, usually reached from Tanohata by Sanriku Railway using the Tanohata→Shin-Tarō link. Shin-Tarō Station is the relevant rail access point for this part of the itinerary. Check current Sanriku Railway times before travelling, as missing a connection can disrupt the whole day.
This is the official Tarō / Shintarō→Jōdogahama stage, rated Intermediate, but it is still a substantial day with around 920 m of ascent and descent. The terrain is more varied than a simple coastal promenade: expect village and harbour sections, paved stretches, forested headland paths, cliff viewpoints, beaches and repeated climbs away from sea level.
Tarō itself is one of the most important cultural and memorial stops on the route. The giant X-shaped double seawall is more than 2.4 km long and about 10 m high, built between 1934 and 1978 and partly destroyed in 2011. Nearby, the gutted Tarō Kankō Hotel remains preserved as an earthquake-heritage tsunami memorial.
South of Tarō, the route passes coastal places including Sagabe / Kashinai Beach, Nakanohama Tsunami Memorial Park and Anegasaki. Nakanohama preserves tsunami-damaged campground facilities, so this stage continues the trail’s pattern of pairing coastal scenery with disaster-learning sites.
The major natural landmark before the finish is Sakiyama Blowhole / Shiofukiana (潮吹穴), described as the largest natural blowhole in Japan and designated as a National Monument. In strong swell it can spout seawater up to around 30 m through the cliff opening, though conditions will determine how active it appears on the day.
The final approach to Jōdogahama (浄土ヶ浜) brings the route to one of the best-known coastal scenes near Miyako: a white-pebble cove with pale rhyolite spires, pine trees and clear cobalt water. The Jōdogahama Visitor Center makes a clear and practical endpoint for the sample hike, with Miyako (宮古) nearby for onward travel and wider services.
Food and water availability between Tarō and Jōdogahama should be treated as limited. Start with enough water and food for a full walking day, especially if walking the stage in one push. Miyako has the best resupply options at the end of the section.
Accommodation is most practical in Tarō before the stage and in or near Miyako after finishing. Jōdogahama itself sits just outside central Miyako, so walkers should plan how to move from the cove or Visitor Center to their accommodation. Local buses serve Jōdogahama, but timetables should be checked before travelling.
Public transport access is useful at both ends: Shin-Tarō Station for the start, and Miyako for onward JR and Sanriku Railway connections after finishing. Jōdogahama is served by local buses, but a late finish can leave fewer options, so avoid relying on a last service without checking the current timetable.
Navigation is generally straightforward where the route passes through settlements and known memorial sites, but less obvious through headland paths and coastal forest. Continue to follow the Michinoku Coastal Trail waymarks and carry a map or offline route. The stage is long enough that small navigation errors can become significant late in the day.
The main warnings are cumulative fatigue, heat and humidity in summer, and weather exposure on open coastal sections. Typhoon-season conditions can affect transport as well as the trail, so check forecasts, rail operation and any route notices before committing to the stage. Allow a full day unless deliberately splitting the route with pre-booked accommodation.
Recommended Itinerary
This itinerary covers the northern-Iwate sample section from Fudai (普代) to Jōdogahama (浄土ヶ浜), using the usual non-walked rail/road link between Tanohata (田野畑) and Tarō (田老). The walking days are not long by distance, but they are slow: expect steep stairs, fixed ladders, forested headlands, hand-dug tunnels and repeated climbs above the Sanriku coast.
Standard 3-day itinerary
This is the best-balanced plan for most fit hikers. It splits the difficult Fudai→Tanohata stage into two manageable days, then gives a full final day for the longer Tarō→Jōdogahama stage.
| Day | From | To | Approx. distance | Why this stage makes sense | Services/accommodation notes |
|---|---|---|---|---|---|
| 1 | Fudai (普代) | Kurosaki / Kitayamazaki (黒崎・北山崎) | approx. 13 km | A sensible first day that gets you onto the dramatic cliff terrain without trying to complete the full Fudai→Tanohata stage in one push. It allows time for Kurosaki Viewpoint and the Anmoura Falls viewpoint, both reached on demanding coastal terrain with steep stairways. | Start with food and water from Fudai, as resupply is limited once on the coast. Accommodation is sparse; Kurosaki-sō near Kitayamazaki is one known option, and any stay should be booked well ahead. Local bus options around Kitayamazaki should be checked before travelling. |
| 2 | Kitayamazaki (北山崎) | Tanohata (田野畑) via Aketo (明戸) | approx. 13 km | Keeps the hardest official stage, Fudai→Tanohata, at a realistic two-day pace. This day includes the Kitayamazaki coast, hand-dug cliff tunnels and the Aketo tsunami seawall memorial before reaching Tanohata. | Carry a headtorch for the unlit tunnels. Tanohata has rural accommodation options, including Hotel Ragaso, but availability is limited and should be booked in advance. The onward Tanohata→Tarō link is normally bridged by Sanriku Railway rather than walked; train times should be checked before travelling. |
| 3 | Tarō (田老) / Shin-Tarō | Jōdogahama (浄土ヶ浜), near Miyako (宮古) | approx. 22 km | This is a longer final walking day on the official Tarō→Jōdogahama stage. It links the Tarō seawall and Tarō Kankō Hotel tsunami memorial with the coast around Sagabe / Kashinai Beach, Nakanohama Tsunami Memorial Park, Anegasaki, Sakiyama Blowhole and the finish at Jōdogahama. | Start early, especially in warm or humid weather. Accommodation and resupply are much easier at the Miyako end than on the intervening coast. Local buses serve Jōdogahama, and JR / Sanriku Railway connections from Miyako should be checked before booking onward travel. |
Slower 4-day variant
A slower plan suits hikers who want shorter days, extra time at the tsunami memorial sites, or more margin in hot, humid or unsettled weather. The main adjustment is to split the Tarō→Jōdogahama stage over two days rather than walking all 22.5 km in one push.
| Day | From | To | Approx. distance | Why this stage makes sense | Services/accommodation notes |
|---|---|---|---|---|---|
| 1 | Fudai (普代) | Kurosaki / Kitayamazaki (黒崎・北山崎) | approx. 13 km | Same as the standard itinerary; this remains the natural first break before the most intricate Kitayamazaki terrain. | Book accommodation before committing to dates. Carry enough food and water from Fudai. |
| 2 | Kitayamazaki (北山崎) | Tanohata (田野畑) via Aketo (明戸) | approx. 13 km | Same as the standard itinerary, with enough time for the tunnels and Aketo memorial without rushing. | Stay in or near Tanohata if available, or use transport where appropriate. This should be checked before travelling. |
| 3 | Tarō (田老) / Shin-Tarō | Part-way along the Tarō→Jōdogahama stage | check official mapping before booking | Breaks up the longest day and gives more time for Tarō, Nakanohama Tsunami Memorial Park and the intervening coastal sections. | Do not assume there is accommodation exactly where you want to stop. This variant depends on pre-booked lodging or a workable transport link from an intermediate point; check official mapping, local transport and accommodation before booking. |
| 4 | Part-way along the Tarō→Jōdogahama stage | Jōdogahama (浄土ヶ浜) / Miyako (宮古) | check official mapping before booking | Leaves a shorter final approach to Sakiyama Blowhole and Jōdogahama, with more flexibility for weather, photography and onward travel from Miyako. | Miyako is the practical end base for accommodation, food and onward rail connections. Local bus times from Jōdogahama should be checked before relying on them. |
Faster 2-day variant
A 2-day itinerary is only for very fit, efficient walkers who are comfortable with long days on steep coastal terrain and can line up the Tanohata→Tarō transport connection. It compresses the two official signature stages into two walking days.
| Day | From | To | Approx. distance | Why this stage makes sense | Services/accommodation notes |
|---|---|---|---|---|---|
| 1 | Fudai (普代) | Tanohata (田野畑) | 26.3 km | Walks the full official Fudai→Tanohata stage in one day. This is the hardest option on the itinerary because it combines the Kitayamazaki cliffs, steep stairways, fixed ladders and hand-dug tunnels without an overnight break at Kurosaki / Kitayamazaki. | Start very early and carry a headtorch, food and water. Accommodation in Tanohata should be booked ahead. If continuing the same evening towards Tarō, check Sanriku Railway times before travelling. |
| 2 | Tarō (田老) / Shin-Tarō | Jōdogahama (浄土ヶ浜), near Miyako (宮古) | 22.5 km | Walks the official Tarō→Jōdogahama stage as a single long day, finishing at the Jōdogahama Visitor Center area. | This day still has significant ascent and descent, despite being rated easier than Fudai→Tanohata. Finish logistics are simplest if staying in Miyako or using local bus / rail connections after the walk; current timetables should be checked before travelling. |
Planning the Route
This page covers one northern-Iwate sample section of the much longer Michinoku Coastal Trail, so route planning is best treated as a compact point-to-point hike rather than a self-contained circular itinerary. The practical structure is dictated by the coast, the villages and the Sanriku Railway: Fudai (普代) to Tanohata (田野畑), then a short rail/road link to Tarō (田老), then Tarō to Jōdogahama (浄土ヶ浜) near Miyako (宮古).
Most fit walkers should allow three walking days. Strong walkers can compress the route by using transport efficiently between Tanohata and Tarō, but the terrain is slower than the map distance suggests: repeated stairways, fixed ladders, forested headlands, short unlit tunnels and almost 2,000 m of cumulative ascent across the two main trail stages.
A slower four-day plan is sensible if accommodation availability, weather, photography, memorial sites or public transport timings make the standard schedule tight. This is not a route where rushing adds much; the best days leave margin for steep descents, route-finding pauses, and time at Kitayamazaki, Aketo, Tarō and Jōdogahama.
Natural stage planning
The cleanest plan follows the natural hubs on the coast. Accommodation and transport points are limited, so daily stages are less flexible than on a trail passing through frequent towns.
| Stage | Practical plan | Notes |
|---|---|---|
| Day 1 | Fudai (普代) to Kurosaki / Kitayamazaki (黒崎・北山崎), about 13 km | A short distance on paper, but with steep coastal terrain and key viewpoints around Kurosaki and Anmoura. Kurosaki-sō near Kitayamazaki is one of the useful accommodation points in this area. |
| Day 2 | Kitayamazaki (北山崎) to Tanohata (田野畑) via Aketo (明戸), about 13 km | Continues the Fudai–Tanohata official stage, including the cliff, tunnel and tsunami-memorial landscape. Tanohata is the main end point for this part of the walk. |
| Link | Tanohata (田野畑) to Tarō / Shin-Tarō (田老・新田老) | This is usually bridged by Sanriku Railway or local road transport rather than walked as part of this sample section. Timetables should be checked before travelling. |
| Day 3 | Tarō (田老) to Jōdogahama (浄土ヶ浜), about 22 km | The longest day, passing Tarō’s seawall and memorial landscape, Nakanohama, Anegasaki and the Sakiyama Blowhole before finishing at Jōdogahama Visitor Center. Some walkers may prefer to split this into 1.5–2 days if accommodation and transport allow. |
The official trail’s two signature stages here are Fudai to Tanohata and Tarō to Jōdogahama. Treat them as substantial walking days even if the individual distances appear moderate.
Accommodation drives the itinerary
Book accommodation before fixing the walking schedule. This part of the Sanriku coast is rural, and choices thin out sharply between settlements.
Useful overnight areas include Fudai before starting, Kurosaki / Kitayamazaki, Tanohata, Tarō and Miyako after finishing. Examples of accommodation styles on or near the route include small hotels, ocean-view inns, minshuku/guesthouses and kokumin-shukusha-style lodges with public baths, such as Kurosaki-sō near Kitayamazaki. Hotel Ragaso is one named option in Tanohata.
Camping exists in places, including Aketo, but it should not be assumed as a turn-up-and-camp route. Opening dates, booking requirements, facilities and access should be checked before travelling.
Food, water and resupply
Plan to carry lunch, snacks and enough water for each full walking day. The route passes villages and harbours, but there are long rural stretches where shops, cafés and vending machines should not be relied on without checking current availability.
Fudai and Miyako are the most important resupply points for this sample section. Tanohata and Tarō are useful transport and accommodation hubs, but food options can still be limited compared with larger towns, especially outside main hours or in quieter seasons.
A practical approach is to start each day with the food needed to finish that stage, rather than planning around a mid-walk shop. Summer heat and humidity increase water needs, and the repeated climbs over headlands make dehydration more likely than the coastal setting might suggest.
Transport and section hiking
Section hiking is practical because the Sanriku Railway Rias Line runs along this coast, with stations including Fudai, Tanohata and Shin-Tarō, and JR access to Miyako. This also makes it realistic to shorten the hike after the Fudai–Tanohata stage or to walk only the Tarō–Jōdogahama stage.
The Tanohata to Tarō gap is normally handled by train or local transport. Local buses also serve places including Kitayamazaki and Jōdogahama, but rural services are infrequent. Sanriku Railway, JR and bus timetables should be checked before travelling, particularly if making same-day connections after a long walking stage.
To extend the hike, continue north or south on the wider Michinoku Coastal Trail. For this page’s sample itinerary, however, the most coherent section is Fudai to Tanohata, then Tarō to Jōdogahama, finishing with access into Miyako.
Navigation and trail information
The route is waymarked as part of the Michinoku Coastal Trail, using the trail’s blue signs and markers, but signage can be sparse. Carry offline mapping or printed route notes and do not rely only on seeing the next marker.
The Fudai–Tanohata section includes short unlit hand-dug cliff tunnels, and some sections use fixed ladders. A headtorch is essential, even if walking only in daylight.
Before setting out, check current notices from the official Michinoku Trail Club and Ministry of the Environment trail information for closures, diversions, tunnel or ladder issues and weather-related warnings. Coastal paths, forest sections and stairways can all be affected by storm damage.
Weather and timing
Late spring and autumn are the best planning windows for most walkers, with milder conditions and clearer days. Summer can be hot and humid, and typhoon risk makes weather planning more important than on a simple lowland path.
Build spare time into the itinerary if travelling in unsettled weather. Heavy rain, strong wind or poor visibility can make the cliff paths, stairs and forested descents slower, and transport disruption is harder to work around on a rural coast.
No special route permit is the key planning issue for this sample section; logistics matter more. Accommodation, campsites, visitor facilities and transport should still be checked in advance, as opening arrangements and timetables can change.
Towns, Villages and Overnight Stops
Accommodation on this northern-Iwate section is rural and unevenly spaced. Do not plan it like a European inn-to-inn trail with frequent cafés and shops: the dependable service points are the route ends and the larger settlements, while cliff and headland sections have long stretches with little or nothing available.
Book beds well ahead, especially around Kitayamazaki and Tanohata, and check whether evening meals, breakfast and packed lunches are available. Public transport is useful for joining, leaving or bridging gaps, but Sanriku Railway and local bus services are infrequent enough that timetables should be checked before travelling.
| Place | Best use for hikers | Overnight potential | Transport |
|---|---|---|---|
| Fudai (普代) | Start point, last practical resupply before the cliffs | Possible pre-hike base; check availability | Sanriku Railway at Fudai Station |
| Kurosaki / Kitayamazaki (黒崎・北山崎) | Natural overnight split between Fudai and Tanohata | Strong option, including Kurosaki-sō near Kitayamazaki | Local bus access to Kitayamazaki; check times |
| Aketo (明戸) | Short stop and possible camping area near the tsunami seawall memorial | Aketo campsite is a listed option; opening should be checked | No major transport hub stated |
| Tanohata (田野畑) | End of the Fudai–Tanohata stage and rail link point | Good overnight or logistics stop; Hotel Ragaso is one named option | Sanriku Railway at Tanohata |
| Tarō / Shin-Tarō (田老) | Restart point for the Tarō–Jōdogahama stage | Possible stop around the town; check current options | Sanriku Railway at Shin-Tarō |
| Jōdogahama (浄土ヶ浜) | Trail finish beside the Visitor Center | Better treated as a finish point than a resupply base | Local buses serve Jōdogahama |
| Miyako (宮古) | Main end-of-section town, resupply and onward travel | Best place for post-hike accommodation and services | JR access to Miyako; onward local transport |
Fudai (普代)
Fudai is the northern start of this sample section, with the trail leading south from Fudai village and Fudai Station (普代駅) onto the coast. It is the most useful place to arrive by rail before committing to the harder Fudai–Tanohata stage.
Treat Fudai as a key food and water planning point. The route brief specifically identifies Fudai, along with Miyako, as a place to resupply, so carry enough food for the cliff section ahead rather than assuming shops or cafés will appear between villages.
Accommodation in this part of the coast is sparse and rural, with small inns, minshuku and similar lodgings rather than large hotel choice. If planning to sleep in or near Fudai before an early start, availability and meal arrangements should be checked before travelling.
Fudai is on the Sanriku Railway Rias Line. This makes it the logical public-transport access point for the section, but train times on rural coastal lines need checking carefully, especially if connecting from elsewhere in Tōhoku.
Nedari-hama / Nedarihama Beach
Nedari-hama is a coastal point soon after Fudai rather than a major overnight stop. It is useful as a progress marker as the route leaves the village environment and begins to feel more committed.
Do not rely on Nedari-hama for accommodation, shops or transport unless a current local option has been arranged in advance. For most hikers it is a pass-through location on the first day.
Anmoura and the Anmoura Falls viewpoint
Anmoura is an important scenic stop on the Fudai–Tanohata stage, reached around the cliff-and-forest terrain north of Kitayamazaki. The Anmoura Falls viewpoint is accessed by a long stairway behind Kurosaki-sō and looks towards the waterfall dropping from the cliffs towards the sea.
This is not a practical resupply or overnight hub. Its value is as a waypoint and viewpoint on a physically demanding section with repeated climbs, stairs and exposed-feeling coastal terrain.
Kurosaki (黒崎)
Kurosaki sits near one of the most useful overnight areas on the route, between Fudai and Tanohata. It works well as a break point because the full Fudai–Tanohata official stage is long and difficult, while the HikeList sample itinerary splits it around Kurosaki / Kitayamazaki.
Kurosaki-sō, near Kitayamazaki, is a named government-lodge-style option with public baths. For many walkers this is the most practical way to avoid turning the northern cliff section into an overlong single push.
The Kurosaki Viewpoint is nearby and is one of the key coastal lookouts of the first half of the walk. If staying locally, plan arrival in daylight: the surrounding trail includes steep stairs, forested headlands and cliff terrain where tired navigation is poor practice.
Food arrangements should be dealt with at the accommodation when booking. Rural lodgings in Japan often work on a meal-inclusive basis, but this should be checked before travelling, especially if a packed lunch is needed for the following day.
Kitayamazaki (北山崎)
Kitayamazaki is the centrepiece cliff area of the Fudai–Tanohata stage, with observatory and visitor facilities giving access to the main views. It is also one of the few places on this section where local bus access is specifically useful, although times should be checked before travelling.
For overnight planning, Kitayamazaki and nearby Kurosaki are best treated together. Staying here creates a sensible two-day version of the Fudai–Tanohata section, reducing the pressure on a route that includes hand-dug tunnels, fixed ladders and heavy cumulative ascent.
Do not assume full village services at the viewpoint area. Carry trail food from Fudai or arrange meals through accommodation, and make sure a headtorch remains accessible for the tunnel sections south of this area.
Hand-dug cliff tunnels
The hand-dug tunnels between Fudai and Tanohata are route features, not stopping places. They are short and unlit, and a headtorch is needed.
They matter for overnight planning because they make late finishes less forgiving. If walking from Fudai to Kurosaki / Kitayamazaki or onwards to Tanohata, leave enough daylight margin for the ladders, stairs, tunnels and any slower navigation.
Aketo (明戸)
Aketo lies on the approach to Tanohata and is important for the preserved tsunami seawall memorial, where the broken wall and surviving red pines connect the walk directly to the 2011 disaster and reconstruction theme of the trail.
Aketo is also listed as having a campsite, making it one of the few camping references on this sample section. Opening dates, booking requirements, facilities and water availability should be checked before travelling.
For non-camping itineraries, Aketo is usually a stopping point during the day rather than the main overnight target. Continue planning around Tanohata or the Kitayamazaki / Kurosaki area unless a campsite stay has been specifically arranged.
Tanohata (田野畑)
Tanohata is the main southern endpoint of the Fudai–Tanohata stage and one of the most important logistics points on this sample route. It has Sanriku Railway access and is the usual place to connect across the short non-walked gap towards Tarō.
Hotel Ragaso in Tanohata is a named accommodation option, and the wider area has rural lodging rather than dense hotel choice. Book ahead and confirm meals, arrival time and any transfer arrangements directly with the accommodation.
Tanohata is a good place to reset after the most demanding northern cliff section. It is also where transport planning becomes important: the sample route normally uses the Sanriku Railway for the Tanohata–Tarō link rather than walking every intervening road section.
Food availability should not be left to chance. Use Tanohata as an overnight and rail point, but carry onward food as required for the next walking stage from Tarō to Jōdogahama.
Tarō / Shin-Tarō (田老)
Tarō is the restart point for the Tarō–Jōdogahama stage. Rail access is via Shin-Tarō on the Sanriku Railway, making it the practical place to resume walking after the Tanohata–Tarō link.
The town is also one of the most significant memorial stops on the route. The Tarō seawall and the preserved Tarō Kankō Hotel ruin are central to understanding this section’s disaster-recovery context, not just passing landmarks.
Tarō can be used as an overnight or staging point if train times require it, but accommodation and food options should be checked before travelling. For many itineraries, Tarō is a morning start rather than the main night stop, with the day then continuing south towards Jōdogahama.
Sagabe / Kashinai Beach
Sagabe / Kashinai Beach is a coastal waypoint on the Tarō–Jōdogahama stage. It is useful for gauging progress along the middle part of the day, but it is not presented as a dependable service hub.
Do not plan around finding shops, cafés or accommodation here unless something has been booked or checked in advance. Carry what is needed from Tarō for the full day to Jōdogahama or Miyako.
Nakanohama Tsunami Memorial Park
Nakanohama Tsunami Memorial Park preserves tsunami-damaged campground facilities and is one of the disaster-learning sites on the southern stage. It is worth allowing time here, particularly if walking this section for the trail’s reconstruction history as well as the coast.
As a planning point, it should be treated as a memorial stop rather than an overnight base. No dependable accommodation or food services should be assumed here without checking current local information.
Anegasaki (姉ヶ崎)
Anegasaki is a named coastal point between Tarō and Jōdogahama. It helps break up the final walking stage across the headlands north of Miyako.
There is no need to plan an overnight here for the standard three-day sample itinerary. Use it as a route marker and continue to manage food, water and timing from the larger places at either end of the stage.
Sakiyama Blowhole / Shiofukiana (潮吹穴)
The Sakiyama Blowhole is one of the main natural features on the Tarō–Jōdogahama stage. It is a worthwhile pause when sea conditions make the blowhole active, but it is not a resupply or lodging point.
Because the stage still has repeated ascent and descent, avoid spending so long at intermediate viewpoints that the finish at Jōdogahama becomes rushed. This is especially important if relying on a bus onward from Jōdogahama.
Jōdogahama (浄土ヶ浜)
Jōdogahama is the walking finish for this sample section, at the white-pebble cove beside the Jōdogahama Visitor Center just outside central Miyako. It is a natural place to end the trail on foot, take stock, and then move on to Miyako for wider services.
Local buses serve Jōdogahama, but rural and visitor-area timetables should be checked before travelling. If finishing late in the day, know in advance how to reach Miyako or where the night’s accommodation is located.
Jōdogahama should not be treated as the main resupply town. It is a finish point and visitor area; for food, accommodation choice and onward rail connections, Miyako is the stronger base.
Miyako (宮古)
Miyako is the practical end-of-section town for most hikers, even though the walking finish is at Jōdogahama. It is the best place on this itinerary for post-hike accommodation, food, resupply and onward travel.
The route brief identifies Miyako as a key resupply point, and JR access makes it the main transport hub at the southern end. This is the place to build in flexibility if connecting to other parts of Tōhoku or continuing along the wider Michinoku Coastal Trail.
For late finishes, consider booking Miyako accommodation rather than trying to make a tight onward connection the same evening. Confirm bus links from Jōdogahama and JR timings before committing to same-day travel.
Getting to the Start
This section starts in Fudai (普代), a small village on the Sanriku Railway Rias Line in northern Iwate Prefecture. The trail begins from Fudai village / Fudai Station (普代駅), where the signposted Michinoku Coastal Trail leads south towards the coast.
Rural transport on this coast is useful but infrequent, so plan the arrival day conservatively. Sanriku Railway, JR and local bus timetables should be checked before travelling, especially if arriving late in the day or connecting from outside Iwate.
By train
Fudai Station (普代駅) is the key access point for the start. It is on the Sanriku Railway Rias Line, which runs along this coast and also serves Tanohata (田野畑) and Shin-Tarō, both useful for the later logistics of this partial section.
For most walkers, the practical rail approach is to reach the Sanriku coast by JR, then use the Sanriku Railway to Fudai. Miyako (宮古) is the main rail-served city near the southern end of this section, with JR access and onward Sanriku Railway connections along the coast. Exact routes and connection times depend on the current JR and Sanriku Railway timetable; this should be checked before travelling.
Build in a buffer if travelling from a major city on the same day. Missing one rural connection can mean a long wait, and arriving in Fudai after dark is poor planning if accommodation, food or onward walking still needs sorting.
By bus
Local buses serve parts of this coastal area, including Kitayamazaki and Jōdogahama, but the start of this itinerary is best treated as a rail access point via Fudai Station. Bus services are rural and can be limited outside the main visitor spots.
Do not assume a bus will fill every gap between villages or trailheads. If using buses for access, sightseeing detours or bail-out logistics, current timetables should be checked before travelling.
By car
Driving to Fudai can work if the walk is being done as a section hike, but it creates a point-to-point problem. The finish is at Jōdogahama (浄土ヶ浜) near Miyako, not back at Fudai, so you will need a return plan by Sanriku Railway, local bus, taxi or a pre-arranged vehicle shuttle.
Long-stay parking at or near Fudai Station is not something to assume. Ask accommodation providers or the relevant local facility before leaving a vehicle for multiple days; this should be checked before travelling.
A taxi can be useful for awkward transfers, early starts or reaching accommodation away from a station, but availability in small coastal villages may be limited. Book ahead rather than relying on finding one at short notice.
From the nearest airport
Airport access is not the simplest way to reach this trailhead unless it fits a wider Japan itinerary. The essential onward connection is still overland travel to the Sanriku coast, then rail on the Sanriku Railway Rias Line to Fudai.
Flight options, airport-to-rail transfers and onward JR/Sanriku Railway connections vary by season and schedule. This should be checked before travelling, and an overnight stop en route may be sensible if arrival times do not line up cleanly.
Where to stay before starting
The most convenient place to stay before walking is Fudai itself, so the first day can begin directly from the village and station. Accommodation is rural and limited, so book ahead rather than arriving without a reservation.
If Fudai accommodation is unavailable, Tanohata or Miyako may be workable alternatives, provided there is an early Sanriku Railway connection to Fudai on the walking morning. Check the first train carefully: the opening stage towards Kurosaki / Kitayamazaki is not a casual half-day stroll, and a late start makes the logistics harder.
Use the pre-walk evening to sort food and water for the first stage. Resupply is limited between settlements, and Fudai and Miyako are the key practical resupply points for this sample section.
Getting Home from the Finish
The walking section finishes at Jōdogahama (浄土ヶ浜), by the Jōdogahama Visitor Center just outside central Miyako (宮古). Treat Miyako as the main exit point: it has the onward rail connections, more services, and better accommodation options than the cove itself.
Do not plan this finish too tightly. Rural bus and rail services on the Sanriku coast can be infrequent, and current Sanriku Railway, JR and local bus timetables should be checked before travelling.
By train
The practical rail exit is via Miyako (宮古). From Jōdogahama, take a local bus or taxi into central Miyako, then continue by rail.
Miyako is served by JR, and the Sanriku Railway Rias Line runs along this coast with useful stations including Shin-Tarō, Tanohata and Fudai. This matters if you need to return north to a previous stop, collect luggage, or retrieve a vehicle left near the start.
For hikers finishing late in the afternoon, avoid assuming a same-day rail connection will work. Build in enough time for the transfer from Jōdogahama to Miyako, ticketing, and any wait between rural services.
By bus
Local buses serve Jōdogahama, making bus the natural first step from the trail finish to Miyako. Use the stop serving the Jōdogahama Visitor Center area, then connect onwards in Miyako.
Bus frequency can be limited, especially outside the main daytime visitor period. Check the current timetable before committing to a same-day onward train, and have a taxi fallback if the last useful bus has already gone.
By car/taxi
A taxi from Jōdogahama into Miyako is the simplest option if you finish late, miss the bus, or have heavy packs. Availability and fares should be checked locally before relying on it, particularly outside normal daytime hours.
If travelling by car, Miyako is the more practical place to end the logistics rather than trying to manage everything from Jōdogahama itself. Drivers who left a vehicle at Fudai, Tanohata or Tarō should plan the return using the coastal rail network where possible, but rail times must be checked before travelling.
From the nearest airport
No airport sits at the trail finish. For flights, the practical approach is to route first to Miyako by rail or other regional transport, then continue to the relevant airport from there.
Airport choice and connections are timetable-dependent and not specified for this section. This should be checked before travelling.
Where to stay at the finish
Staying overnight in Miyako is usually the safest plan after completing the Tarō–Jōdogahama stage, especially if you want to avoid rushing the final coastal section or gambling on late rural transport. Miyako also gives better access to food, resupply and onward rail than the immediate Jōdogahama finish area.
If the final day is long or the weather is poor, book accommodation in or near Miyako rather than planning a tight same-day departure. Accommodation opening, availability and check-in times should be checked in advance, particularly outside peak travel periods or when arriving after a full hiking day.
Which Direction Should You Walk?
Standard direction: Fudai to Jōdogahama
For this northern-Iwate sample section, the most natural direction is southbound: Fudai (普代) → Tanohata (田野畑) → Tarō (田老) → Jōdogahama (浄土ヶ浜). The two named trail stages are commonly described this way — Fudai to Tanohata, then Tarō/Shin-Tarō to Jōdogahama — with the short Tanohata to Tarō gap usually bridged by the Sanriku Railway.
Southbound also gives the cleanest walking rhythm. You start from Fudai Station on the Sanriku Railway, move quickly into the harder cliff country around Kurosaki (黒崎), Anmoura and Kitayamazaki (北山崎), then finish at Jōdogahama beside its Visitor Center near Miyako (宮古), where onward transport and services are easier to arrange than in the smaller villages.
The scenery builds well in this direction. Kitayamazaki and the hand-dug cliff tunnels come early, the Aketo (明戸) and Tarō (田老) tsunami memorial landscapes sit in the middle of the journey, and the walk ends at the distinctive white-pebble cove and pale rock spires of Jōdogahama. As a psychological finish, Jōdogahama is much stronger than ending at Fudai Station.
Reverse direction: Jōdogahama to Fudai
Walking northbound is entirely possible, but it is less convenient for most hikers using this as a compact 3-day section. You would normally need to reach Jōdogahama from Miyako first, then walk north to Tarō, use the Sanriku Railway link between Tarō/Shin-Tarō and Tanohata, and continue through Kitayamazaki towards Fudai.
The main advantage of the reverse direction is if it fits a wider Michinoku Coastal Trail itinerary or if accommodation availability forces it. It also puts Miyako at the start, which can be useful for buying food and sorting last-minute logistics before entering the sparser northern stages.
The downside is the finish. Fudai is rail-served, so it is not a bad endpoint logistically, but it does not have the same sense of arrival as Jōdogahama. Reverse walkers also tackle the Tarō to Jōdogahama stage in the opposite direction first, before reaching the more demanding Fudai–Tanohata cliff section.
Are the climbs easier one way?
There is no clear easier direction. This route repeatedly climbs and descends over sea cliffs, forested headlands, stairways and fixed-ladder sections, so the total effort is broadly similar whichever way it is walked.
Southbound does not avoid the steep work; it simply places the harder Fudai to Tanohata terrain at the start of the itinerary. Reverse walkers may prefer warming up on the Tarō–Jōdogahama stage first, but they still have to deal with Kitayamazaki’s stairways, tunnels and headland climbs later.
Weather and wind
There is no strong direction-based weather advantage for this section. Exposure on the Sanriku coast, summer heat and humidity, and typhoon-season disruption matter far more than whether the route is walked northbound or southbound.
Check current weather, trail notices, railway timetables and any tunnel, ladder or diversion information before committing to either direction.
Recommendation
Walk southbound from Fudai to Jōdogahama unless there is a specific reason not to. It follows the natural order of the named stages, works well with the Sanriku Railway link, places the wildest cliff terrain early, and gives the most satisfying finish at Jōdogahama near Miyako.
Accommodation Along the Route
Accommodation on this northern-Iwate sample section is workable for an inn-to-inn hike, but it is not a route where you can safely turn up and improvise each night. The coast between Fudai (普代), Kitayamazaki (北山崎), Tanohata (田野畑) and Tarō (田老) is rural, with small settlements, limited rooms and long stretches of cliff-and-forest walking between services.
The most practical overnight pattern is to stay near the start in Fudai, break the Fudai→Tanohata stage around Kurosaki / Kitayamazaki, then stay in Tanohata before using the Sanriku Railway link towards Tarō for the final Tarō→Jōdogahama stage. At the southern end, Jōdogahama (浄土ヶ浜) is just outside Miyako (宮古), which is the natural place to finish with wider services and onward transport.
Accommodation by place
| Place | Accommodation level | Best for | Notes |
|---|---|---|---|
| Fudai (普代) | Limited | Night before starting; rail access on the Sanriku Railway | Useful for an early start onto the Fudai→Tanohata stage. Resupply before leaving, as options thin out quickly once on the coast. |
| Kurosaki / Kitayamazaki (黒崎・北山崎) | Limited | Best overnight break between Fudai and Tanohata | The key mid-stage area for splitting the difficult Fudai→Tanohata section. Kurosaki-sō near Kitayamazaki is a notable government-style lodge with public baths; book ahead. |
| Aketo (明戸) | Very limited | Camping or a short stop near the tsunami seawall memorial | Aketo has a campsite, but it should not be treated as a guaranteed fallback without checking opening dates and booking requirements. This should be checked before travelling. |
| Tanohata (田野畑) | Limited to moderate | End of the Fudai→Tanohata stage; base before the Tarō link | Hotel Ragaso is one of the better-known inn options in the area, and there are rural guesthouse/minshuku-style possibilities. Staying here works well before taking the Sanriku Railway towards Tarō. |
| Tarō / Shin-Tarō (田老・新田老) | Limited | Start point for the Tarō→Jōdogahama stage | The sample route usually bridges the Tanohata→Tarō gap by rail. If staying here, arrange accommodation before travelling rather than assuming availability on arrival. |
| Jōdogahama (浄土ヶ浜) / Miyako (宮古) | Good relative to the route | Finish night, recovery, onward travel | Jōdogahama is near Miyako, making the city the most practical end-point base for accommodation, food, resupply and JR/Sanriku Railway connections. |
Booking strategy
Book all rural nights before setting out, especially the Kurosaki / Kitayamazaki and Tanohata stops. These are the accommodation-critical points: if rooms are full or closed, there may be no convenient nearby alternative on foot.
Small inns, minshuku and lodges in this part of Japan may expect advance notice for evening meals and breakfast. Do not assume late check-in, English-speaking reception or walk-in meals; arrange arrival time, dinner and breakfast when booking.
Late spring and autumn are the best walking seasons and can also be the periods when desirable coastal rooms are in demand. Weekends and Japanese holiday periods should be treated as higher-pressure dates. Confirm current opening days, meal provision and cancellation terms before committing to the walking schedule.
Camping and low-cost options
Camping exists but is not dense enough to make this an easy camping-led itinerary. Aketo is the named campsite on this section, while the rest of the route relies mainly on inns, lodges, guesthouses and small hotels in or near settlements.
Do not plan around informal camping or assumed shelters. This section includes national park coast, fishing villages, memorial areas and cliff terrain, so use designated accommodation or designated campsites only. Campsite opening and booking rules should be checked before travelling.
Luggage, taxis and awkward gaps
This route can work for inn-to-inn walkers carrying a normal hiking pack, but luggage transfer should not be assumed as a standard service. If heavy baggage needs moving between lodgings, ask each accommodation directly in advance or arrange transport separately. This should be checked before travelling.
The main awkward logistics gap is Tanohata→Tarō, which is commonly bridged by the Sanriku Railway rather than walked as part of this sample itinerary. That makes the accommodation plan more flexible: walkers can sleep in Tanohata after the Kitayamazaki stage, then reposition by rail for the Tarō→Jōdogahama day.
Taxis or local buses may help with access to places such as Kitayamazaki or Jōdogahama, but rural services are infrequent and should not be relied on without a current timetable or booking. If a lodging is away from the trail, arrange pick-up details before arrival, not at the end of a long cliff stage.
Camping and Wild Camping
This northern-Iwate section is possible with camping, but it is not a route to approach as a casual wild-camp trip. Formal options are sparse, the terrain is steep, and much of the walk passes through Sanriku Fukkō (Reconstruction) National Park, coastal villages, managed viewpoints, memorial sites and private land.
Most hikers will find a mixed plan more reliable: use accommodation at hubs such as Fudai (普代), Kurosaki / Kitayamazaki (黒崎・北山崎), Tanohata (田野畑), Tarō (田老) or Miyako (宮古), and only camp where a proper campsite is available and open.
Formal campsites
The main named camping option on this sample section is around Aketo (明戸), near Tanohata. Aketo is also the site of the tsunami seawall memorial, so camp only in the designated campsite area and treat the surrounding memorial landscape with care.
| Place | Usefulness for this route | Planning notes |
|---|---|---|
| Aketo (明戸) | Best formal camping anchor on the Fudai→Tanohata part of the walk | Opening dates, booking requirements, facilities, water and current access should be checked before travelling. |
| Nakanohama Tsunami Memorial Park (中の浜) | Not a normal planning campsite | The site preserves tsunami-damaged campground facilities as a memorial. Do not assume overnight camping is allowed unless current local information explicitly says so. |
Do not build an itinerary around informal tent spots between Fudai and Tanohata. The official Fudai→Tanohata stage is difficult, with steep stairs, fixed ladders, unlit hand-dug tunnels and long stretches away from services; carrying full camping kit will make this significantly harder.
Wild camping
Wild camping should not be assumed to be legal or acceptable on this route. The trail crosses protected coastal landscapes, village land, working harbours, viewpoints and disaster memorial areas, where pitching a tent without permission can cause problems even if the ground looks unused.
Use formal campsites or booked accommodation unless a local authority, campsite manager or landowner has clearly allowed camping in a specific place. This should be checked before travelling.
Avoid camping at viewpoints, trailheads, shrines, memorial sites, beaches, seawalls, harbour areas, road lay-bys or beside the hand-dug tunnels. These are exposed, sensitive or managed spaces rather than backcountry camping areas.
Water and supplies when camping
Plan water conservatively. Reliable resupply is concentrated in settlements such as Fudai, Tanohata, Tarō and Miyako, with limited options between villages.
Do not rely on coastal streams, waterfalls or memorial-park facilities as drinking-water sources. If camping at Aketo, check in advance whether potable water is available on site and whether facilities are open for the season.
Summer can be hot and humid, and the repeated climbs over forested headlands increase water demand. A camping load plus insufficient water is a poor combination on the Fudai→Tanohata stage in particular.
Fire, waste and Leave No Trace
Open fires should be avoided unless a managed campsite explicitly permits them in a designated place. Use a stove only where allowed, and be especially cautious in dry forested sections and around wooden structures, boardwalks and campsites.
Pack out all rubbish, including food waste. Keep noise low near villages and memorial areas, and do not use public toilets, shelters or visitor facilities as overnight sleeping spaces unless they are specifically designated for that purpose.
The route’s memorial sites, including Aketo, Tarō (田老) and Nakanohama, are part of the trail’s recovery and disaster-learning purpose. Treat them as places of remembrance, not as convenient bivvy spots.
Is camping worth it on this section?
Camping can work if Aketo fits the itinerary and current campsite conditions are suitable. It is less suitable as a full self-supported wild-camping route, because the section is short, physically demanding, and has limited confirmed camping infrastructure.
For most walkers, the more dependable plan is to book rural accommodation well ahead and keep the pack light for the steep stairways, ladders and cliff paths.
Food, Water and Resupply
Food and water planning needs more attention on this northern-Iwate section than the distance alone suggests. The route repeatedly leaves villages for steep cliff, forest and headland terrain, and resupply is sparse between Fudai (普代), Tanohata (田野畑), Tarō (田老) and the Miyako (宮古) end of the walk.
Treat Fudai and Miyako as the main places to arrive fully supplied. Between them, plan around accommodation meals where possible and carry enough food for each walking day rather than expecting regular shops, cafés or roadside services on the trail.
Food planning
For a typical 3-day itinerary, carry a packed lunch, high-energy snacks and an emergency reserve each day. This is especially important on the Fudai→Tanohata stage, where the route passes through cliff and forest terrain around Kurosaki (黒崎), Kitayamazaki (北山崎), the hand-dug tunnels and Aketo (明戸), with limited on-trail resupply.
If staying at rural inns, minshuku or lodges such as around Kurosaki / Kitayamazaki or Tanohata, book meals in advance where offered. Do not assume it will be easy to buy dinner after arrival, particularly outside peak season or on days when small rural businesses close.
The Tarō→Jōdogahama (浄土ヶ浜) stage is a long day at about 22 km with repeated ascent and descent. Start from Tarō with the day’s lunch and snacks already packed, then use Miyako at the end of the section for a proper resupply.
Water planning
Start each day with enough water for the full stage. For most walkers, that means at least 2 litres before leaving accommodation or a settlement, with more needed in summer heat and humidity.
Reliable treated water should be obtained from accommodation, stations, visitor facilities or other staffed places where available; ask before filling bottles. Do not rely on finding drinkable water on the cliff paths, forested headlands or tunnel sections.
Natural water should be treated if used. The route passes coastal streams and the Anmoura Falls area, but scenic water is not the same as safe drinking water, and availability can vary by season and exact line walked.
Resupply by section
| Section | Food availability | Water availability | Notes |
|---|---|---|---|
| Fudai (普代) to Kurosaki / Kitayamazaki (黒崎・北山崎) | Best to buy food before leaving Fudai. Carry lunch, snacks and an emergency reserve for the full day. | Fill bottles before leaving Fudai or at booked accommodation. Do not rely on the cliff route for water. | Steep stairs, forest path and cliff terrain make this slower than the distance suggests. If staying around Kurosaki / Kitayamazaki, arrange dinner and breakfast ahead. |
| Kitayamazaki (北山崎) to Tanohata (田野畑) via Aketo (明戸) | Limited on-trail resupply. Carry the day’s food before leaving. | Start full from accommodation; refill only where a staffed facility or accommodation allows it. | The hand-dug tunnel and headland sections are poor places to run short of food or water. Rural opening times should be checked before travelling. |
| Tanohata (田野畑) to Tarō (田老) link | Food availability depends on timing and what is open around the rail/road link. Do not count on a quick shop unless checked. | Refill at accommodation or a staffed place before continuing. | This section is usually bridged by Sanriku Railway rather than walked as part of this sample itinerary. Train times and local services are infrequent and should be checked before travelling. |
| Tarō (田老) to Jōdogahama (浄土ヶ浜) | Carry a full day’s lunch and snacks from Tarō. Miyako is the practical end-point resupply. | Leave Tarō with enough water for the full 22 km stage, especially in warm weather. | A long stage with memorial sites, coast and headland walking. Do not assume regular food stops before Jōdogahama / Miyako. |
Closures and rural hours
Small rural shops, cafés and accommodation kitchens can keep short or seasonal hours, and some may close on particular weekdays or outside the main visitor season. Sunday and holiday opening should not be assumed.
Before committing to a food plan, check accommodation meal arrangements, local shop hours and transport timing. If any single shop or café is essential to the day’s plan, this should be checked before travelling.
Terrain, Conditions and Difficulty in Practice
This northern Iwate section is harder than its modest maximum elevation suggests. The route rarely goes high in mountain terms, but it repeatedly drops from coastal terraces towards coves, harbours and memorial sites, then climbs back over forested headlands. Across the two main walked stages — Fudai (普代) to Tanohata (田野畑), and Tarō (田老) to Jōdogahama (浄土ヶ浜) — the cumulative ascent is roughly 1,990 m.
There is no technical mountaineering, scrambling grade or exposed ridge walking, but the trail is physically serious. The difficulty comes from steep stairways, fixed ladders, short unlit hand-dug tunnels, rough forest path, rocky clifftop ground, humid weather and limited easy exits between settlements.
Underfoot: mixed coastal trail, forest path and village paving
Expect a changing surface rather than a single continuous footpath. The trail uses dirt and gravel forest paths, rocky clifftop sections, boardwalks, steps, paved village roads and fishing-harbour approaches. This makes footwear choice important: lightweight shoes may feel comfortable on the paved sections, but grippy hiking shoes or boots are more reassuring on damp steps, forest descents and rocky headlands.
The paved stretches through villages and harbour areas are usually the easiest walking underfoot, but they do not make the overall route easy. They often sit between tougher headland climbs, so the day can feel stop-start: steady road or village walking, followed by a sharp ascent, then another descent towards the coast.
This is not a boggy upland route, and bog is not a defining hazard here. After rain, however, the forest path, timberwork, rock and stairways can become slippery, especially where shade and sea air keep surfaces damp.
Climbs, descents and cumulative fatigue
The main trap is underestimating the repeated ascent. The Kitayamazaki coast rises to around 200 m above the Pacific, and the route also crosses forested headlands of roughly 300–350 m. None of these heights looks dramatic on a profile, but the cumulative effort is substantial.
The official Fudai→Tanohata stage is rated Difficult and includes about 1,070 m of ascent and 1,000 m of descent over 26.3 km. The Tarō→Jōdogahama stage is rated Intermediate and still includes about 920 m of ascent and 900 m of descent over 22.5 km. For most walkers, these figures explain the route better than the high point does.
Long stairways are a repeated feature. They save the route from being technically complex, but they are hard on knees and calves, especially on descents with a full pack. Trekking poles can be useful on the forest path and long descents, though they may need to be stowed for ladders and tighter tunnel sections.
Ladders, tunnels and clifftop exposure
The Fudai→Tanohata section includes fixed ladders and short unlit hand-dug tunnels cut through the headlands. These are not mountaineering obstacles, but they require care, free hands and a steady approach. A headtorch is essential for the tunnels; a phone light is a poor substitute if both hands are needed or the battery is being conserved for navigation.
The clifftop terrain around the Kitayamazaki coast is one of the route’s highlights, but it also adds seriousness. The path and viewpoints sit above high sea cliffs and wave-cut terraces, with the cliffs rising around 200 m above the Pacific in places. In wind, rain or poor visibility, stay conservative near edges and allow extra time rather than rushing to meet transport or accommodation deadlines.
Exposure here is mostly practical and psychological rather than alpine. The route does not require climbing skills, but a slip on wet steps, rock or ladders could have real consequences. Walkers uncomfortable with height, steep stairs or enclosed dark tunnels should treat the Fudai→Tanohata stage as the crux of this sample section.
Stage-by-stage feel
| Section | Terrain character | What makes it harder |
|---|---|---|
| Fudai (普代) to Kurosaki / Kitayamazaki (黒崎・北山崎) | Coastal and forest walking, clifftop viewpoints, steep access paths and stairs | Early cumulative climbing, long stairways, exposed coastal viewpoints, approach to the Kitayamazaki cliff terrain |
| Kitayamazaki (北山崎) to Tanohata (田野畑) via Aketo (明戸) | Rough coastal headlands, hand-dug tunnels, ladders, descents towards coves and memorial areas, village approaches | The most demanding terrain features: tunnels, ladders, steep ups and downs, and slow progress over short distances |
| Tarō (田老) to Jōdogahama (浄土ヶ浜) | Mixed coastal path, forested headlands, memorial sites, harbour/village sections and the approach to Jōdogahama | A long day at 22.5 km if walked in one push, with about 920 m ascent despite being rated Intermediate |
The Tanohata→Tarō gap is normally bridged by the Sanriku Railway, so the most relevant walking terrain is concentrated on the Fudai→Tanohata and Tarō→Jōdogahama stages. Anyone choosing to alter the route should check the current official trail line, closures and transport before committing to a road alternative.
Signage and navigation difficulty
The Michinoku Coastal Trail is waymarked with blue route signs, but signage can feel sparse in places. The walking is not a constant single-track trail where the next step is always obvious; the route passes through villages, harbour areas, forest paths, viewpoints and memorial sites. A map, offline route file and the ability to match trail signs to the ground are strongly recommended.
Navigation mistakes are most likely where the route transitions between natural trail and settlement roads, or where a side path leads to a viewpoint. Do not rely on waymarks alone if walking late in the day, in fog, in heavy rain or when trying to reach a timed train connection.
Weather and seasonal conditions
Late spring and autumn are the most comfortable seasons for this section, with milder temperatures and generally better walking conditions. Summer can be hot and humid on the Sanriku coast, which makes the repeated climbs feel significantly harder and increases the importance of carrying enough water between settlements.
Typhoon season is a serious planning factor. Strong wind and heavy rain can make clifftop paths, stairways, ladders, tunnels and forest descents much less safe, and may also affect rail and bus services. Weather, route notices, tunnel and ladder conditions, and public transport should be checked before travelling.
After rain, expect slower progress. Timber steps, boardwalk, damp rock, leaf litter and compacted forest soil can all become slick, and descents may take longer than the map distance suggests. Building spare time into each day is more sensible here than planning around a best-case walking speed.
Obstacles that are less relevant here
Livestock fields, stiles, farm gates and fence crossings are not a major feature of this coastal Japanese route. The practical obstacles are instead engineered and coastal: stairways, ladders, tunnels, paved settlement links, rough clifftop ground and repeated headland climbs.
There are also no river-ford or tidal-section issues for this sample route. The sea still matters through wind, rain, cliff exposure and storm conditions, but the main walking challenge is vertical repetition rather than beach timing.
Who will find it difficult
This route suits fit walkers and experienced hikers more than casual sightseers. It is a poor choice for anyone expecting a gentle coast path with frequent services, consistently easy surfaces and short climbs. The full three-day sample demands steady legs, confidence on steep stairs and ladders, and enough self-sufficiency to handle sparse resupply between villages.
Families, dogs and heavily loaded walkers need particular caution. The fixed ladders, unlit tunnels, long stairs and cliff terrain make the whole section unsuitable as an easy family stroll, even though individual viewpoints and village areas may be straightforward to visit separately.
Weather and Best Time to Walk
Late spring and autumn are the best windows for this northern-Iwate section of the Michinoku Coastal Trail. The route is coastal but physically demanding: repeated steep stairways, fixed ladders, forested headlands, rocky clifftop sections and short unlit hand-dug tunnels all become more serious in poor weather.
Peak summer is less attractive because the trail can be hot and humid, and there is a typhoon risk. Winter is not the normal season for this itinerary; cold conditions, short daylight, possible ice on steps or ladders, and reduced rural services can make the route awkward or unsafe. Conditions, diversions and any seasonal closures should be checked before travelling.
Seasonal planning
| Season | Hiking implications |
|---|---|
| Late spring | One of the best times to walk. Milder conditions make the long climbs and descents more manageable, and the cliff paths, steps and forest sections are generally more pleasant than in summer heat. Accommodation should still be booked ahead, especially around small rural hubs such as Kurosaki / Kitayamazaki and Tanohata. |
| Summer | Walkable, but expect heat and humidity to add significantly to the difficulty. Carry more water than usual between villages, start early, and avoid pushing the 22 km Tarō (田老) to Jōdogahama (浄土ヶ浜) stage into the hottest part of the day. Typhoon-related storms or warnings should be taken seriously; exposed clifftops, ladders and steep stairways are poor places to be in severe weather. |
| Autumn | Another strong choice, with generally more comfortable walking temperatures and clearer-feeling conditions than peak summer. Shorter daylight becomes a planning factor, especially on the longer Tarō to Jōdogahama stage and anywhere signage is sparse. Build in enough time to finish before dark. |
| Winter | Not recommended as a default plan for this sample section. The route has many steep constructed steps, ladders, forest tracks and exposed coastal paths, all of which become harder with cold, ice, snow or stormy coastal weather. Rural accommodation, buses and local facilities may also be more limited; this should be checked before travelling. |
Weather risks that matter on this route
Rain affects more than comfort here. Wet boardwalks, rocky clifftop paths, fixed ladders and long stairways can become slippery, particularly on the Fudai (普代) to Tanohata (田野畑) section around Kurosaki (黒崎), Kitayamazaki (北山崎) and the hand-dug cliff tunnels.
A headtorch is needed for the short unlit tunnels in any season, but it becomes more important in poor visibility or if a stage runs late. Do not rely on a phone light as the only option.
Coastal wind and low cloud can reduce visibility on the cliff sections and at viewpoints such as Kitayamazaki and Kurosaki. The route is still navigable in ordinary mist if you have the official route information and are paying attention, but sparse signage means bad visibility can slow progress.
After heavy rain or storms, check for route notices, ladder or tunnel restrictions, and any diversions before setting out. The official trail manager and Ministry of the Environment trail information should be checked before relying on a specific line through the cliff sections.
Daylight and stage timing
The route is only around 50 km, but it should not be treated like an easy low-level coast path. The two main official stages together involve roughly 1,990 m of ascent, with many short, steep climbs and descents that take time.
Start early on the longer walking days, especially Tarō to Jōdogahama at about 22.5 km. In late autumn or marginal weather, avoid itineraries that depend on reaching Jōdogahama after dark, as the route includes forested sections, coastal paths and memorial sites rather than a continuous lit promenade.
Accommodation and seasonal availability
Accommodation is sparse and rural between Fudai, Tanohata, Tarō and Miyako, so the best weather seasons can also be the periods when desirable inns and lodges book up. Reserve well ahead rather than assuming there will be a room at the end of each stage.
Opening dates, meal availability, campsite operation and transport links can change by season. This should be checked before travelling, particularly if walking outside the main spring-to-autumn hiking window.
Safety Notes
This is a coastal mountain-and-forest walk, not a technical climb, but the northern Iwate stages are physically demanding. The main risks are steep fatigue-inducing climbs, exposed cliff terrain, fixed ladders, short unlit tunnels, hot or stormy weather, and thin services between villages.
Emergency planning and mobile signal
Do not plan around UK emergency numbers such as 999 or 112. Save the correct Japanese emergency numbers, accommodation contacts and transport contacts before travelling; this should be checked before travelling.
Mobile signal should not be assumed to be continuous on forested headlands, inside the hand-dug tunnels, or in rural coastal sections between Fudai (普代), Kitayamazaki (北山崎), Tanohata (田野畑), Tarō (田老) and Jōdogahama (浄土ヶ浜). Carry offline maps, a charged phone, a power bank and the day’s route notes.
Terrain hazards
Expect repeated steep stairways, boardwalks, fixed ladders and rough forest path. These are most serious when wet, when tired late in the day, or when carrying a heavy pack.
A headtorch is essential for the short unlit hand-dug cliff tunnels between Fudai and Tanohata. Do not rely on a phone light as the only torch; it drains battery and is awkward on ladders or uneven ground.
Stay well back from clifftop edges and do not step onto unstable-looking margins for photographs. The Kitayamazaki coast has cliffs rising to about 200 m, and some viewpoints and paths sit above very steep ground.
Weather, heat and exposure
Late spring and autumn are the most practical seasons for this section. Summer can be hot and humid, and the typhoon season can make the route unsafe or impractical.
Rain makes steps, ladders, rock, boardwalk and forest path more slippery. Strong wind and poor visibility are more serious on open clifftops and exposed viewpoints than in the sheltered village sections.
Check the forecast each morning, including wind, rain and typhoon information. If severe weather is forecast, shorten the day, use transport, or delay rather than committing to a long cliff-and-forest stage.
Coast, blowholes and low-lying areas
The route visits coves, harbours, memorial sites and the Sakiyama Blowhole / Shiofukiana (潮吹穴). Keep away from wave-washed rocks, cliff openings and blowhole edges, especially in strong swell.
The trail passes several tsunami memorial locations, including Aketo (明戸), Tarō (田老) and Nakanohama. In low-lying harbour or cove areas, follow any local instructions immediately after an earthquake or tsunami warning.
Road and village sections
Some parts of the route use paved village stretches, harbour roads and road links. Stay alert for local traffic, especially where there is no clear pavement, on bends, and when moving between trail, station, bus stop and accommodation.
The Tanohata to Tarō gap is normally bridged by train rather than walked as part of this sample section. Verify current Sanriku Railway and bus timetables before setting off, as rural services are infrequent.
Solo hiking
Solo walkers should leave the day’s plan with accommodation or a trusted contact, including the intended finish point and any transport connection. This matters most on the Fudai to Tanohata stage, where the terrain is harder and services are sparse.
Carry enough food and water to finish the day without relying on an unplanned shop or café. Resupply is limited between settlements, with Fudai and Miyako (宮古) the more reliable planning points for provisions.
Check before setting off each day
- Weather forecast, including heavy rain, wind, heat and typhoon risk.
- Trail notices for closures, diversions, ladder issues or tunnel problems on the official Michinoku Coastal Trail / Ministry of the Environment information.
- Sanriku Railway, JR and local bus times if the day depends on transport.
- Accommodation check-in arrangements, especially in rural inns or guesthouses.
- Enough daylight for the full stage, allowing for steep stairs, ladders and photo stops.
- Headtorch, offline map, battery, water, food and waterproof layer.
- A realistic turnaround or exit plan if progress is slower than expected.
Gear Recommendations
This section is short enough for a light pack, but the terrain is not casual: steep cliff stairways, fixed ladders, forested headlands, rocky coastal path, paved village stretches and short unlit hand-dug tunnels all affect what should be carried. Pack for a full hiking day between settlements rather than for a promenade-style coastal walk.
Footwear
Wear supportive hiking shoes or lightweight boots with good grip. The route mixes dirt and gravel forest path, rocky clifftop sections, boardwalks, steps and paved village approaches, so soles need to cope with both hard surfaces and damp, uneven trail.
High-cut boots are not essential for every walker, but footwear should be stable enough for repeated descents, long stairways and ladder approaches. Avoid smooth-soled trainers, especially if rain is forecast or the forest sections are wet.
Waterproofs and layers
Carry a proper waterproof jacket and a pack cover or dry bags. The route stays close to the Pacific and crosses exposed headlands, so wet weather can make stairs, ladders and rocky sections more awkward even when temperatures are mild.
Late spring and autumn are the best walking seasons, but mornings, sea wind and clifftop viewpoints can still feel cool. A light insulating layer is sensible even on a short inn-to-inn itinerary.
In summer, heat and humidity are the bigger problem, with typhoon risk also part of the season. Use light, breathable clothing, but still keep waterproofs accessible rather than buried at the bottom of the pack.
Navigation and lighting
Do not rely only on waymarks. The Michinoku Coastal Trail has blue route signs, but this northern Iwate section has some sparse signage, so carry offline mapping, saved route notes and enough phone battery to navigate without mobile signal.
A headtorch is essential between Fudai (普代) and Tanohata (田野畑), where the route uses short unlit hand-dug cliff tunnels. A phone light is a poor substitute when both hands may be needed for balance, steps or wet ground.
Carry a power bank if navigating by phone, especially on the longer Tarō (田老) to Jōdogahama (浄土ヶ浜) day. Check current diversion, tunnel, ladder and weather notices before setting out each morning.
Water and food carry
Resupply is limited between villages, so start each day with enough water and food for the full stage. This matters most on the longer Tarō to Jōdogahama section and on hot, humid summer days.
Do not assume that every viewpoint, fishing harbour or memorial stop has food or drink available. Fudai and Miyako (宮古) are the main places in this sample section to plan resupply around, with rural options thinner in between.
Carry compact lunch food and emergency snacks even if staying in inns. If accommodation provides breakfast or a packed meal, confirm this before relying on it.
Trekking poles
Trekking poles are useful for the repeated climbs and descents, particularly on the Fudai to Tanohata stage and the headland walking towards Jōdogahama. They can reduce leg fatigue on the long stair sections.
Use poles carefully around fixed ladders, narrow steps and tunnel entrances. They should be collapsible or easy to stow so both hands are free where the route demands it.
Camping gear
Camping is possible only where suitable sites are available, and options are sparse on this rural coastal section. Aketo (明戸) is one named campsite area, but opening dates, booking requirements and facilities should be checked before travelling.
Campers should carry a complete self-sufficient overnight setup rather than assuming shelters or frequent facilities. A lightweight tent, sleeping system, stove plan, water containers and food for the night are more important here than saving every gram.
If using inns, hotels, minshuku or lodges such as those around Tanohata, Kurosaki or Kitayamazaki, camping gear is unnecessary weight. Book rural accommodation well ahead, as carrying a tent as a last-minute backup is not a reliable substitute for planning.
Sun, insects and seasonal extras
For summer, carry sun protection, insect repellent and enough fluids for humid walking. The sea-cliff setting does not guarantee shade; forest sections may be sheltered, while viewpoints and coastal terraces can be exposed.
For spring and autumn, add a warmer layer for early starts, clifftop rests and windy viewpoints such as Kurosaki (黒崎) and Kitayamazaki (北山崎). Gloves and a warm hat are optional but useful if walking in cooler shoulder-season weather.
Avoid planning this section during severe weather. Typhoon-season conditions can make cliff paths, stairs, ladders and transport connections a poor combination.
Packing by hiking style
| Hiking style | Gear priorities |
|---|---|
| Inn-to-inn hikers | Keep the pack light, but still carry waterproofs, warm layer, headtorch, offline navigation, power bank, full-day food and water. Do not strip the kit down too far just because accommodation is booked. |
| Campers | Add a full overnight camping setup, extra food and water capacity, and confirm campsite availability before travelling. Expect fewer services between settlements than on more developed Japanese walking routes. |
| Fast or section hikers | Prioritise navigation, lighting, water, emergency food and weather protection even if using the Sanriku Railway to link or shorten stages. A fast pace does not remove the need for a headtorch, rain shell or battery reserve. |
Budget and Costs
Budgeting for this northern-Iwate section is mainly about accommodation, local transport and how much food can be bought before leaving the larger settlements. Prices on rural Japanese coastal routes can change seasonally and some services operate with limited opening, so current yen prices should be checked before booking.
Main cost items
| Cost item | What to budget for | Planning notes |
|---|---|---|
| Accommodation | Rural inns, small hotels, kokumin-shukusha / government lodges, minshuku and a few campsites | Options are sparse between Fudai (普代), Tanohata (田野畑), Tarō (田老) and Miyako (宮古). Book ahead, especially around Kitayamazaki (北山崎) and Kurosaki (黒崎). |
| Food and drink | Breakfasts/dinners at accommodation, packed lunches, snacks and drinks | Resupply is limited between villages. Stock up in Fudai and Miyako, and do not rely on finding shops during the cliff and forest sections. |
| Rail and bus | Sanriku Railway Rias Line, JR access to Miyako, local buses to places such as Kitayamazaki and Jōdogahama | Rural timetables are infrequent. Verify current Sanriku Railway, JR and bus times before travelling. |
| Tanohata → Tarō link | Short non-walked connection, usually by train | This link is normally used to connect the two signature trail stages. Current fares and schedules should be checked before travelling. |
| Taxis | Backup transport, accommodation transfers or timetable gaps | Taxis may be useful if staying off-route or if a bus/train connection is impractical. Availability and fares should be checked locally in advance. |
| Camping | Campsites such as Aketo, where open | Camping can reduce accommodation costs, but do not assume every stage has a convenient campsite. Opening dates, booking rules and fees should be checked before travelling. |
| Luggage transfer | Not a core assumption for this section | There is no standard luggage-transfer system to rely on for this short sample section. If needed, ask accommodation providers or local taxi companies before booking. |
| Guided or self-guided packages | Optional, if arranged through an operator | Package prices depend heavily on accommodation grade, meals, transfers and support. Compare inclusions carefully before booking. |
Budget approach
A low-cost trip means using campsites where practical, carrying more food, keeping rail and bus use to the essential access legs, and choosing simple minshuku or guesthouse-style stays when camping is not realistic. This approach needs the most advance planning because camping options are limited and resupply is thin on the Fudai→Tanohata and Tarō→Jōdogahama stages.
Do not cut costs by assuming food will be available on the trail each day. The safer budget option is to buy lunches and snacks before each stage, especially before the cliff sections around Kitayamazaki and the longer Tarō→Jōdogahama day.
Mid-range approach
Most independent hikers should plan for small inns, lodges or rural hotels, with some meals included at accommodation where available. This is the most practical style for a 3-day crossing because it reduces food-carrying and avoids relying on sparse campsites.
Accommodation around Kurosaki / Kitayamazaki, Tanohata and the Miyako end should be booked well ahead. Places such as Kurosaki-sō near Kitayamazaki and Hotel Ragaso in Tanohata are examples of the type of lodging used on this coast, but current prices and availability should be checked before booking.
Comfortable approach
A more comfortable budget allows for private-room accommodation, meals at inns or hotels, taxi transfers where public transport is inconvenient, and extra nights in Miyako before or after the hike. This is the easiest way to manage rural timetables, particularly if arriving late, leaving early or connecting from elsewhere in Japan.
This approach is also sensible if walking in hotter months, when shorter days, extra drinks and more flexible transport can make the route safer and less pressured.
Where costs can rise unexpectedly
The biggest avoidable cost risk is poor transport planning. Missing an infrequent Sanriku Railway or bus connection can force a taxi ride or an extra night, so build the budget around realistic timetables rather than the cheapest theoretical itinerary.
Accommodation can also become expensive or unavailable if booked late, especially because villages along this stretch are small. Reserve overnight stops before committing to travel dates.
Carry enough cash in yen for rural spending. Card acceptance and cash-machine access should not be assumed between larger settlements; this should be checked before travelling.
Luggage Transfer, Guided Tours and Support Services
Luggage transfer
Do not assume there is a dedicated inn-to-inn baggage-transfer system on this northern Iwate section. The route passes through small coastal settlements, with sparse accommodation between Fudai (普代), Kurosaki / Kitayamazaki (黒崎・北山崎), Tanohata (田野畑), Tarō (田老) and Miyako (宮古), so walkers should be prepared to carry what they need for each walking day.
The most practical approach is to keep luggage light and use accommodation strategically. If staying at rural inns, minshuku or lodges such as around Kurosaki / Kitayamazaki and Tanohata, ask at booking whether they can store a bag, receive luggage, arrange local transport or advise on courier options. This should be checked before travelling.
For overseas hikers carrying a larger suitcase, consider separating trail kit from travel luggage before starting. Main luggage can sometimes be left with a city hotel before or after the walk, but this depends on the property and should be agreed in advance.
Using rail, bus and taxis for support
The Sanriku Railway Rias Line is the key support option for this sample section, with stations at Fudai, Tanohata and Shin-Tarō. It is especially useful for the non-walked Tanohata→Tarō link, which is normally bridged by train rather than walked as part of this itinerary.
Local buses serve places including Kitayamazaki and Jōdogahama, but rural services are infrequent. Verify current Sanriku Railway, JR and bus timetables before travelling, and avoid planning a day that depends on the final connection unless the timing is certain.
Taxis can be useful for short transfers between stations, accommodation and trailheads, particularly around Kitayamazaki, Tanohata, Tarō and Jōdogahama. In small towns, taxis should be booked ahead where possible, ideally through accommodation or the local station area. Availability, operating hours and prices should be checked before relying on them.
| Support need | Best option on this section | Planning note |
|---|---|---|
| Bridging Tanohata→Tarō | Sanriku Railway via Tanohata / Shin-Tarō | This is the usual non-walked link in the sample itinerary. Check train times in advance. |
| Reaching or leaving the trail | Sanriku Railway, JR to Miyako, local buses | Rural services are limited; build in buffer time. |
| Avoiding a long road or accommodation transfer | Pre-booked local taxi | Arrange ahead through accommodation where possible. |
| Walking with less weight | Carry a small overnight pack; arrange any luggage help directly | Dedicated baggage transfer should not be assumed. |
Self-guided walking packages
This route suits independent hikers who are comfortable booking rural accommodation, using Japanese public transport and carrying their own kit. The walking is waymarked as part of the Michinoku Coastal Trail, but signage can be sparse in places, so a self-guided walker should still carry offline maps, route notes, a headtorch for the hand-dug tunnels, and current diversion information.
Self-guided packages, where available, would typically be most useful for accommodation booking, transport planning and reducing language barriers rather than for technical trail support. Before paying for any package, check exactly what is included: accommodation, meals, luggage arrangements, station transfers, emergency contact support and any help with the Tanohata→Tarō rail link.
No fixed baggage-transfer or package-walking infrastructure should be assumed for this short Fudai→Tanohata→Tarō→Jōdogahama section. Confirm current details before booking.
Guided tours and local interpretation
A guide is not essential for fit, experienced hikers, but it can add value on this trail because the route is closely tied to the 2011 Great East Japan Earthquake and tsunami recovery story. Sites such as Aketo (明戸), the Tarō seawall, the Tarō Kankō Hotel ruin and Nakanohama Tsunami Memorial Park are more meaningful with local context.
Guided support is also worth considering for walkers who are not confident with Japanese rural transport, route-finding where signs are sparse, or the more awkward terrain between Fudai and Tanohata, including steep stairways, fixed ladders and unlit tunnels. Any guide or local tour should be arranged well ahead, especially outside peak visitor periods.
The NPO Michinoku Trail Club and official Michinoku Coastal Trail resources are the best starting points for current route information, closures, diversions and practical trail updates. For place-specific assistance, the visitor facilities at Kitayamazaki and Jōdogahama can also be useful during opening hours, but do not rely on visitor centres as emergency support on the trail.
Shorter Hikes and Best Sections
The northern Iwate stretch is easy to shorten because the Sanriku Railway runs through the coast, with useful stations at Fudai (普代), Tanohata (田野畑) and Shin-Tarō. Local buses also serve places such as Kitayamazaki (北山崎) and Jōdogahama (浄土ヶ浜), but rural services are infrequent and should be checked before travelling.
| Best for | Start → end | Approx. distance | Why choose it | Transport notes |
|---|---|---|---|---|
| Best long day walk | Tarō / Shin-Tarō → Jōdogahama | 22.5 km | The most practical single-day linear stage, with Tarō’s seawall and tsunami memorial context, coastal walking past Nakanohama Tsunami Memorial Park, Anegasaki, Sakiyama Blowhole and the finish at Jōdogahama. It is still a hard day, with about 920 m of ascent and repeated climbs. | Start from Shin-Tarō on the Sanriku Railway. Finish at Jōdogahama Visitor Center, then use local bus/taxi or continue towards Miyako connections. Timetables should be checked before travelling. |
| Best weekend section | Fudai → Tanohata, split around Kurosaki / Kitayamazaki | 26.3 km over 2 days | This is the signature northern-Iwate section: Kurosaki Viewpoint, Anmoura Falls, the Kitayamazaki cliffs, hand-dug tunnels, fixed ladders and the descent towards Aketo and Tanohata. It is officially rated Difficult, so treat it as a proper hiking weekend rather than a casual coast path. | Fudai and Tanohata are both on the Sanriku Railway. Accommodation around Kurosaki / Kitayamazaki is sparse, so book ahead and do not rely on turning up. |
| Best 3-day sample | Fudai → Tanohata, then Shin-Tarō / Tarō → Jōdogahama | About 49–50 km of walking, with the Tanohata→Tarō link normally bridged by train | This gives the strongest compact version of the route covered on this page: Kitayamazaki scenery first, then the Tarō memorial landscape and the final approach to Jōdogahama. It fits walkers who want a short thru-hike feel without committing to the full Michinoku Coastal Trail. | Use the Sanriku Railway between Tanohata and Shin-Tarō for the non-walked link. Miyako is the main onward transport hub after Jōdogahama. |
| Best for scenery | Fudai → Tanohata via Kurosaki and Kitayamazaki | 26.3 km | The most dramatic cliff scenery is concentrated here, including the roughly 200 m Kitayamazaki sea cliffs, Anmoura Falls viewpoint, forested headlands and short hand-dug tunnels. Carry a headtorch for the tunnels and allow time for the repeated stair climbs. | Railway access at Fudai and Tanohata; local bus access to Kitayamazaki may help if shortening the stage. Current bus times should be checked before travelling. |
| Best for public transport | Tarō / Shin-Tarō → Jōdogahama | 22.5 km | A straightforward linear stage to organise because it starts near a Sanriku Railway station and finishes close to Miyako’s transport network. It is also a strong choice if the Fudai→Tanohata cliff section feels too exposed or logistically tight. | Sanriku Railway to Shin-Tarō; local bus/taxi from Jōdogahama towards Miyako. Rural connections are not frequent, so build the day around the timetable. |
| Best for villages and accommodation | Fudai → Tanohata over 2 days | 26.3 km | This section has named overnight bases around Kurosaki / Kitayamazaki and Tanohata, including lodge/inn-style accommodation such as Kurosaki-sō and Hotel Ragaso. It is still rural and limited, so it suits hikers who prefer booked accommodation over camping. | Start and finish on the Sanriku Railway. Book accommodation well ahead, especially outside larger towns. |
| Best for camping | Fudai → Tanohata, using Aketo only if it fits the plan | 26.3 km | Camping is possible in the area, with Aketo named as a campsite on this sample section, but it should not be treated as a flexible wild-camping route. The practical plan depends on campsite opening, booking rules and how the day’s distance is split. | Fudai and Tanohata give rail access. Aketo campsite details, opening and any booking requirements should be checked before travelling. |
For beginners
There is no genuinely easy full stage on this sample section. The Fudai→Tanohata stage is rated Difficult, and even the more moderate Tarō→Jōdogahama stage is a 22.5 km coastal day with substantial ascent.
Less experienced walkers should sample the route in shorter out-and-backs around Jōdogahama, Kitayamazaki or the Tarō memorial area rather than committing to a full point-to-point day. Exact local walking distances and bus times should be checked before travelling.
Highlights and Points of Interest
This northern-Iwate section is unusually rich for a short coastal walk: major sea-cliff viewpoints, hand-cut trail features, fishing villages and several 2011 tsunami memorial sites all sit directly on or close to the route. If time is tight, the places most worth building extra time around are Kitayamazaki, Anmoura Falls, Tarō and Jōdogahama.
Fudai to Kurosaki and Kitayamazaki
Kurosaki Viewpoint (黒崎展望台) is one of the first major clifftop stops after leaving Fudai (普代). It gives a broad view over the northern Kitayamazaki coastline and is a useful place to pause before the rougher sea-cliff walking south towards Tanohata.
Anmoura Falls (安家川の滝 / Anmoura-no-taki) is reached from the Fudai–Tanohata stage by a long stairway behind Kurosaki-sō. The waterfall drops more than 100 m from the cliffs towards the sea and is regarded as the tallest waterfall in Iwate. Allow extra time here: the viewpoint is a worthwhile detour-style pause, but the stairway adds effort to an already demanding day.
Kitayamazaki cliffs (北山崎) are the centrepiece of this section. The cliffs rise to about 200 m above the Pacific and run for roughly 8 km along the Sanriku coast, with jagged headlands, rock spires and pine-covered slopes dropping into the sea. The Kitayamazaki Observatory and visitor centre are the easiest places to take in the full scale of the coast, and they are worth timing for clear weather if the itinerary allows.
Kitayamazaki to Tanohata
The hand-dug cliff tunnels between Fudai and Tanohata are among the most distinctive trail features on this sample section. These short, unlit tunnels were cut through the headlands by hand and form part of the walking route rather than a side attraction. Carry a headtorch and expect this section to feel more rugged than a normal coastal footpath; fixed ladders are also used on parts of the stage.
Aketo (明戸) tsunami seawall memorial near Tanohata is one of the most important human-history stops on the route. The preserved broken seawall and two surviving red pines commemorate the 2011 Great East Japan Earthquake and tsunami, linking the walk directly to the recovery purpose behind the Michinoku Coastal Trail.
Tanohata (田野畑) is a practical overnight and transport point rather than just a pass-through village. It makes a sensible place to slow down, reset after the difficult Fudai–Tanohata stage and arrange the onward link towards Tarō if not walking continuously.
Tarō to Jōdogahama
Tarō seawall (田老防潮堤 / Bōrōtei) is one of the defining cultural and memorial sites on the southern part of this section. The giant X-shaped double seawall is more than 2.4 km long and about 10 m high, built between 1934 and 1978, and was partly destroyed in 2011. Nearby, the gutted Tarō Kankō Hotel has been preserved as an earthquake-heritage tsunami memorial.
Nakanohama Tsunami Memorial Park (中の浜) preserves tsunami-damaged campground facilities on the coast. It is one of several places along this stretch where the route’s purpose as a reconstruction and remembrance trail is especially clear, and it is worth treating as more than a quick photo stop.
Sakiyama Blowhole / Shiofukiana (潮吹穴) is a designated National Monument and is described as the largest natural blowhole in Japan. In strong swell, seawater can spout up to about 30 m through the cliff opening. Conditions matter here: in calm seas it may be subdued, while rougher water gives the best chance of seeing it active.
Anegasaki (姉ヶ崎) sits on the Tarō–Jōdogahama stage and forms part of the varied coastal approach towards Miyako. This southern day mixes forested headlands, beaches and memorial sites, so it rewards an early start rather than being rushed as a simple finish-day walk.
Jōdogahama and the finish near Miyako
Jōdogahama (浄土ヶ浜) is the natural finish point for this sample section and one of the most striking coastal landscapes on the Sanriku shore. The white-pebble cove is framed by pale rhyolite spires, pine trees and clear cobalt water, with the Jōdogahama Visitor Center close by.
It is the best place on the route to build in unhurried time at the end of the hike. Miyako (宮古) is close enough to make onward travel practical, but the cove itself deserves time before leaving the coast.
Common Mistakes and Planning Tips
Treating this as an easy coastal stroll
Mistake: Planning the Fudai (普代) to Jōdogahama (浄土ヶ浜) sample section as a gentle seaside walk because the high point is low and the total distance is only about 50 km.
Fix: Plan for the harder end of moderate, with strenuous sections. The route has roughly 1,990 m of cumulative ascent across the two main walking stages, including repeated steep stairways, fixed ladders, forested headland climbs and descents to coves and harbours. Daily distances can feel much harder than they look on a map.
Overloading the first two days
Mistake: Underestimating the Fudai→Tanohata (田野畑) stage because it is split into two days of around 13 km in this itinerary.
Fix: Treat Fudai→Tanohata as the tougher half of the section. The official stage is 26.3 km and rated Difficult, with the Kitayamazaki (北山崎) cliffs, Kurosaki (黒崎), Anmoura, steep access paths, ladders and hand-dug tunnels. Starting early is sensible, especially if staying around Kurosaki / Kitayamazaki and wanting time for the viewpoints.
Forgetting the Tanohata→Tarō link
Mistake: Assuming the whole sample section is walked continuously from Fudai to Jōdogahama.
Fix: Build in the short non-walked link between Tanohata and Tarō (田老), usually bridged by the Sanriku Railway. Check the current Sanriku Railway timetable before travelling, as rural services are infrequent and a missed train can affect the next day’s start from Tarō / Shin-Tarō.
Leaving accommodation too late
Mistake: Waiting until arrival to arrange places to sleep in this rural stretch.
Fix: Book accommodation well ahead, especially around Kurosaki / Kitayamazaki, Tanohata and Tarō. Options are sparse and include small hotels, ocean-view inns, kokumin-shukusha lodges such as Kurosaki-sō, minshuku and a few campsites such as Aketo. Opening periods, meal availability and check-in arrangements should be checked before travelling.
Assuming every settlement has easy resupply
Mistake: Relying on villages, fishing harbours or sightseeing areas for food and water without planning.
Fix: Carry enough food for the day and more water than a short-distance map reading might suggest, particularly in warm or humid weather. Resupply is most dependable at larger hubs such as Fudai and Miyako (宮古); options thin out between settlements. If staying in rural accommodation, check whether dinner and breakfast are included or available.
Walking the tunnels without a light
Mistake: Treating the hand-dug cliff tunnels between Fudai and Tanohata as a novelty rather than a practical equipment issue.
Fix: Carry a headtorch or small torch, even on a bright day. The tunnels are short but unlit, and using a phone light as the only option is a poor plan if battery life is also needed for navigation, translation or transport checks.
Relying only on waymarks
Mistake: Expecting the blue Michinoku Coastal Trail waymarks to remove all navigation work.
Fix: Carry offline mapping and the latest route information from the official Michinoku Trail Club / Ministry of the Environment trail resources. Signage can be sparse in places, and coastal trails in this region may be affected by diversions, ladder or tunnel notices, forestry work or weather damage. Current route conditions should be checked before travelling.
Misjudging the final Tarō→Jōdogahama day
Mistake: Treating Tarō→Jōdogahama as an easy finish because it is rated Intermediate rather than Difficult.
Fix: Allow a full walking day unless deliberately splitting it. The stage is about 22.5 km with roughly 920 m of ascent and descent, passing the Tarō seawall, Nakanohama Tsunami Memorial Park, Anegasaki, Sakiyama Blowhole / Shiofukiana (潮吹穴) and the final approach to Jōdogahama. It is scenic and varied, but still has significant cumulative climbing.
Not checking onward transport from Jōdogahama
Mistake: Finishing at Jōdogahama and assuming onward travel to Miyako or beyond will be immediate.
Fix: Check the current local bus timetable between Jōdogahama and Miyako, plus onward JR or Sanriku Railway connections, before setting out. Rural and coastal services can be infrequent, and the final day should leave a buffer if catching a same-day train.
Choosing peak summer without adjusting the plan
Mistake: Booking the same itinerary for midsummer as for spring or autumn.
Fix: Late spring and autumn are the most comfortable seasons for this section. In summer, heat and humidity can make the stair climbs and exposed clifftop sections much harder, and typhoon-season weather can disrupt walking and transport. Start earlier, carry more water and keep plans flexible if walking in hotter months.
Skipping weather and closure checks
Mistake: Assuming that a low-altitude coastal route is unaffected by bad weather.
Fix: Check the forecast before each stage, especially for wind, heavy rain and typhoon conditions. Steep steps, ladders, rocky clifftop paths and forest descents are less forgiving when wet, and transport disruption can quickly become a planning problem on a point-to-point route.
Rushing the memorial sites
Mistake: Treating Aketo (明戸), the Tarō seawall and Nakanohama as quick photo stops on the way to the next viewpoint.
Fix: Allow time for the recovery and disaster-memory elements of the trail. This section passes preserved tsunami-damaged structures, seawall memorials and learning sites connected to the 2011 Great East Japan Earthquake and tsunami. They are part of the purpose of the Michinoku Coastal Trail, not side attractions.
Planning with outdated files or assumptions
Mistake: Using an old GPX, a saved blog itinerary or a previous transport plan without checking current details.
Fix: Re-check route notices, accommodation availability, Sanriku Railway services, JR connections, local buses and weather shortly before departure. This is especially important on a rural coastal trail with sparse services and sections using cliff paths, ladders and tunnels.
Final Advice
This section is best for fit, self-sufficient walkers who want a short but serious taste of the Michinoku Coastal Trail without committing to the full 1,025 km route. Treat it as a demanding coastal hike, not a casual seaside path: the repeated stairs, ladders, forested climbs and unlit hand-dug tunnels make the northern Iwate stages feel much harder than the modest daily distances suggest.
The main planning priority is logistics. Accommodation and resupply are sparse between Fudai (普代), Tanohata (田野畑), Tarō (田老) and Miyako (宮古), and rural rail and bus services are infrequent. Book places to stay well ahead, carry enough food and water for the day, and check Sanriku Railway, JR and local bus timetables before travelling, especially for the Tanohata–Tarō link and the finish at Jōdogahama (浄土ヶ浜).
The most rewarding stretch is the Fudai–Tanohata section over Kurosaki (黒崎), Kitayamazaki (北山崎), Anmoura and Aketo (明戸). It gives the route its strongest mix of high sea-cliff scenery, steep physical walking, fixed ladders, tunnels and tsunami memorial landscape. The Tarō–Jōdogahama stage adds a different weight: the Tarō seawall, Tarō Kankō Hotel ruin, Nakanohama Tsunami Memorial Park, Sakiyama Blowhole and the finish at Jōdogahama make the final day as much about recovery and memory as scenery.
For most walkers, this works best as a compact 3-day section hike rather than something to rush. Strong hikers can compress parts by using transport, but doing so reduces the margin for weather, missed connections and the cumulative ascent. A headtorch is essential for the tunnels, and late spring or autumn gives the best balance of conditions; peak summer heat, humidity and typhoon risk make the route less forgiving.
Go if the appeal is a rugged, culturally significant coastal trail with real effort between villages. Avoid treating it as a lightweight sightseeing walk: plan the nights first, check route notices and transport close to departure, and allow enough time to walk slowly through both the dramatic cliff sections and the memorial sites.
Reviews
How would you rate Michinoku Coastal Trail (Partial)?
Tap a star to start your review — you could be the first.